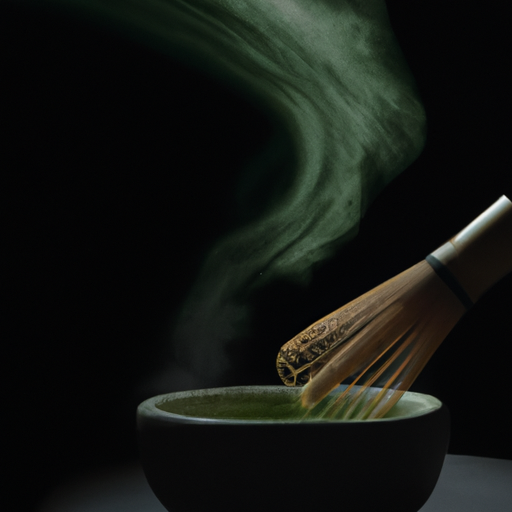

Hey, matcha and macaron lovers! Ever thought about smashing these two yummy goodies together into a mind-blowing sweet treat?
That’s right, today I’m going to show you how to make matcha macarons! Making macarons can seem intimidating, but with a little patience and practice, it’s actually quite simple.
And when you add the unique flavor of matcha to the mix, you’ll have a dessert that’s sure to impress your friends and family. So, let’s get started on this fun and tasty adventure!
Key Takeaways
- Matcha macarons require precision and attention to detail, but can be made with patience and practice.
- Making macarons involves using a stand or hand mixer, piping bag and tip, parchment paper, and a baking sheet, as well as following certain techniques like macaronage and resting the shells before baking.
- Matcha filling can be customized with different flavors and additions like vanilla extract, chopped nuts, white chocolate chips, or honey.
- Matcha macarons pair well with green tea, coffee, champagne, fruits, or ice cream, and can be presented in a visually appealing way to enhance their overall appearance.

Amazon Basics Basket Coffee Filters for 8-12 Cup Coffee Makers, White, 200 Count, Packaging May Vary
- Package Quantity: 200 filters included
- Compatibility: Fits 8-12 cup coffee makers
- Filtration Quality: Eliminates sediment for better taste
As an affiliate, we earn on qualifying purchases.
Gather Your Ingredients and Equipment
You’ll need to gather all your ingredients and equipment before diving into the delicious world of matcha macarons, so grab your apron and get ready to bake!
The equipment essentials include a stand mixer, piping bag, piping tip, parchment paper, and a baking sheet. If you don’t have a stand mixer, a hand mixer will work just fine. And if you don’t have a piping bag or tip, you can use a plastic bag with the corner snipped off.
Now, let’s talk about the ingredients. The main ingredient in matcha macarons is, of course, matcha powder. You can find this at most specialty food stores or online. Other ingredients include almond flour, powdered sugar, egg whites, granulated sugar, and cream of tartar.
If you don’t have almond flour, you can substitute it for finely ground almonds. And if you don’t have cream of tartar, you can substitute it for lemon juice or white vinegar.
Once you have everything you need, it’s time to prepare your matcha filling.
Prepare Your Matcha Filling
Once the butter and sugar are creamed together, the mixture should be light and fluffy like whipped cream, giving the filling a cloud-like texture that will melt in your mouth.
To add a matcha flavor to the filling, I recommend using high quality culinary grade matcha powder. You can adjust the amount of matcha powder to your preference, but I usually use about 2 teaspoons for a subtle matcha flavor and up to 4 teaspoons for a stronger flavor.
If you want to experiment with different filling options, there are many possibilities. You can add a touch of vanilla extract or almond extract for a more complex flavor profile. You can also add some finely chopped nuts, such as pistachios or almonds, for a crunchy texture. Or, if you prefer a sweeter filling, you can add some white chocolate chips or a drizzle of honey.
The possibilities are endless, so have fun and get creative! Now, let’s move on to making the macaron shells.
Make the Macaron Shells
Alright, it’s time to make the macaron shells.
First, I mix together the batter to get the perfect consistency.
Then, I pipe the batter onto the baking sheets, making sure to leave enough space between each shell.
Finally, I let the shells rest for a bit before popping them in the oven.
Mixing, piping, and resting – these are the three key steps to making the perfect macaron shells.
Mixing the Batter
Now it’s time to get your arms working and mix the batter until it’s smooth and shiny! Before you start mixing, it’s important to note that the key to successful macarons lies in the mixing techniques. Over-mixing can cause the batter to be too runny, while under-mixing can result in cracked shells. So, be sure to mix the batter just right!
To begin, I start by folding the dry ingredients into the egg white and sugar mixture. I use a spatula to fold the ingredients in gently, making sure to scrape the sides and bottom of the bowl.
Then, I use the macaronage technique to mix the batter. This involves folding the batter over itself until it becomes smooth, shiny, and has a lava-like consistency.
Once the batter has reached the perfect consistency, it’s time to pipe it onto baking sheets. With a piping bag and round tip, I pipe the batter into small circles onto a baking sheet lined with parchment paper. Remember to leave enough space between each circle to allow for spreading during baking.
With the batter mixed and piped, it’s time to move on to the next step – baking the macaron shells to perfection!
Piping onto Baking Sheets
Using a piping bag and round tip, I carefully squeeze out small dollops of the batter onto the parchment-lined baking sheets, creating perfectly shaped circles that will soon turn into delicate macaron shells. It can be tricky at first, but with some practice techniques and the right piping tips, it becomes easier to achieve consistent and uniform shapes. I make sure to leave enough space between each dollop to allow for the batter to spread out slightly and form the signature macaron feet.
To make the piping process even easier, I like to use a template underneath the parchment paper. This can be as simple as drawing circles onto a piece of paper and placing it underneath the parchment, or using a silicone mat with pre-drawn circles. It helps me keep the size and spacing consistent, and ensures that each macaron shell is the same size. Once all the batter has been piped onto the baking sheets, I gently tap them on the counter to release any air bubbles and let them rest for a bit before placing them in the oven.
Resting the shells is an important step in the macaron-making process, as it allows the shells to develop a thin, dry layer on the surface before baking. This helps to create the characteristic smooth and shiny surface of the macaron shells, and ensures that they rise properly in the oven.
Resting the Shells
Before you pop your macaron shells in the oven, it’s important to let them rest for a bit to allow for a smooth and shiny surface to develop. Resting the shells is a crucial step that shouldn’t be skipped.
This allows the macaron shells to develop a thin film on the surface, which will help them rise evenly while baking. Once piped, let the shells rest at room temperature for 30 minutes to an hour, or until the surface is dry to the touch.
Tips for maximizing shell resting time include placing the baking sheets on a flat surface and covering them with a clean kitchen towel to prevent them from drying out. You can also turn on a fan or air conditioner to reduce humidity in the room, as moisture can prolong the resting time.
To know when your macaron shells are ready for baking, gently touch the surface of the shells with your fingertip. If the shells aren’t sticky and feel dry to the touch, they’re ready for baking.
Once your macaron shells have rested, it’s time to bake and cool them.
Bake and Cool the Macaron Shells
Alright, now that we’ve made the macaron shells, it’s time to get them baked and cooled.
First things first, I’m going to preheat my oven to 300°F. Once it’s heated up, I’ll pop in my macarons and bake them for about 15-18 minutes, making sure to rotate the tray halfway through.
After they’re done, I’ll let the shells cool completely on the tray before removing them.
Preheating the Oven
Now’s the time to warm up your oven to the perfect temperature, allowing the matcha macarons to bake into a delicate, crispy texture with a soft and chewy interior. Preheating the oven is an essential step in baking macarons, as it ensures that the shells are cooked evenly and rise properly.
Here are some benefits of preheating and common preheating mistakes to avoid:
-
Benefits of Preheating:
-
Helps to activate the baking powder and baking soda for better texture and rise
-
Ensures that the macarons are baked at a consistent temperature
-
Reduces the risk of undercooked or overcooked macarons
-
Improves the overall quality and appearance of the macarons
-
Common Preheating Mistakes:
-
Not preheating long enough or at the correct temperature
-
Opening the oven door too frequently, which causes temperature fluctuations
-
Overcrowding the oven with too many baking sheets
-
Neglecting to use an oven thermometer to ensure accuracy
With the oven preheated and the macaron shells ready to go, it’s time to move on to the next step: baking time and temperature.
Baking Time and Temperature
To achieve perfectly baked macarons, you’ll want to ensure that the oven temperature is set to the right degree and that the baking time is just right. Adjusting oven settings can be the difference between a successful batch and a disaster. I recommend preheating your oven to 300°F (150°C) and placing the baking tray on the middle rack. Use an oven thermometer to confirm the temperature is accurate. If your oven tends to run hot, lower the temperature to 275°F (135°C) to prevent browning too quickly.
Once you’ve confirmed the oven temperature is correct, it’s time to bake the macarons. The baking time and temperature will vary depending on your oven and the size of your macarons. For reference, I bake my 2-inch macarons for 18-20 minutes at 300°F (150°C). To help keep track of the baking time, I recommend using a timer or setting an alarm on your phone. Check for doneness by gently touching the top of the macaron shells. If they are firm and do not wiggle, they are ready. Once baked, transfer the baking sheet to a cooling rack to cool the shells.
Cooling the Shells
Once the macarons are done baking, you’ll want to be careful when handling them and let them cool completely on the baking sheet before removing them. This ensures that the delicate shells don’t break or stick to the surface.
Here are some tips on how to cool the shells before filling them:
-
Using a fan: You can speed up the cooling process by using a fan. Simply place the baking sheet in front of a fan and let the air circulate around the shells. This will help them cool down faster and prevent them from becoming soggy.
-
Refrigerating the shells: Another way to cool the shells is to refrigerate them. Once the macarons come out of the oven, transfer the baking sheet to the refrigerator and let them cool for at least 10 minutes. This will help the shells set and prevent them from cracking when you handle them.
-
Don’t touch the shells: It’s important to resist the temptation to touch the shells while they’re still warm. They need time to cool and set before you can remove them from the baking sheet.
-
Check for doneness: Before you start filling the macarons, make sure they’re completely cooled and set. You can test this by gently pressing on the top of a shell. If it feels firm and doesn’t move, it’s ready to be filled.
Now that the shells are cooled and ready, it’s time to fill them with your favorite matcha filling.
Fill the Macarons
Now comes the fun part – filling the macarons! I love piping the filling onto each shell and seeing the vibrant colors and flavors come to life.
Once all the shells are filled, it’s time to sandwich them together and create the perfect macaron. It’s important to be gentle when sandwiching the shells, so as not to crush the delicate meringue.
Piping the Filling
Next up, it’s time to grab your piping bag and fill it with the matcha filling. When it comes to decorating techniques, piping the filling is one of the simplest and most effective methods.
To begin, cut the tip off of your piping bag and attach the desired piping tip. Then, spoon the matcha filling into the bag, being careful not to overfill it. You want to have enough filling to pipe, but not so much that it will be difficult to control.
When it comes to flavor pairings, matcha is a versatile ingredient that can be paired with a variety of flavors. Some popular options include white chocolate, lemon, and raspberry. However, for these matcha macarons, we’ll simply be filling them with a generous amount of matcha buttercream.
Once your piping bag is filled with the matcha filling, it’s time to move on to the next step: sandwiching the shells.
Sandwiching the Shells
To assemble the delicate treats, gently press two shells together with a generous dollop of the matcha buttercream filling in between. The filling should be piped onto one shell, leaving a small border around the edge, before being topped with the other shell. Press down lightly to create the perfect sandwich.
Flavor options for the filling are endless – try adding a hint of vanilla or a sprinkle of cinnamon for a unique twist. Additionally, filling techniques can vary, from using a piping bag to spreading the filling gently with a spoon. Whatever method you choose, be sure to handle the macarons with care to avoid cracking the delicate shells.
With a little practice, you’ll be able to create bakery-worthy matcha macarons that will impress any guest. Now, onto how to store and serve your beautiful creation.
Store and Serve
Don’t forget to showcase your beautiful matcha macarons by presenting them on a decorative platter or cake stand! Presentation is key when it comes to desserts, especially ones as delicate and intricate as macarons. You want to make sure your guests can admire your hard work and appreciate the beautiful green color of the matcha shells.
To really elevate the presentation, consider pairing your matcha macarons with complementary flavors. Some flavor combinations that work well with matcha include white chocolate, raspberry, and black sesame. You can also add a touch of gold or silver edible glitter to add some sparkle and glam to your display. Remember, presentation tips can make all the difference in making your desserts look as good as they taste.
Now, if you run into any issues during the macaron making process, don’t worry! Troubleshooting tips are on the way.
Troubleshooting Tips
If you’re facing issues with your delicate confections, these troubleshooting tips will come in handy. Making matcha macarons can be a challenging task, but with a few adjustments, you can get the perfect result you’re looking for. Here are some common mistakes you should avoid and how to fix them:
-
If your macarons have cracked shells, it’s usually a sign that the batter is too dry or that you’ve overmixed it. To fix this, add a few drops of water to your batter and mix it gently until it’s smooth.
-
If your macarons have hollow shells, it’s usually a sign that you’ve overmixed the batter or that your oven temperature is too high. To fix this, try reducing the mixing time and lowering the oven temperature.
-
If your macarons have uneven feet, it’s usually a sign that your oven temperature is uneven, or your baking sheet is warped. To fix this, try using a silicone baking mat or rotating your baking sheet halfway through baking.
-
If your macarons are sticking to the parchment paper after baking, it’s usually a sign that they’re undercooked. To fix this, bake your macarons for a few more minutes until they’re fully cooked.
Now that you’ve mastered the art of making matcha macarons, it’s time to experiment with flavor variations.
Experiment with Flavor Variations
Get creative with your macaron flavors by trying out different combinations of fillings! Flavor experiments are a fun way to add your own unique twist to the classic matcha macaron recipe.
Some of my favorite flavor pairings include raspberry and white chocolate, or lemon and lavender. You can also experiment with different textures, like adding a crunchy hazelnut praline filling or a creamy ganache.
Presentation ideas are also a fun way to make your matcha macarons stand out. Try coloring the shells with different shades of green to create an ombre effect, or decorate with edible gold leaf for a touch of elegance. Don’t be afraid to get creative with your presentation, as it can make a big difference in how your macarons are received.
And remember, practice makes perfect!
Practice Makes Perfect
You’ll see a noticeable improvement in your macaron-making skills with consistent practice and patience. Making matcha macarons, or any type of macaron for that matter, requires precision and attention to detail.
Here are some practice tips to help you perfect your macaron-making skills:
- Use a kitchen scale to measure ingredients accurately
- Mix the ingredients just until the batter is smooth and glossy
- Let the macarons rest before baking to ensure a smooth and even surface
- Experiment with different piping techniques to find the one that works best for you
It’s important to remember that mistakes are common when making macarons. Don’t get discouraged if your first few batches don’t turn out perfectly. Keep practicing and you’ll soon be able to make beautiful and delicious matcha macarons.
With your newly acquired macaron-making skills, it’s time to enjoy your delicious matcha macarons!
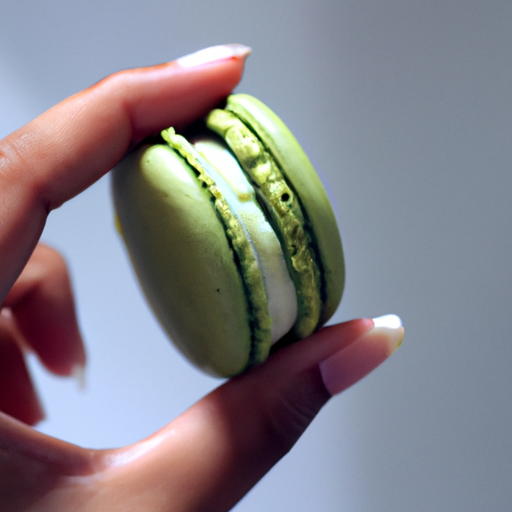
Enjoy Your Delicious Matcha Macarons!
Now it’s time to savor every bite of these heavenly treats and experience pure bliss with each chewy, flavorful macaron. But before you do that, let me share with you some presentation tips that will make your matcha macarons look even more appetizing.
You can dust some matcha powder on top of the macarons or sprinkle some edible gold dust for an extra touch of elegance. You can also pipe some whipped cream or ganache in the center of the macaron for a surprise filling. Just make sure to refrigerate the macarons first before filling them to prevent them from getting too soft.
As for pairing suggestions, matcha macarons go well with a variety of beverages such as green tea, coffee, and even champagne. You can also pair them with some fresh fruits like strawberries or raspberries for a fruity contrast to the earthy matcha flavor. Another option is to serve them with some creamy ice cream for a decadent dessert.
Whatever your choice may be, one thing is for sure, your matcha macarons will be the star of the show and will leave your guests begging for more.
Frequently Asked Questions
Can I use regular green tea powder instead of matcha powder for this recipe?
While regular green tea powder may seem like a substitute for matcha powder, it won’t yield the same flavor or health benefits. Consider using it for other recipes. When making macarons, consistency and oven temperature are key.
How long will the macarons stay fresh if stored properly?
I’m happy to share my tips on maximizing the shelf life of macarons. Proper storage is key – keep them in an airtight container in the fridge and they’ll stay fresh for up to a week.
Can I freeze the macarons for future consumption?
Yes, I can freeze Macarons for future consumption. It extends the shelf life for two to three months. I can also experiment with alternative fillings and flavors after thawing.
How do I know if I’ve over- or under-mixed the macaron batter?
When making macarons, common mistakes include over or under-mixing the batter. To troubleshoot, I check for the right consistency – it should flow like lava. To fix over-mixing, I add more dry ingredients. For under-mixing, I gently fold the batter a few more times.
Can I use a different type of filling besides matcha for these macarons?
Wow, the possibilities for different filling options and flavor variations are endless! While matcha is a great choice, I’ve experimented with everything from raspberry jam to salted caramel. Don’t be afraid to get creative and try out new combinations.
Conclusion
Well, there you have it! Making matcha macarons may seem daunting, but with the right ingredients, equipment, and a little practice, you can create a delicious dessert that will wow your loved ones.
Remember to take your time, follow the steps closely, and don’t hesitate to experiment with different flavors and fillings. As the saying goes, Rome wasn’t built in a day, and neither are perfect macarons.
But with each attempt, you’ll learn something new and get closer to achieving that perfect, delicate texture and flavor. So, don’t be discouraged if your first batch isn’t perfect – keep practicing and soon enough, you’ll be whipping up matcha macarons like a pro.
Now, go forth and impress your taste buds (and your friends) with your newfound macaron-making skills!