
Being a fan of everything related to green tea, the concept of a matcha cake has always caught my attention. The thought of a soft and moist cake enriched with the natural, somewhat bitter taste of matcha appeared to be the ideal sweet treat for me.
After several trials and errors in the kitchen, I finally found the perfect recipe for making matcha cake at home.
There is something magical about baking a homemade cake that makes it taste infinitely better than any store-bought version. With this step-by-step guide, you too can make an incredibly delicious matcha cake that will impress your friends and family.
So let’s gather our ingredients and get started on this culinary adventure!
Key Takeaways
- Accurate measuring and high-quality matcha powder are important for the best flavor and texture.
- Fresh ingredients and smooth batter texture are recommended for optimal results.
- Baking and cooling instructions should be followed carefully for the perfect texture.
- Creativity in decorating and flavor combinations can make the cake unique and personalized.

Amazon Basics Basket Coffee Filters for 8-12 Cup Coffee Makers, White, 200 Count, Packaging May Vary
- Package Quantity: 200 filters included
- Compatibility: Fits 8-12 cup coffee makers
- Filtration Quality: Eliminates sediment for better taste
As an affiliate, we earn on qualifying purchases.
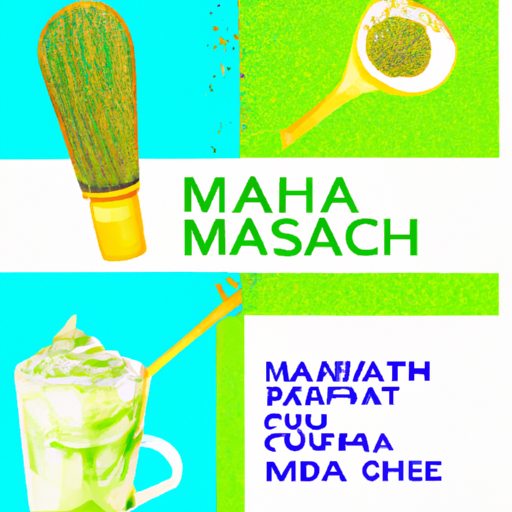
Gather Your Ingredients
You’ll wanna gather all your matcha-loving ingredients ASAP! First and foremost, you need to make sure that you’re measuring accurately. Matcha cake is a delicate balance of flavors, so it’s important to be precise with your measurements. Invest in a good digital kitchen scale if you don’t have one already.
Measuring cups and spoons are fine, but they can vary from brand to brand, which could affect the outcome of your cake. Next up is choosing quality ingredients. Since matcha is the star ingredient of this recipe, it’s important that you choose a high-quality powder that will give your cake its vibrant green color and robust flavor. Make sure to read reviews before purchasing and opt for an organic variety if possible.
For the other ingredients like flour, sugar, eggs, butter or oil – always go for the freshest ones available. Now that you have all of your ingredients ready and measured out accurately, it’s time to start preparing the batter. But first things first – preheat your oven! Set it at 350°F (180°C) and let it heat up while you move on to the next step.
Preparing the Batter
First, it’s important to gather all the necessary ingredients before starting to make the matcha cake. Once you have everything ready, it’s time to start preparing the batter. The key here is not only to mix everything together but also to achieve a perfect consistency.
When mixing the wet and dry ingredients, it’s important to follow some mixing techniques. First, I like to whisk together all the dry ingredients in a bowl until well combined. Then, in a separate bowl, I combine all the wet ingredients and whisk them together until they’re fully incorporated.
Next, I slowly pour the wet mixture into the dry mixture while stirring with a wooden spoon or rubber spatula until just combined. Be careful not to overmix as this can result in a tough cake.
The batter should have a smooth and creamy texture without any lumps or clumps of flour visible. If your batter seems too thick or heavy, add a little bit of milk gradually until you reach your desired consistency.
Now that we have our perfectly mixed matcha cake batter ready, let’s move on to baking it in the oven!
Baking the Cake
Now it’s time to pop that delicious green batter into the oven and let it bake to perfection! Before we begin, preheat your oven to 350°F (175°C) and grease a 9-inch cake pan with butter or cooking spray.
Here are some things to keep in mind when baking your matcha cake:
- Be sure not to overmix the batter. Overmixing can cause the cake to become tough and chewy.
- Check on your cake periodically while it’s baking. Every oven is different, so the exact baking time may vary depending on your oven.
- Use a toothpick or cake tester to check if your cake is done. Insert it into the center of the cake – if it comes out clean, then your cake is ready!
Once you’ve finished mixing and have prepared your pan, pour in the batter and smooth out the surface with a spatula. Then place it in the preheated oven for about 35-40 minutes or until fully baked.
After taking out our freshly baked matcha cake from the oven, let it cool down completely before moving onto decorating!
Letting the Cake Cool
Once the cake’s out of the oven, let it cool down completely like a summer breeze on a warm day to avoid melting your frosting. This step is crucial in achieving the perfect matcha cake texture and preventing any mishaps during frosting application.
Cooling allows for even distribution of moisture within the cake layers, ensuring that each bite has a consistent texture. The importance of cooling cannot be stressed enough as it also plays a significant role in controlling the overall texture of your matcha cake.
If you attempt to frost a hot or warm cake, it’ll cause the frosting to melt off the sides and slide down onto your serving plate. On top of that, cutting into an uncooled cake can lead to crumbling and breakage, which can make serving difficult.
To achieve optimal results when making matcha cake, take your time with this step and allow sufficient time for cooling before applying any frosting. Once cooled entirely, you can begin layering on some delicious homemade matcha frosting by spreading evenly over each layer using a spatula or piping bag.
With its smooth and creamy consistency perfectly complementing your moist and fluffy matcha sponge layers – this dessert will be sure to impress!
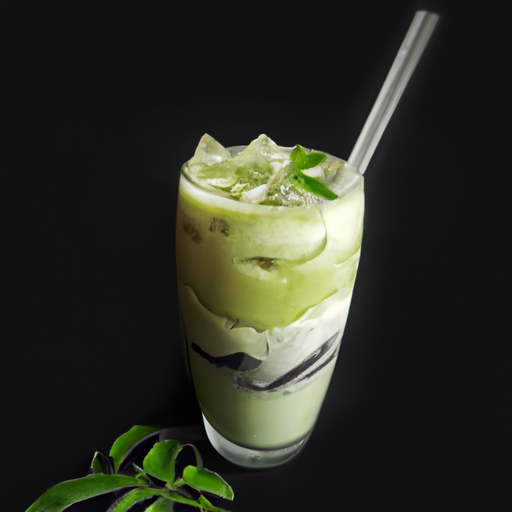
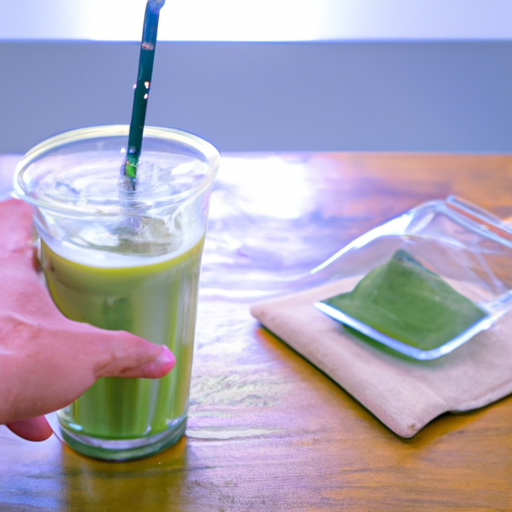
Making the Matcha Frosting
When you’re ready to add some extra flavor to your cooled matcha cake, it’s time to whip up a delectable matcha frosting. Here’s how I make mine:
I start by sifting 1 cup of powdered sugar and 1 tablespoon of matcha powder into a mixing bowl. Then, I add in 4 tablespoons of softened unsalted butter and 2 tablespoons of heavy cream.
Next, I use an electric mixer on medium speed to combine the ingredients until they’re fluffy and smooth. The key here is to use a whisking technique that ensures the frosting stays light and airy. Once the ingredients are fully combined, I set the frosting aside until it’s time to frost the cake.
When it comes to storing leftover matcha frosting, there are a couple of options. If you plan on using it within a day or two, simply cover it with plastic wrap and store in the refrigerator. If you won’t be using it for several days or need to transport it somewhere, transfer it into an airtight container and freeze for up to one month. Just remember to thaw before using again!
Now that we have our frosting ready, let’s move on to how we can use this delicious topping to frost our cake seamlessly without any messes!
Frosting the Cake
To achieve a perfectly frosted matcha cake, start by placing the cooled cake on a flat surface. Make sure the top of the cake is level by carefully trimming any unevenness with a sharp knife.
Next, apply a thin layer of frosting to the entire surface of the cake using an offset spatula. This will serve as a crumb coat and prevent loose crumbs from ruining your final layer of frosting.
Once you have applied the crumb coat, put the cake in the fridge for at least 30 minutes or until firm to touch. This step is crucial since it will help set and stabilize your frosting.
Afterward, take your remaining frosting and spread it generously over the chilled crumb-coated cake. You can use different decorating techniques like piping or creating swirls with your spatula to make it look more appealing.
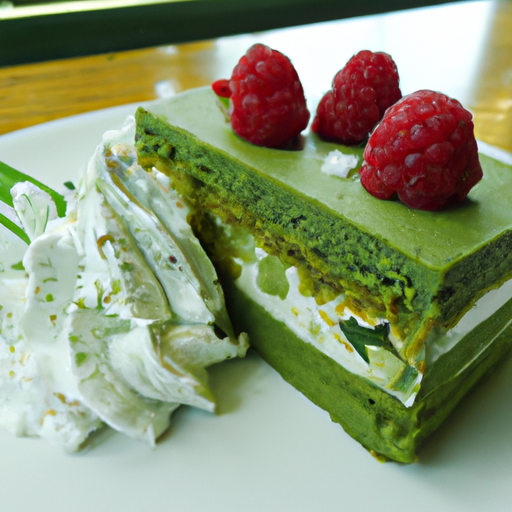
When it comes to flavor combinations, there are endless possibilities you can try! You can add some sliced strawberries or raspberries on top for a fruity twist or sprinkle some chopped nuts for extra crunchiness.
You can even mix in some white chocolate chips into your frosting for added sweetness and creaminess. Whatever combination you choose, make sure it complements well with matcha’s earthy notes.
Now that we’ve successfully frosted our matcha cake, let’s move on to serving and storing it properly without ruining our hard work!
Serving and Storing the Cake
Now that the cake is perfectly frosted, it’s time to think about how to serve and store it. First things first, make sure the cake has completely cooled down before attempting to plate or decorate it. If you’re short on time, pop it in the fridge for a few minutes.
When it comes to plating the cake, consider using a cake stand or pedestal to showcase its beauty. Alternatively, you can place the cake on a decorative serving tray or flat dish. Once you’ve chosen your plating option, use a sharp knife to cut even slices of the matcha cake.
On top of that, decorating tips can elevate your matcha cake from simple to stunning. You can add fresh berries or edible flowers on top of each slice for an elegant touch. Another idea is dusting some powdered sugar or cocoa powder over the top of each slice for a classic finish. Whatever decoration you choose, remember that presentation counts just as much as taste!
Moving onto variations and tips…
Variations and Tips
So, if I want to add some variety to my matcha cake, there are a few things I can do.
One option is to experiment with different flavors or fillings, such as adding raspberry jam or chocolate chips.
Another option is to adjust the amount of matcha powder used in the recipe to achieve a stronger or milder flavor.
When it comes to baking and decorating, there are also some tips that can help ensure success. For example, using parchment paper for easy removal from the pan and allowing the cake to cool completely before frosting.
Remember to use contractions.
Adding Flavors or Fillings
Transform your matcha cake into a flavor explosion by incorporating your favorite fillings! You can add fresh berries or creamy chocolate ganache to your cake. Here are some flavor combinations and alternative fillings to try:
- Matcha and Strawberry: Add chopped strawberries to the batter or use them as a filling between cake layers.
- Matcha and Chocolate: Make a rich chocolate ganache and spread it on top of the cake.
- Matcha and Citrus: Use lemon or orange zest in the batter for a refreshing twist.
- Matcha and Coconut: Mix shredded coconut into the batter or sprinkle it on top of the frosting for added texture.
- Matcha and Red Bean Paste: Spread sweet red bean paste between cake layers for an authentic Japanese dessert.
Adding different flavors or fillings is an easy way to customize your matcha cake recipe. Don’t be afraid to experiment with different combinations until you find one that satisfies your taste buds.
In the next section, I’ll discuss how adjusting the amount of matcha powder can affect the overall taste of your cake.
Adjusting matcha powder amount is crucial in achieving just the right balance of flavor in your matcha cake. By adding more or less matcha powder, you can adjust its intensity according to your preference. Let’s dive deeper into this topic in our next section.
Adjusting Matcha Powder Amount
To get the right balance of flavor in your matcha cake, you’ll want to adjust how much matcha powder you use. The amount of matcha powder will determine the intensity of the matcha flavor in your cake. More powder will make it stronger, while less will give a milder taste.
If the recommended amount of matcha powder in your recipe is too strong for your liking, you can always substitute some of it with regular flour. This will help to tone down the intensity without sacrificing the green tea flavor altogether.
It’s important to keep in mind that when adjusting the matcha powder amount, it may affect the texture and moisture level of your cake as well. So be sure to test out different amounts until you find what works best for you!
Now onto some tips for baking and decorating your delicious matcha cake.
Tips for Baking and Decorating
For an added touch of elegance, consider garnishing your matcha confection with delicate edible flowers or a dusting of powdered sugar. Creative designs and color combinations can also make your cake stand out from the crowd.
Here are some tips for baking and decorating your matcha cake to perfection:
- Use high-quality ingredients to ensure a rich and vibrant green hue.
- Experiment with different frosting flavors, such as vanilla, cream cheese, or citrus.
- Try using piping bags or cookie cutters to create unique shapes and patterns on your cake.
Presentation techniques and garnishing play a crucial role in making your matcha cake look visually appealing. You can use fresh fruits like strawberries or kiwis to add pops of color, or top it off with whipped cream for a decadent finish.
Don’t be afraid to get creative with your decoration choices – after all, the beauty of baking is in the artistry! With these simple tips and tricks, you’ll be able to elevate your matcha cake game and impress all those who try it.
Frequently Asked Questions
What is the difference between matcha powder and regular green tea powder?
When it comes to Matcha vs. Green Tea: Differences and Benefits, the main difference is that matcha is a type of green tea that is grown in shaded conditions. This results in a higher concentration of chlorophyll and amino acids, giving matcha its distinct flavor and bright green color.
Matcha powder also contains more caffeine than regular green tea powder, making it a popular choice for those looking for an energy boost.
In terms of Matcha vs. Regular Green Tea Powder: Which is Better?, it really depends on personal preference and intended use. If you want the full benefits of matcha’s unique taste and high caffeine content, then go for matcha powder.
However, if you don’t mind a milder taste or are using it for cooking purposes where the color isn’t as important, regular green tea powder may be a better option.
Can I substitute ingredients like sugar or flour for healthier options in the matcha cake recipe?
When it comes to baking, I always try to make healthier substitutions whenever possible. For the matcha cake recipe, there are definitely some options for swapping out ingredients like sugar and flour.
Instead of using white sugar, I like to use coconut sugar or honey for a more natural sweetener. For flour, I often use almond flour or oat flour instead of all-purpose flour. These substitutions not only make the cake healthier but also add a unique flavor to the final product.
Additionally, when experimenting with flavors in the matcha cake recipe, I like to add in some lemon zest or vanilla extract for an extra kick of taste. Overall, healthy substitutions and flavor experimentation can take your matcha cake recipe to the next level while still maintaining its deliciousness.
How long can the matcha cake be stored in the refrigerator?
The shelf life of a matcha cake can vary depending on how it’s stored. In general, it can be stored in the refrigerator for up to five days.
However, proper storage tips are crucial to maintain the freshness and flavor of the cake. It should be tightly wrapped in plastic wrap or stored in an airtight container to prevent it from drying out or absorbing any odors from other foods in the fridge.
Before refrigerating, allow the cake to cool completely at room temperature. When you’re ready to serve, let it come back to room temperature before slicing and enjoying. Remember, proper storage is key to extending the shelf life of your matcha cake!
Can I use a different type of frosting instead of matcha frosting on the cake?
Switching up the frosting on a cake can be like changing the outfit for a party – it adds a new flavor and style to the whole event. When it comes to matcha cake, there are plenty of alternative frosting options that can add their own unique flair.
From classic cream cheese frosting to tangy lemon or rich chocolate ganache, the possibilities are endless. The key is finding a flavor that compliments rather than overpowers the matcha taste.
So don’t be afraid to experiment with different frostings and find your perfect pairing!
Can I add any additional flavors, like lemon or raspberry, to the matcha cake recipe?
Adding flavors like lemon or raspberry to the matcha cake recipe can be a great way to enhance the taste and add your own personal touch. However, it’s important to keep in mind that adding additional flavors may affect the moisture level of the cake. To prevent any dryness, I suggest adjusting the amount of liquid ingredients or adding more moist ingredients such as yogurt or applesauce.
It’s also important to consider which flavors pair well with matcha, so doing a bit of research beforehand can be helpful. Overall, experimenting with different flavor combinations can be exciting and delicious, but it’s important to balance out the added ingredients with the original recipe to maintain a moist and tasty matcha cake.
Conclusion
So there you have it, how to make a delicious matcha cake! But wait, before you go off and start baking, let me tell you about one more thing that will take your matcha cake to the next level.
Imagine taking a bite of this moist and fluffy cake with just the right amount of sweetness. Now imagine tasting the subtle yet distinct flavor of matcha in every bite. And as you savor each mouthful, imagine topping it off with a creamy and decadent matcha frosting that perfectly complements the cake.
Are you drooling yet? Trust me, once you try this matcha cake recipe, you’ll never want to go back to plain old vanilla again.