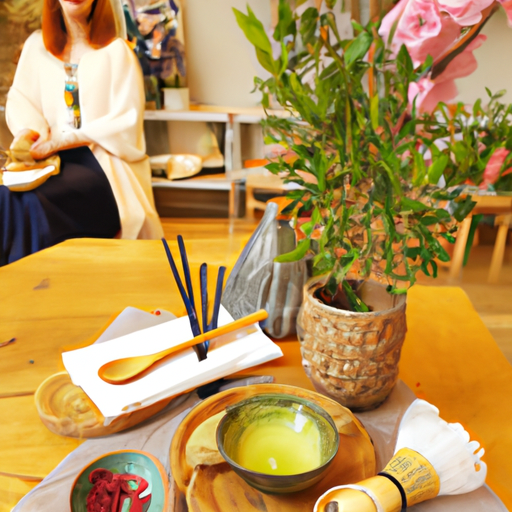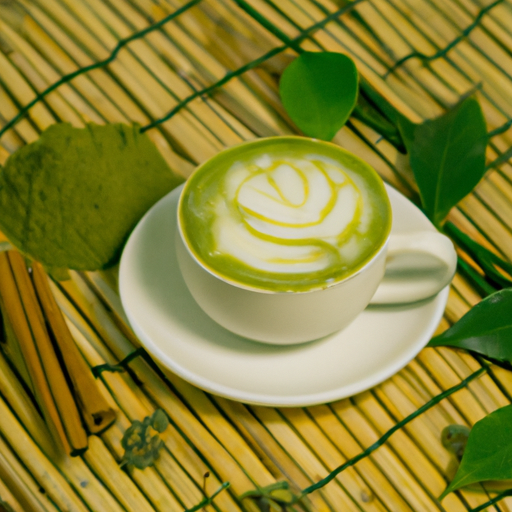
I’ve always adored macarons, and I’ve recently found delight in incorporating matcha into the combination. The matcha’s earthy, vegetal flavor complements the subtle sweetness of a macaron shell exquisitely. Moreover, the filling’s bright green hue is simply irresistible.
Making matcha macarons may seem intimidating, but with a little patience and practice, you’ll be able to whip up a batch that would make any pastry chef proud.
To start, you’ll need to gather your ingredients and equipment. You’ll need almond flour, powdered sugar, egg whites, granulated sugar, matcha powder, a piping bag, and a stand mixer or hand mixer. It’s important to have everything measured and ready to go before you start making the batter, as the process can move quickly.
Once you have everything on hand, it’s time to start creating your matcha macarons.
Key Takeaways
- Properly sift dry ingredients to avoid lumps in the batter.
- Pair shells of similar size for a uniform appearance.
- Experiment with different flavor variations such as black sesame, coconut, yuzu, and red bean.
- Store macarons in an airtight container for freshness and serve at room temperature for the best taste and texture.

Amazon Basics Basket Coffee Filters for 8-12 Cup Coffee Makers, White, 200 Count, Packaging May Vary
- Package Quantity: 200 filters included
- Compatibility: Fits 8-12 cup coffee makers
- Filtration Quality: Eliminates sediment for better taste
As an affiliate, we earn on qualifying purchases.
Gather Your Ingredients and Equipment
Time to grab all the goodies and gear up for some matcha macaron magic! The first step to making matcha macarons is to gather all the necessary ingredients and equipment.
You’ll need almond flour, powdered sugar, granulated sugar, egg whites, matcha powder, a piping bag, a mixer, a baking sheet, and parchment paper.
Before you start, make sure all your equipment is clean and dry. Any residual oils or moisture can ruin your macarons. Also, be sure to measure your ingredients accurately, as even a slight deviation can affect the texture and taste of your macarons.
If you can’t find some of the ingredients, you can try substituting them, but make sure to research the substitution first.
Now that you have all your ingredients and equipment ready, it’s time to prepare your baking sheets. Line them with parchment paper and preheat your oven to 300°F. This temperature may vary depending on your oven, so be sure to check the instructions for your specific model.
With everything set up, you’re ready to move on to the next step and start making your matcha macarons.
Prepare Your Baking Sheets
Before you get started, it’s important to get your ducks in a row and prepare your baking sheets by lining them with parchment paper.
Sheet preparation tips include making sure to use a flat and even surface, as any bumps or warps can cause the macarons to come out unevenly. Additionally, it’s important to measure out the parchment paper to fit perfectly onto the baking sheet, as any excess paper can cause the macarons to spread out too much.
If you don’t have parchment paper on hand, there are alternative sheet options that you can use. A silicone mat is a great option as it’s non-stick and reusable, making it environmentally friendly. Another option is to lightly grease the baking sheet with butter or oil, although this can be tricky as too much grease will cause the macarons to spread out too much.
Once you’ve prepared your baking sheets, it’s time to move on to the next step and make the macaron batter. With the sheets lined and ready to go, you’ll be able to move smoothly through the rest of the process.
Make the Macaron Batter
Now that you’ve got your prepared baking sheets, you’ll want to start mixing together the almond flour, powdered sugar, and egg whites until a smooth and shiny batter forms, with just a few lumps remaining. This is the base of your macaron shells, and getting the consistency right is crucial for the success of your dessert.
Mixing techniques vary, but I find that folding the dry ingredients into the egg whites with a spatula in a circular motion works best. It’s important to gently incorporate the dry ingredients without overmixing, as this can cause the macarons to spread or crack.
One common mistake when making macaron batter is not sifting the almond flour and powdered sugar before adding them to the egg whites. This can result in lumps and an uneven texture.
Another mistake is not letting the batter rest for at least 30 minutes before piping it onto the baking sheets. This allows the batter to settle and creates a smooth top on the macaron shells. To check if the batter is ready, lift the spatula and let the batter fall back into the bowl. It should flow like lava and create a ribbon-like pattern on the surface.
Once your macaron batter is ready, it’s time to pipe the macaron shells onto your prepared baking sheets. But before we get into that, let’s talk about piping bags and tips.
Remember, having the right tools is important to achieve the perfect macaron shells.
Pipe the Macaron Shells
Grab your piping bag and attach a round tip for the perfect sized macaron shells with a satisfying ‘swoosh’ sound. Before starting, it’s important to note that piping macaron shells is not as easy as it looks. Piping techniques play a crucial role in creating the perfect macaron, so make sure to practice your piping skills before starting.
When piping the macaron shells, hold the piping bag perpendicular to the baking sheet and apply even pressure while piping the batter. Remember to leave space between each shell to allow for spreading. Troubleshooting tips include tapping the baking sheet gently on the counter to release any air bubbles and using a toothpick to pop any remaining bubbles on the surface of the shell.
Once all the shells have been piped, let the macaron shells rest for about 30-60 minutes before baking. This step is crucial for developing the signature ‘feet’ of the macaron. During this time, the shell’s surface will dry out, allowing for the batter to rise and the feet to form.
After this resting period, it’s time to bake the macaron shells to perfection.
Let the Macaron Shells Rest
To ensure the perfect texture and structure of your macaron shells, it’s important to let them rest for at least 30 minutes before baking. This step is critical in achieving the signature smooth and shiny surface of macarons. The resting period allows the macaron shells to develop a skin on the surface, which helps prevent cracking during baking.
There are a few tips for successful macaron resting. First, make sure to let the macaron shells rest in a cool, dry place. Avoid resting them in a humid or warm environment, as this can cause the shells to become sticky and lose their shape. Additionally, be careful not to over-rest the shells, as this can also affect the texture and make them too dry or brittle.
The importance of letting macarons rest before baking cannot be overstated. This step is crucial in achieving the perfect macaron texture and structure.
Once the shells have rested for at least 30 minutes, it’s time to move on to the next step: baking the macarons.
Bake the Macarons
Once the macarons are in the oven, it takes an average of 12-15 minutes for them to bake to perfection, depending on the recipe and oven temperature. During this time, it’s important to resist the urge to open the oven door and check on them too frequently. Doing so can cause the macarons to collapse or crack. Instead, set a timer and trust the process.
To give you an idea of what to expect, here’s a table outlining the baking times and temperatures for a basic matcha macaron recipe:
| Oven Temperature | Baking Time |
|---|---|
| 300°F (150°C) | 12 minutes |
| 325°F (165°C) | 13 minutes |
| 350°F (175°C) | 14 minutes |
| 375°F (190°C) | 15 minutes |
Once the macarons are done, remove them from the oven and let them cool completely before attempting to remove them from the baking sheet. This will prevent them from sticking or breaking. At this point, you can start thinking about alternative fillings and decorating options to make your matcha macarons truly unique.
Now that the macarons are baked and cooled, it’s time to make the matcha filling.
Make the Matcha Filling
Now it’s time to make the matcha filling for our macarons! First, I mix together the softened butter, powdered sugar, and matcha powder in a mixing bowl until it forms a creamy mixture.
Next, I whip the filling until it’s smooth and airy, using an electric mixer on medium-high speed for about 2-3 minutes.
Finally, I transfer the filling to a piping bag and refrigerate it until it’s time to fill the macarons. These steps ensure that our matcha filling is perfectly smooth and delicious, ready to complement the delicate macaron shells.
Mix Ingredients
Get ready to create something amazing by mixing together your finely ground almond flour, powdered sugar, and matcha powder! This is where the magic begins.
Mixing these ingredients together is crucial for achieving the perfect texture for your macarons. Here are some tips to keep in mind while mixing:
-
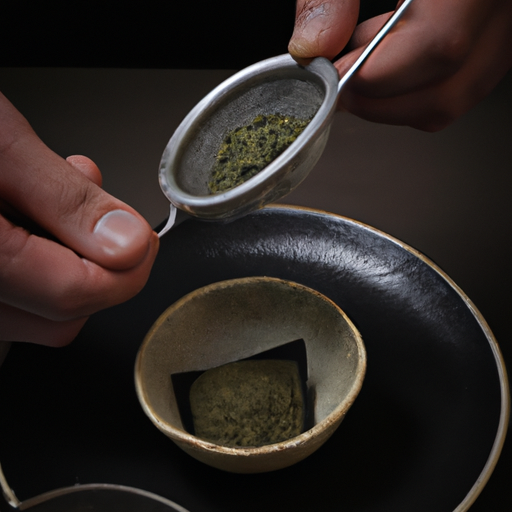
Use a fine mesh sieve to sift the almond flour, powdered sugar, and matcha powder together. This will ensure that there are no clumps in your mixture.
-
Use a folding technique to mix the ingredients together. This involves gently lifting the mixture from the bottom of the bowl and folding it over the top until everything is well incorporated.
-
Don’t overmix the batter. You want it to be smooth and thick, but not runny. Overmixing will cause your macarons to spread too much and lose their signature shape.
-
Experiment with different flavor variations by adding extracts or food coloring to the mixture. Just be careful not to add too much liquid, as this can also affect the texture of the macarons.
Once your mixture is well combined, it’s time to move onto the next step: whipping the filling until smooth.
Whip Filling Until Smooth
You’re going to love how creamy and delicious your filling becomes as you whip it until it’s perfectly smooth. Start by pouring heavy cream into a mixing bowl and adding sugar and matcha powder. Mix these ingredients together with a hand mixer on low speed until the sugar dissolves. Then, gradually increase the speed to high and continue mixing until soft peaks form. Be careful not to overmix, or the cream will become grainy and unpleasant.
Here are some tips for whipping cream: use chilled equipment, such as a cold mixing bowl and beaters, to help the cream whip faster and hold its shape better. Also, add sugar gradually to prevent the cream from becoming too sweet.
Once your filling is smooth and fluffy, you can start decorating your macarons with it. Spoon the filling into a piping bag fitted with a round tip and pipe small dollops onto the flat side of one macaron shell. Now, it’s time to transfer the filling to the piping bag and get ready for the final step.
Transfer Filling to Piping Bag
To achieve perfectly piped macarons, it’s important to transfer your creamy and luscious filling to a piping bag. This will allow for precise and consistent distribution of filling onto the macaron shells. There are a few piping techniques to consider, such as starting from the center and working your way outwards, or piping in a spiral motion from the outside in. Experiment with different techniques to find the one that works best for you.
Another great way to elevate your matcha macarons is by exploring different flavor variations for the filling. Some popular options include adding lemon zest or juice for a citrusy kick, or incorporating crushed raspberries for a fruity twist. Don’t be afraid to get creative and experiment with different flavors to make your macarons truly unique and delicious. With your filling transferred to a piping bag and your flavor variations in mind, it’s time to move on to assembling the macarons.
Assemble the Macarons
Now that I’ve made the matcha filling, it’s time to assemble the macarons!
The first step is to pair the shells of similar size, which will ensure that each macaron has a uniform appearance.
Once the shells are paired, I’ll pipe the filling onto one shell, making sure not to overfill it.
Finally, I’ll sandwich the second shell on top, gently pressing down to set it in place.
With these simple steps, my delicious matcha macarons will be ready to enjoy!
Pair Shells of Similar Size
Honestly, ain’t nobody got time for mismatched macaron shells. Keep it simple and pair those babies up based on size. Matching colors may also be helpful to ensure consistency in presentation.
Here are some tips to help you pair your macaron shells:
- Use a ruler or caliper to measure the diameter of each shell
- Place similar size shells side by side to compare
- Sort the shells into groups of similar sizes
- Keep shells with cracks or imperfections separate
- Consider filling variations when pairing shells to create a balanced taste experience
Once you’ve paired your macaron shells, it’s time to move on to the next step: piping the filling onto one shell. This is where the fun really begins!
Pipe Filling onto One Shell
First, you’ll want to prepare your piping bag and tip, then start by squeezing a small dollop of filling onto the center of one of your similarly sized macaron shells. For matcha macarons, I like to use a white chocolate ganache infused with matcha powder. However, feel free to experiment with different flavor variations to find your perfect filling.
You can also add a bit of food coloring to your filling to match the color of your macaron shells, or add some fun decorating options like sprinkles or edible glitter.
Once you’ve piped your filling onto one shell, gently press the second shell on top to create a sandwich. It’s important to make sure the shells are of similar size so that they fit together nicely.
Now, you’re ready to move onto the next step of the macaron-making process.
Sandwich with Second Shell
To create the perfect matcha macaron sandwich, you’ll want to gently press the second shell onto the filling, making sure they fit together nicely. This will create a smooth and cohesive texture that will enhance the overall flavor of the macaron. Additionally, you can add your own personal touch to the macarons by exploring different flavor variations and decorating options.
To give you some inspiration, here’s a table with some popular flavor variations and decorating options for matcha macarons:
| Flavor Variations | Decorating Options |
|---|---|
| Vanilla Buttercream | Matcha powder dusting |
| Strawberry Cream Cheese | White chocolate drizzle |
| Chocolate Ganache | Edible gold leaf |
| Lemon Curd | Fresh fruit garnish |
| Raspberry Jam | Sprinkles or colored sugar |
By experimenting with different combinations of flavors and decorations, you can create a unique and delicious treat that will impress your friends and family. Once your macarons are assembled, it’s time to store and serve them to ensure they stay fresh and delicious.
Store and Serve the Macarons
When I make matcha macarons, I always make sure to store them in an airtight container to keep them fresh. It’s important to keep them in a cool, dry place to prevent them from getting too soft or sticky.
When it’s time to serve them, I let them come to room temperature before serving to ensure the best texture and flavor.
Store in Airtight Container
After whipping up a batch of matcha macarons to perfection, seal them away in an airtight container to keep them fresh and ready to indulge in at any time. Storing tips are crucial in maintaining the quality and flavor of the macarons. The shelf life expectancy of macarons stored in an airtight container is around 3-4 days at room temperature or up to a week in the refrigerator.
To ensure that the matcha macarons stay fresh, it is important to store them in an airtight container. This prevents moisture and air from entering the container, which can cause the macarons to lose their texture and flavor. When storing the macarons, be sure to keep them away from sunlight or heat sources. Once stored properly, the matcha macarons can be enjoyed at their best when served at room temperature.
Serve at Room Temperature
Now that you’ve stored your matcha macarons properly, it’s time to think about how to serve them. For the best taste and texture, it’s important to serve macarons at room temperature. This allows the filling to soften and the flavors to meld together. If you’ve stored your macarons in the fridge, it’s a good idea to take them out about 30 minutes before serving to allow them to come to room temperature.
When it comes to presentation ideas and serving suggestions, there are many options to choose from. You can simply arrange the macarons on a platter or cake stand, or you can get creative with your presentation. For example, you could place them in a decorative box or jar, tie a ribbon around the container, and give them as a gift.
You could also serve them on individual plates with a scoop of ice cream or whipped cream on the side. The possibilities are endless, so have fun and be creative!
Now that you know how to serve your matcha macarons, let’s move on to some tips and troubleshooting to ensure that your macarons turn out perfectly every time.
Tips and Troubleshooting
To ensure your matcha macarons turn out perfectly, you’ll want to keep in mind a few tips and tricks. Don’t worry, it’s easier than you think! One common mistake that people make when making macarons is overmixing the batter. This can cause the macarons to become flat and not rise properly. To avoid this, make sure to fold the batter gently and only until it reaches the "ribbon stage"where it falls back into the bowl in a thick ribbon-like consistency.
Another tip is to make sure your ingredients are at room temperature before starting. This includes the egg whites and any dairy products you may be using in your filling. Room temperature ingredients will mix more easily and create a smoother batter. Additionally, when adding the matcha powder to the batter, make sure to sift it first to avoid any clumps. This will ensure an even distribution of the matcha flavor throughout the macaron shells.
Lastly, if you want to get creative with your matcha macarons, there are many flavor variations you can try. Some popular options include adding a layer of strawberry jam between the macaron shells, or making a white chocolate ganache filling with a hint of matcha. The possibilities are endless! To give you some inspiration, here’s a table of some unique flavor combinations you can experiment with:
| Flavor Combination | Description |
|---|---|
| Matcha and Black Sesame | A nutty and earthy twist on traditional matcha |
| Matcha and Coconut | A tropical take on matcha, perfect for summer |
| Matcha and Yuzu | A citrusy and refreshing combination |
| Matcha and Red Bean | A classic Japanese flavor pairing |
With these tips and flavor variations, you’ll be able to make delicious matcha macarons that will impress all of your guests. Happy baking!
Frequently Asked Questions
Can I use regular green tea powder instead of matcha powder for this recipe?
I wouldn’t recommend using regular green tea powder instead of matcha powder for this recipe. While both powders come from the same plant, matcha powder is made from shade-grown tea leaves that are ground into a fine powder, giving it a distinct flavor and vibrant green color.
Regular green tea powder, on the other hand, is usually made from older tea leaves and has a more muted flavor and color. If you substitute regular green tea powder, you may not get the same flavor and color profile that the recipe intended.
However, if you do decide to use green tea powder, I’d suggest using a high-quality one and adjusting the amount used based on taste. Additionally, keep in mind that baking with green tea powder can be tricky because it can turn bitter if overused, so be sure to follow recipe instructions carefully and taste test along the way.
How long do the macarons last once assembled and stored?
When it comes to storing macarons, there are a few shelf life tips and storing techniques that I always follow. First of all, it’s important to keep them in an airtight container to prevent any moisture from getting in and causing the macarons to become soft or mushy.
I also recommend storing them in the refrigerator, where they can last for up to a week. Another tip is to avoid stacking the macarons on top of each other, as this can cause the delicate shells to crack or break. Instead, place them in a single layer in the container, with a piece of parchment paper in between each layer.
With these techniques in mind, you can ensure that your macarons stay fresh and delicious for as long as possible.
Can I substitute almond flour with another type of flour?
When it comes to making macarons, almond flour is the traditional and most commonly used ingredient. However, there are some flour alternatives that can be used as a substitute.
One option is hazelnut flour, which gives the macarons a nuttier taste. Another option is coconut flour, which is a gluten-free alternative and adds a subtle coconut flavor.
It’s important to note that using a different type of flour may affect the texture and overall outcome of the macarons, so it’s best to experiment with small batches first. Baking tips to keep in mind when using a flour alternative include sifting the flour before using it and adjusting the amount of liquid in the recipe if needed.
What is the best way to store the macaron batter if I need to make it ahead of time?
When it comes to preparing macaron batter in advance, there are a few refrigeration methods that work well.
First, you can store the batter in an airtight container in the fridge for up to 24 hours. Just make sure to bring it back to room temperature before piping and baking.
Another method is to freeze the batter in a piping bag for up to 1 month. When you’re ready to use it, let it thaw in the fridge overnight and then bring it to room temperature before piping and baking.
It’s important to note that the longer the batter sits, the more likely it is to lose its consistency and affect the final product’s texture. So, while it’s possible to prepare macaron batter in advance, it’s best to keep it as fresh as possible for the best results.
Can I use a hand mixer instead of a stand mixer for making the macaron batter?
In the world of baking, a hand mixer and a stand mixer are like two different animals. They both have their unique strengths and weaknesses.
When it comes to making macaron batter, using a stand mixer is the ideal choice. It delivers a consistent and steady mixing speed that is required to achieve the perfect texture of the batter. However, if you don’t have a stand mixer, using a hand mixer is a viable alternative. Despite the manual nature of a hand mixer, it can still produce a good quality macaron batter as long as you have good control of the mixing speed and time.
The downside of using a hand mixer is that it can be tiring and time-consuming, especially if you need to make a large batch of macarons. Overall, the choice between a hand mixer and a stand mixer comes down to personal preference and availability.
Conclusion
Well, there you have it! Making matcha macarons may seem daunting at first, but with the right ingredients and equipment, a little bit of patience and practice, anyone can create these delicate and delicious treats.
Just like life, there may be some bumps along the way, but don’t be discouraged. Keep trying, experimenting, and learning from your mistakes, and soon enough, you’ll be a matcha macaron master!
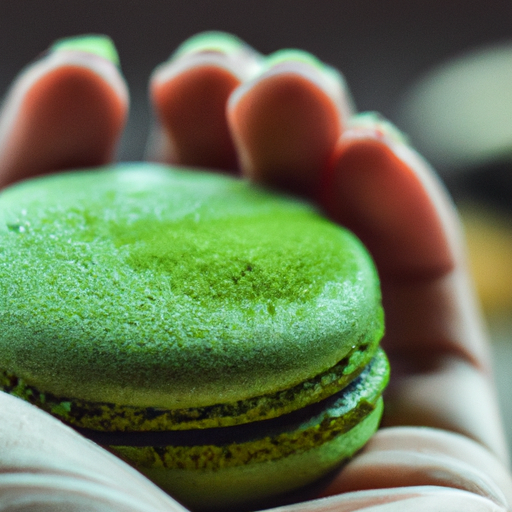
As I bite into one of these beautiful green macarons, I’m reminded that sometimes the most satisfying things in life take time and effort to create.
Just like the intricate layers of a macaron, our experiences and accomplishments are built on a foundation of hard work and determination.
So go ahead, take a leap of faith, and try making these matcha macarons. Who knows, it may just be the start of a new passion or hobby that brings you joy and satisfaction for years to come.