
Baking lights up my world, and hunting for fresh recipes keeps me on my toes.
Recently, I discovered a delicious twist on classic brownies that incorporates one of my favorite ingredients: matcha. Matcha is a type of powdered green tea that has gained popularity in recent years due to its health benefits and unique flavor.
If you’re like me and looking for a creative way to add some matcha to your diet, then these matcha brownies are the perfect recipe for you. They’re easy to make and taste absolutely amazing!
In this article, I’ll walk you through each step of the process so you can bake your own batch of delicious matcha brownies right at home.
So let’s get started!
Key Takeaways
- Matcha brownies incorporate matcha powder for a unique flavor and health benefits.
- Whole wheat flour and coconut sugar can be used for a healthier twist, and alternative flours and plant-based milk can be used for gluten-free and dairy-free options.
- Batter should be thick but still pourable before pouring into prepared pan, and toothpick test can be used to check if brownies are done.
- Let brownies cool down on wire rack to prevent crumbling, and cut into bite-sized pieces and serve with fresh fruit and whipped cream for a delicious and impressive dessert.
Gather Your Ingredients
Gotta gather all the goodies to make these scrumptious matcha brownies! First on my list is, of course, matcha powder. I prefer using high-quality ceremonial grade matcha for its distinct flavor and health benefits. But if you can’t find it or don’t want to spend that much, regular culinary grade will do just fine.
It’s important to sift the powder before adding it to your mixture to avoid clumps. Next up are the dry ingredients: flour, sugar, baking powder, and salt. For a healthier twist, I like using whole wheat flour and coconut sugar instead of white sugar. You can also use almond flour or oat flour for gluten-free alternatives.
Baking powder ensures our brownies rise nicely while salt balances out all the sweetness. We have the wet ingredients: melted butter (or coconut oil), eggs, vanilla extract, and milk (or non-dairy alternative). If you’re feeling adventurous, you can substitute avocado or banana for some or all of the butter/oil for a fudgier texture and added nutrients.
And don’t forget about plant-based milk such as almond or soy milk if you’re opting for dairy-free options. Now that we’ve got everything we need, let’s get started on making these delicious treats! But first things first – preheat your oven and prepare your pan by greasing it with some cooking spray or lining it with parchment paper.
Preheat Your Oven and Prepare Your Pan
First, you’ll want to grab your trusty baking pan and lightly grease it with butter or cooking spray.
Then, preheat your oven to 350 degrees Fahrenheit so it’s ready to go when your batter is mixed and poured in. It’s important to preheat the oven because this ensures that your brownies will bake evenly and cook all the way through.
For alternative pan options, you can use a square or rectangular baking dish instead of a traditional round one. Just make sure that whichever pan you choose is deep enough to hold the batter as it rises while baking. Additionally, if you prefer thicker brownies, opt for a smaller pan size.
Once your pan is greased and the oven is preheated, it’s time to pour in the batter and let it bake!
But before we get there, let me share some tips for melting your chocolate and butter in the next section.
Melt Your Chocolate and Butter
To achieve a rich and indulgent flavor in your brownies, you’ll want to melt together the chocolate and butter until they become smooth and glossy. Start by chopping up your chocolate into small pieces and placing them in a heatproof bowl with the butter.
You can use any type of chocolate, but I recommend using dark chocolate for a more intense flavor. If you’re looking for alternative ingredients, vegan or dairy-free substitutes work just as well.
Next, place the bowl over a pot of simmering water (also known as a double boiler). Stir occasionally until the mixture is completely melted and smooth. Be careful not to let any water get into the bowl or else it will cause the chocolate to seize up and ruin your brownies.
If you don’t have a double boiler, you can also melt the chocolate and butter in short bursts in the microwave. Just be sure to stir every 30 seconds so that it doesn’t burn.
If you’re having trouble getting your mixture to melt smoothly, try adding a tablespoon of vegetable oil or cream to help loosen it up. Alternatively, if your mixture becomes too thick or grainy after melting, try adding an extra egg yolk before mixing in your dry ingredients.
Once everything is fully incorporated, set aside the melted mixture to cool slightly while you prepare your dry ingredients. Mix together your dry ingredients…
Mix Together Your Dry Ingredients
Now you’ll want to grab a large mixing bowl and add in your dry ingredients, which include flour, cocoa powder, baking powder, and salt. It’s important to sift the flour before adding it in order to prevent any lumps or clumps from forming in the brownie batter. This will ensure a smooth texture for your matcha brownies.
You can also experiment with different variations of dry ingredients based on personal preference. For example, substituting some of the all-purpose flour for almond flour can add a nutty flavor and make the brownies gluten-free. Adding in some chopped nuts or chocolate chips can also give an extra crunch to each bite.
Once you have added all of your dry ingredients into the mixing bowl, use a whisk or fork to thoroughly mix them together until there are no visible clumps. This ensures that each brownie will have an even distribution of flavors throughout. Now that your dry mixture is ready, it’s time to move onto beating your eggs and sugar until light and fluffy.
Beat Your Eggs and Sugar
You’ll want to get cracking on whisking together your eggs and sugar until they’re as light and fluffy as a cloud on a sunny day. This step is crucial in creating the perfect texture for your matcha brownies. To achieve the airy consistency, I recommend using an electric mixer or stand mixer.
Here are some variations on beating that you could try:
- Start at low speed for 30 seconds, then increase it to high speed for about 2-3 minutes until you see soft peaks forming.
- Beat the egg whites separately from the yolks for a few minutes before adding in the sugar and continuing to beat.
- Use powdered sugar instead of granulated sugar for a smoother mixture.
If you’re having trouble getting your eggs and sugar to reach that desired fluffiness, here are some troubleshooting tips:
- Make sure your eggs are at room temperature before beginning.
- Add in a pinch of cream of tartar while mixing to help stabilize the egg whites.
- If all else fails, don’t worry too much – just make sure everything is mixed thoroughly before moving onto the next step.
Now that your eggs and sugar are perfectly whipped, it’s time to combine them with your dry ingredients!
Combine Your Wet and Dry Ingredients
Once your eggs and sugar are fluffy, it’s time to mix them with the dry ingredients to create a smooth batter. Combining the wet and dry ingredients is a crucial step in making matcha brownies. It’s essential that you achieve an ideal consistency for your batter while avoiding overmixing.
When combining the wet and dry ingredients, start by sifting the flour and matcha powder together into a separate bowl. In another bowl, whisk together melted butter, milk, and vanilla extract until fully combined. Add this mixture to your beaten eggs and sugar slowly while stirring gently to avoid deflating the air bubbles that give your brownies their light texture.
The ideal consistency should be thick enough to hold its shape when scooped but still thin enough to spread out evenly in your baking pan. Overmixing can cause gluten formation, which results in tough brownies instead of soft and chewy ones.
Now that you have successfully combined your wet and dry ingredients without overmixing, it’s time to fold in your chocolate and butter mixture. This will add richness as well as depth of flavor to your matcha brownies.
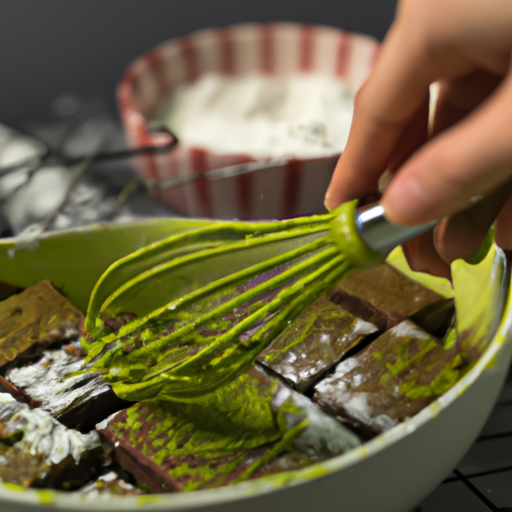
Fold in Your Chocolate and Butter Mixture
Adding the chocolate and butter mixture is where things get truly decadent, as the rich flavors meld with the earthy matcha for a taste sensation you won’t forget. To start, take your melted butter and chocolate and pour it into your bowl of dry ingredients. Gently fold everything together until all the flour is incorporated.
Next, add in any optional ingredients like chopped nuts or different types of chocolate substitutions. I personally love adding chopped walnuts for some added crunch and nuttiness to complement the smoothness of the chocolate. You can also try using dark chocolate chips or white chocolate chunks for a different flavor profile.
Make sure to gently fold in your additional ingredients so as not to overmix the batter. Overmixing can lead to tough brownies rather than soft, fudgy ones. The batter should be thick, but still pourable.
Once all your ingredients are fully combined, it’s time to pour the batter into your prepared pan and bake!
Pour the Batter into Your Prepared Pan
Now it’s time to get that batter into the pan and start baking, so don’t hesitate to indulge in a little chocolatey goodness – you won’t regret it!
Pour the batter into your prepared pan evenly, making sure that the mixture is spread out well. You can choose to use any size of pan depending on how thick or thin you want your brownies to be.
When it comes to brownie variations, there are endless possibilities. For instance, you can add toasted nuts or dried fruits for a crunchy texture or sprinkle some sea salt on top for a sweet and salty combo. You can also swirl in some raspberry jam or peanut butter for an extra burst of flavor. The options are limitless!
Before popping them into the oven, here are some baking tips: make sure not to overbake your matcha brownies as they tend to dry out quickly. Stick a toothpick in the center of the brownies after about 20-25 minutes of baking; if it comes out clean with no batter sticking to it, then they’re ready!
Let them cool down for at least 10-15 minutes before slicing and serving. And voila! Your delicious matcha brownies are now ready for indulgence.
Indulge yourself in these rich and fudgy matcha brownies by following my easy steps above. Bake your matcha brownies today and taste heaven right from your kitchen!
Bake Your Matcha Brownies
Get ready to savor the scrumptious aroma of freshly baked matcha brownies as they come out of the oven! Baking your matcha brownies is a crucial step in achieving that perfect texture. Here are some tips to ensure your brownies come out just right:
-
Check your oven temperature: Make sure your oven’s preheated to the correct temperature before you put your pan in. A too-hot or too-cold oven can affect how your brownies bake.
-
Use toothpick test: After about 25 minutes, start checking if your brownies are done by inserting a toothpick into the center. If it comes out clean, then it’s ready. If not, give it another few minutes.
-
Let them cool down: Once baked, let the matcha brownies rest and cool down on a wire rack for at least 10 minutes before slicing them. This will help prevent crumbling.
Want to add something extra? Try experimenting with different flavors! Here are some variations you can try:
-
Add nuts: Walnuts or almonds make great additions that bring an extra crunch to your matcha brownies.
-
Incorporate fruits: Dried cranberries or raspberries add sweetness and tartness that complements the earthy flavor of matcha.
-
Mix in chocolate chips: Because who doesn’t love more chocolate? Adding semi-sweet chocolate chips provides an indulgent contrast to the bitterness of matcha.
Now that you’ve baked and added variations to your matcha brownies, it’s time to serve and enjoy them with friends and family!
Serve and Enjoy!
It’s time to indulge in the deliciousness of your freshly baked matcha brownies and share them with loved ones! But before we dig in, let’s talk about creative presentation.
You can sprinkle some powdered sugar on top, or even drizzle melted white chocolate for a decadent touch. Another idea is to cut them into bite-sized pieces and place them on a platter with fresh fruit and whipped cream.
Flavor variations are also something to consider when serving your matcha brownies. For a more intense green tea flavor, you can add more matcha powder to the batter. If you’re feeling adventurous, try adding some chopped nuts or dried fruit for added texture and flavor. And if you want to make them extra indulgent, spread a layer of Nutella or peanut butter on top before baking.
No matter how you choose to present and serve your matcha brownies, one thing is certain – they will be a hit among family and friends! So go ahead and enjoy every bite of these rich and fudgy treats that perfectly combine the flavors of green tea and chocolate. Trust me, once you’ve tried these matcha brownies, they’ll become a regular addition to your dessert menu!
Frequently Asked Questions
Can I use regular green tea instead of matcha for this recipe?
Interestingly, green tea and matcha come from the same plant, but they have distinct differences in taste, texture, and health benefits. Matcha is made by grinding the entire tea leaf into a fine powder, resulting in a more concentrated flavor and higher levels of antioxidants compared to traditional steeped green tea.
While you could technically use regular green tea for a brownie recipe calling for matcha powder, it would not provide the same depth of flavor or nutritional value. In fact, one cup of matcha contains up to 137 times more antioxidants than a cup of brewed green tea!
So if you’re looking to reap the health benefits of matcha in your baked goods, I highly recommend sticking with the real deal.
Can I substitute coconut oil for butter in this recipe?
When it comes to baking, coconut oil can be a great substitute for butter. It’s a healthier option with its medium-chain fatty acids and anti-inflammatory properties, and it also adds a subtle flavor to baked goods. However, it’s important to note that coconut oil has a lower melting point than butter, so adjust accordingly in your recipe.
To make the switch from butter to coconut oil, use a 1:1 ratio and melt the coconut oil before incorporating it into your mixture. Keep in mind that baking with coconut oil might result in a denser texture due to its solid state at room temperature.
In terms of health benefits, Coconut oil vs butter: Which is healthier? The answer lies in moderation and balance – both have their pros and cons depending on the quantity used and individual dietary needs.
How long will the brownies last once baked?
When it comes to storing brownies, there are a few key tips to keep in mind. First and foremost, make sure they’re completely cooled before attempting to store them.
Once cooled, you can wrap them tightly in plastic wrap or aluminum foil and keep them at room temperature for up to 3 days. If you want to extend their shelf life, consider storing them in an airtight container in the refrigerator for up to a week.
Another option is to freeze them for longer-term storage; simply wrap individual portions in plastic wrap and then place them in a freezer-safe container or bag.
When stored properly, brownies should maintain their freshness and flavor for several days or even weeks depending on how they are stored. Keep an eye out for any signs of mold or spoilage as an indicator that they may have gone bad.
Can I add nuts or other mix-ins to the batter?
When it comes to making brownies, there are endless mix-in options that can really take your baking game to the next level. Personally, I love adding different variations on nuts to my brownie batter – walnuts and pecans being two of my favorites. But don’t stop at just nuts! Experiment with different types of chocolate chips or even mixing in some dried fruit for a fun twist.
When it comes to baking tips, one important factor is adjusting the oven temperature based on your preferred texture – lower for fudgier brownies and higher for cakey ones. And always remember to test for doneness by inserting a toothpick into the center before taking them out of the oven. Once they’re done, store them in an airtight container at room temperature or in the fridge if you prefer them chilled.
Is it necessary to sift the dry ingredients before mixing them together?
When it comes to baking, I’ve learned that sifting the dry ingredients is a crucial step in achieving the desired consistency.
By sifting flour, cocoa powder, and other dry ingredients before mixing them together, you’re able to remove any lumps or clumps that may have formed during storage. This ensures that your batter will be smooth and evenly mixed.
Additionally, sifting aerates the dry ingredients which can result in a lighter and fluffier final product.
In terms of baking brownies specifically, sifting can help prevent overmixing which can lead to tough brownies instead of fudgy ones.
So while it may seem like an extra step, taking the time to sift your dry ingredients can make all the difference in achieving perfect baking consistency.
Conclusion
Wow, making matcha brownies was a fun and flavorful experience! I loved how the rich chocolate and earthy matcha flavors complemented each other so well. Plus, the process was surprisingly easy to follow.
One interesting statistic that I came across during my research is that matcha has 137 times more antioxidants than regular green tea. This means that not only are these brownies delicious, but they’re also packed with health benefits!
To make your own batch of matcha brownies, all you need are some basic ingredients like flour, sugar, eggs, butter, and of course, matcha powder. The key is to mix everything in the right order and bake at the right temperature for the perfect texture.
Overall, I highly recommend giving this recipe a try for a unique twist on traditional brownies. Your taste buds (and body) will thank you!