I recall my initial experience sipping on yerba mate. Its robust, earthy taste and the burst of energy it provided immediately captivated me. It quickly became an essential part of my daily habits, leading me to ponder if it was possible to grow this incredible plant right in my backyard.
After extensive research and experimentation, I discovered that not only is it possible, but it’s also incredibly rewarding. In this article, I will guide you through the process of cultivating yerba mate, from selecting the perfect location to harvesting and processing the leaves.
We will delve into the intricacies of preparing the soil, choosing the right seeds, and troubleshooting common cultivation issues. By the end of this journey, you will have the knowledge and skills to grow your very own yerba mate, ensuring a fresh and sustainable supply of this remarkable beverage.
So grab your gardening tools and let’s get started on this exciting adventure together.
Key Takeaways
- Fermentation process enhances flavor and taste of yerba mate
- Proper storage in an airtight container, away from sunlight and moisture, maintains freshness and flavor
- Experimenting with flavors by adding herbs or fruits to the infusion creates unique flavor profiles and enhances the yerba mate experience
- Pest management, including regular inspection and the use of natural insecticides, is crucial for the health and productivity of yerba mate plants.
Introduction to Yerba Mate
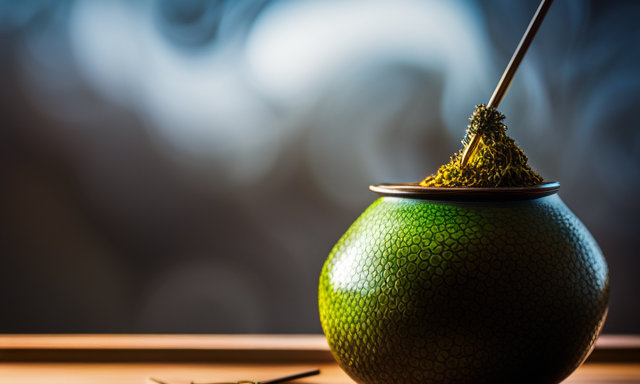
Welcome to the world of yerba mate! This traditional South American beverage has gained global popularity for its numerous health benefits. Packed with antioxidants, vitamins, and minerals, yerba mate can boost your immune system, improve digestion, and enhance mental focus. To prepare this invigorating drink, the dried leaves and stems of the yerba mate plant are traditionally steeped in hot water and consumed from a gourd through a metal straw called a bombilla. These preparation methods and rituals have been passed down through generations, ensuring an authentic and unique experience. Now, let’s move on to the next section and explore selecting the right location for cultivating yerba mate.
Selecting the Right Location for Cultivation
To successfully grow yerba mate, you’ll want to find a location that offers ample sunlight and protection from strong winds. Selecting the optimal climate is crucial for the plant’s growth and productivity.
Yerba mate thrives in regions with temperatures ranging from 68 to 86 degrees Fahrenheit, with a minimal chance of frost. It is also important to understand the soil composition before planting. Yerba mate prefers well-draining soil that is rich in organic matter. Sandy or loamy soils with a slightly acidic pH level of 6 to 6.5 are ideal.
Before moving on to preparing the soil for planting, it is essential to ensure that you have chosen the right location and have a clear understanding of the climate and soil requirements for yerba mate cultivation.
Preparing the Soil for Planting
Preparing the soil for planting is an important step in growing yerba mate. Here are some key techniques to consider:
-
Clear the area: Remove any weeds or debris from the planting site to create a clean slate.
-
Loosen and aerate the soil: This helps promote proper root growth by allowing air and water to penetrate the soil.
-
Add organic matter: Improve the soil’s fertility and drainage by incorporating compost or well-rotted manure.
-
Test the soil pH: Yerba mate plants prefer slightly acidic soil, so it’s important to check the pH and make any necessary adjustments.
Understanding the nutrient requirements of yerba mate plants is also crucial. By incorporating these soil preparation techniques and considering nutrient needs, you can set the foundation for successful cultivation. Once the soil is ready, the next step is choosing the right yerba mate seeds.
Choosing the Right Yerba Mate Seeds
Once you’ve prepared the soil, it’s crucial to select the perfect yerba mate seeds that will flourish in your chosen location.
Choosing the right seeds is essential for a successful yerba mate cultivation. Look for seeds that are fresh, healthy, and specifically suited for your climate and soil conditions. Consider factors such as temperature, humidity, and sunlight requirements.
Germinating yerba mate seeds can be a delicate process, but with proper care, you can increase your chances of success. Start by soaking the seeds in water for 24 hours to soften the outer shell. Then, place them in a seed tray filled with a well-draining soil mix, making sure to plant them at a shallow depth.
Keep the soil consistently moist and provide indirect sunlight. With the right seeds and proper germination techniques, you’ll be well on your way to planting and germinating yerba mate seeds successfully for a bountiful harvest.
Planting and Germinating Yerba Mate Seeds
When planting and germinating yerba mate seeds, you’ll need to carefully prepare the soil and select the perfect seeds for your location. Germinating yerba mate seeds can be a delicate process, but with the right techniques, you can ensure a successful growth. Start by soaking the seeds in water for 24 hours to soften their outer shell. Then, prepare a seedling tray with a well-draining soil mix. Plant the seeds about 1/4 inch deep and cover lightly with soil. Keep the soil consistently moist and place the tray in a warm, well-lit area. Germination typically takes around 2-4 weeks. Once the seedlings have grown to about 2-3 inches tall, they can be transplanted into individual pots or directly into the ground. Remember to handle the seedlings gently to avoid damaging their delicate roots. Transplanting yerba mate plants allows them to establish stronger root systems and thrive in their permanent location. With these germinating and transplanting methods, you’ll be well on your way to cultivating healthy yerba mate plants. In the next section, we’ll explore how to care for these plants and ensure their long-term growth.
Caring for Yerba Mate Plants
Now that we have successfully planted and germinated our yerba mate seeds, it’s time to shift our focus to caring for the young plants.
Caring for yerba mate plants requires a combination of attention and proper techniques.
One important aspect of caring for yerba mate is providing adequate water and ensuring that the soil remains moist but not waterlogged. Regularly monitoring the moisture levels and adjusting watering accordingly is crucial.
Additionally, it is important to protect the plants from pests and diseases. Implementing effective pest control measures such as using organic pesticides or companion planting can help prevent damage. Regularly inspecting the plants for any signs of pests or diseases is essential for early detection and intervention.
By employing these caring techniques and maintaining a healthy environment, we can ensure the successful growth of our yerba mate plants.
Next, we will explore the process of harvesting yerba mate leaves.
Harvesting Yerba Mate Leaves
To ensure a bountiful yield of your precious tea leaves, get ready to embark on a leaf-plucking adventure that will leave your plants feeling lighter and you feeling like a master harvester. Harvesting yerba mate leaves requires careful techniques and optimal timing. You want to pick the leaves when they are at their peak flavor and aroma, which is usually when they are young and vibrant. Avoid harvesting during rainy or humid days, as the leaves may become too moist and prone to spoilage. Instead, choose a dry and sunny day to ensure the best quality leaves. When plucking the leaves, it is important to use a gentle and precise hand, picking only the mature leaves and leaving the younger ones to continue growing. With proper harvesting techniques, you can ensure the highest quality yerba mate. Now, let’s move on to the next step: drying and processing yerba mate.
Drying and Processing Yerba Mate
After the leaves have been harvested, the next step is to dry and process them to create the perfect yerba mate tea. The drying process is crucial as it helps to preserve the flavor and aroma of the leaves.
There are various processing techniques that can be used, but the most common one is air drying. The leaves are spread out in a thin layer and exposed to the air until they become brittle. This can take up to several weeks, depending on the weather conditions.
Once the leaves are dry, they are ready for the next step, which is fermentation. Fermentation is done by placing the leaves in airtight containers and allowing them to ferment for a certain period of time. This process enhances the flavor and gives the yerba mate its distinctive taste.
After fermentation, the leaves can be stored and enjoyed, allowing you to savor the fruits of your labor.
Storing and Enjoying Your Homegrown Yerba Mate
Once your homegrown yerba mate is properly stored, you can savor the fruits of your labor and experience the taste of pure satisfaction. Storing your yerba mate properly is crucial to maintain its freshness and flavor.
To start, make sure to store your yerba mate in an airtight container, away from direct sunlight and moisture. This will help preserve its aroma and prevent it from losing its flavor. Additionally, it is recommended to store your yerba mate in a cool, dark place, such as a pantry or cupboard. This will further enhance its longevity and maintain its quality.
When it comes to enjoying your homegrown yerba mate, you can experiment with different flavor profiles by adding herbs or fruits to your infusion. This will create unique and delightful combinations that will elevate your yerba mate experience.
As we move on to troubleshooting common cultivation issues, it’s important to be aware of potential challenges in order to address them effectively.
Troubleshooting Common Cultivation Issues
Now, let’s delve into some common issues that may arise when growing your own yerba mate and how to troubleshoot them effectively. Pest management is crucial in ensuring the health and productivity of your yerba mate plants. Some common pests that may attack your plants include aphids, spider mites, and mealybugs. To combat these pests, you can use natural insecticides like neem oil or insecticidal soap. Regularly inspecting your plants for any signs of infestation and taking prompt action can help prevent the spread of pests and minimize damage. Another important aspect of cultivation is irrigation techniques. Yerba mate plants require consistent moisture, but overwatering can lead to root rot. It’s essential to find the right balance and provide adequate water without drowning the plants. Monitoring the soil moisture levels and adjusting your watering schedule accordingly is key to successful cultivation.
Frequently Asked Questions
How long does it take for yerba mate seeds to germinate?
Yerba mate seeds typically take around 10 to 20 days to germinate. The germination process can be affected by factors such as temperature, moisture, and light exposure.
Can I grow yerba mate indoors?
Yes, you can grow yerba mate indoors. Indoor growing techniques, like providing the right amount of sunlight and humidity, can help you successfully cultivate this beneficial herb at home.
What is the ideal temperature for growing yerba mate?
The ideal temperature range for growing yerba mate is between 70-80 degrees Fahrenheit. This provides the best growing conditions for the plant, allowing it to thrive and produce high-quality leaves.
How often should I water my yerba mate plants?
Water yerba mate plants every 3-4 days, allowing the top inch of soil to dry between waterings. Overwatering leads to root rot, so watch for droopy leaves and yellowing. Remember: "Too much of a good thing can be harmful!"
Can I use regular potting soil to grow yerba mate?
Yes, regular potting soil can be used for growing yerba mate. It provides the necessary nutrients and drainage for optimal growth. Growing yerba mate indoors has benefits such as control over temperature and protection from harsh weather conditions.
Conclusion
In conclusion, cultivating yerba mate has been a rewarding and fulfilling experience for me. I have learned the importance of selecting the right location, preparing the soil, and choosing the right seeds for successful growth.
Throughout the process of planting, germinating, and harvesting yerba mate leaves, I have witnessed the dedication and patience required for a bountiful yield.
One interesting statistic to note is that yerba mate is the national drink of Argentina, where it is consumed by over 90% of the population.
With proper drying, processing, and storage techniques, I can now enjoy my homegrown yerba mate and savor its rich flavor and numerous health benefits.
Cultivating yerba mate has truly been a labor of love, and I encourage others to embark on this journey of growing their own traditional tea.