
Setting up your new Keurig K-Mini is straightforward, but doing it correctly will ensure optimal performance and safety. This guide provides easy-to-follow steps to get your machine ready for brewing, along with helpful tips and safety warnings.
Whether you’re a first-time Keurig user or just want a quick refresher, these instructions will help you enjoy your coffee experience without hassle.
Key Takeaways
| Compact Design | Fits small spaces with less than 5 inches width. |
| Easy to Use | Simple setup and quick brewing with minimal steps. |
| Custom Brew Sizes | Adjust between 6-12oz for personalized servings. |
| Maintenance Needed | Regular descaling and cleaning ensure best flavor. |

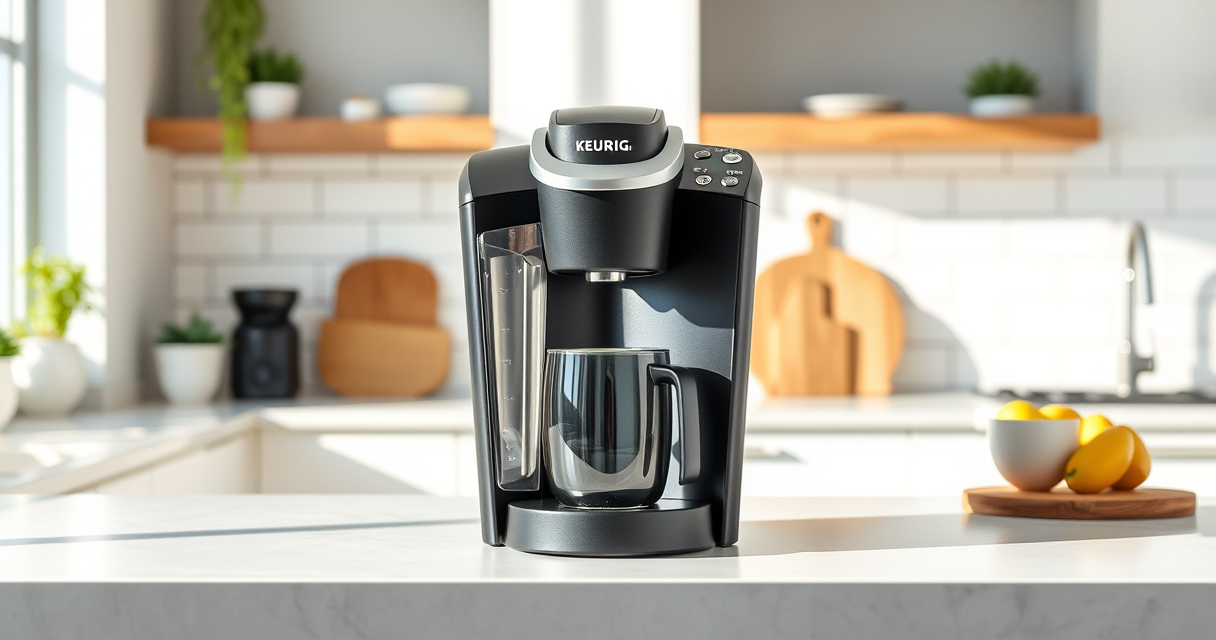
Keurig K-Mini Single Serve K-Cup Pod Coffee Maker, 6 to 12oz Brew size, with Cord Storage, Perfect for Small Spaces, Black
- Compact Design: Fits small spaces under 5 inches wide
- Adjustable Brew Size: Brew 6-12oz cups with Keurig pods
- Removable Water Reservoir: Add fresh water for each brew
As an affiliate, we earn on qualifying purchases.
Unboxing and Initial Setup
- Remove the Keurig K-Mini from its packaging and place it on a flat, stable surface.
- Ensure all packaging materials are removed from the machine and the drip tray is properly attached.
- Fill the water reservoir with fresh, clean water using a jug or cup.
Powering On and Priming the Machine
- Plug the power cord into an electrical outlet.
- Press the power button; the machine will turn on and warm up, indicated by the lights.
- Run a rinse cycle without a K-Cup to prime the system: place a mug on the tray, select the largest brew size (12oz), and press brew. Discard the water afterward.
Brewing Your First Coffee
- Lift the brew handle and insert a K-Cup pod of your choice.
- Lower the handle to puncture the pod and secure it.
- Select your desired brew size (6-12oz).
- Press the brew button and wait for the coffee to dispense into your mug.
Cleaning and Maintenance
- Regularly descale the machine every 3-6 months using a descaling solution, especially if you notice slower brewing or strange taste.
- Remove and wash the drip tray and water reservoir with soap and water.
- Use the rinse feature periodically to clear out flavor residues.
Troubleshooting Common Issues
- If the machine doesn’t turn on, check the power connection and outlet.
- If water isn’t dispensing, clean the needle area and descale the machine.
- If the machine leaks or leaks from the bottom, ensure the drip tray is properly positioned and the water reservoir isn’t overfilled.
The Products in This Guide

Keurig K-Mini Single Serve K-Cup Pod Coffee Maker
- ✔ Mug Size: Up to 7 inches tall
- ✔ Cord Storage: Yes
- ✔ Auto Off: Yes

My K-Cup® Reusable Coffee Filter
- ✔ Filter Type: Reusable
- ✔ Brew Method: Ground coffee
- ✔ Dishwasher Safe: Yes
Keurig K-Mini Single Serve K-Cup Pod Coffee Maker
The Keurig K-Mini Single Serve K-Cup Pod Coffee Maker is perfect for small spaces and quick brewing. Its simple setup and minimal maintenance make it a convenient choice for coffee lovers on the go.
Pros:
- Fits anywhere
- Fast brewing
- Removable drip tray
- Energy efficient
Cons:
- Limited to K-Cup pods
- No built-in water filter
- No temperature control
Best for: Small apartments, offices, dorm rooms
Not ideal for: Large households needing multiple cups at once
Bottom line: A compact and efficient coffee maker ideal for small spaces.
My K-Cup® Reusable Coffee Filter
The My K-Cup® Reusable Coffee Filter allows you to brew your favorite ground coffee with the Keurig K-Mini, offering more variety and cost savings.
Pros:
- Use your own coffee
- Eco-friendly
- Cost-effective
- Easy to clean
Cons:
- Requires ground coffee
- May need more cleaning
- Less convenient than pods
Best for: Coffee enthusiasts seeking customization
Not ideal for: Those preferring quick pod-based brewing
Bottom line: An eco-friendly upgrade for ground coffee fans.
Frequently Asked Questions
Can I use any K-Cup pods with the Keurig K-Mini?
Yes, the K-Mini is compatible with all standard K-Cup pods. Just insert your preferred flavor and brew.
How often should I descale my Keurig K-Mini?
It’s recommended to descale every 3-6 months, especially if you notice slower brewing or strange taste.
Can I brew large travel mugs with the K-Mini?
The removable drip tray accommodates travel mugs up to 7 inches tall, but larger mugs may not fit comfortably.
Is the water reservoir removable?
Yes, the water reservoir is removable for easy filling and cleaning.
Start Your Perfect Coffee Routine Today
Setting up your Keurig K-Mini is simple and quick, ensuring you can enjoy fresh coffee in minutes. Regular maintenance like descaling will keep your machine functioning smoothly and tasting great. Enjoy your brewing experience and customize your drinks to suit your taste!
Affiliate disclosure: As an Amazon Associate we earn from qualifying purchases. Prices and availability are accurate as of the time of publishing.