As the proverb states, “a good cup of tea is unparalleled.” For me, this refers to a piping hot cup of yerba mate. This beverage from South America has become an essential part of my daily routine for many years, and the thought of beginning my day without it is unimaginable.
If you’re new to yerba mate or looking to perfect your brewing technique, I’m here to share my tips and tricks for making the perfect cup.
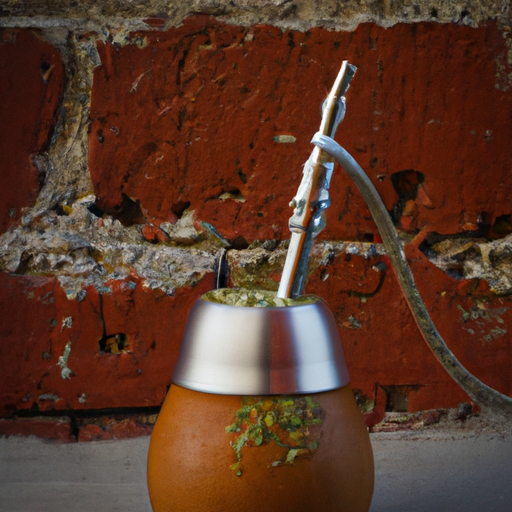
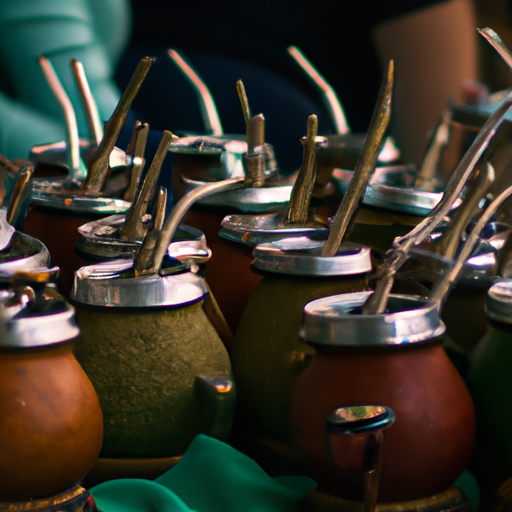
First things first, let’s gather our supplies. You’ll need a gourd or cup specifically designed for yerba mate, loose leaf yerba mate leaves, hot water (not boiling), and a bombilla (a metal straw with a filter at the end). Don’t worry if you don’t have all these items on hand – we’ll cover how to prepare each one in detail.
So grab your mug and let’s get started!
Key Takeaways
- Choosing high-quality yerba mate leaves is crucial for a satisfying and flavorful drinking experience.
- Proper preparation involves seasoning and polishing the gourd/cup, filling with 2/3 yerba mate leaves, and waiting 30 seconds before inserting the bombilla.
- Yerba mate offers numerous health benefits such as boosting energy, improving mental focus, and being high in antioxidants and nutrients.
- Customizing yerba mate tea with sweeteners, milk alternatives, and herbs/spices can enhance flavor and offer additional health benefits.
Gather Your Supplies
When it comes to making yerba mate tea, I always start by gathering my supplies.
First, I select a gourd or cup that suits my preference.
Then, I choose a bombilla that’s comfortable and functional for me to use.
Lastly, I make sure to buy quality yerba mate leaves that’ll provide the rich and flavorful taste I crave in each sip.
With these essential items in hand, I’m ready to brew the perfect cup of yerba mate tea every time!
Choosing a Gourd or Cup
To get the best taste and experience, it’s important to select a gourd or cup that suits your personal preferences.
When it comes to choosing a vessel for yerba mate tea, you have two options: decorative gourds or traditional gourds. Decorative gourds are often colorful and adorned with intricate designs, making them more aesthetically pleasing but less practical for daily use.
Traditional gourds, on the other hand, are made from natural materials and have a simple design that allows for better flavor extraction. Another option is to choose a cup specifically designed for yerba mate.
These cups typically have a wider opening than traditional gourds, allowing for easier filling and cleaning. Additionally, many cups come with built-in filters that eliminate the need for a separate bombilla.
However, if you prefer the traditional method of drinking yerba mate through a bombilla inserted into a gourd or cup, be sure to choose one that fits securely in your chosen vessel. When selecting your vessel of choice, consider factors such as material (such as ceramic or stainless steel), size (for individual use or sharing with others), and personal style preferences.
Once you have chosen your perfect cup or gourd, it’s time to move on to selecting the perfect bombilla to complete your yerba mate experience.
Selecting a Bombilla
Now that you have chosen your perfect vessel for enjoying yerba mate, let’s talk about how to pick the bombilla that will make all the difference in your drinking experience. The bombilla is a metal straw with a filter at one end that allows you to drink from the gourd without getting clogged with leaves. There are different types of bombillas available, so it’s important to choose one that suits your preferences.
To help you decide which type of bombilla is best for you, here’s a table outlining their characteristics:
| Type | Description | Pros |
|---|---|---|
| Spoon Bombilla | Has a spoon-like filter | Easy to clean |
| Filtered Bombilla | Has tiny holes in the filter | Prevents small particles from entering your mouth |
| Spring Bombilla | Has a spring inside the tube | Prevents blockages and improves water flow |
Once you have selected your preferred type of bombilla, it’s essential to take proper care of it to ensure its longevity. After each use, rinse it with warm water and allow it to dry thoroughly before storing it away. Avoid using harsh detergents or scrubbing too hard as this can damage the delicate filter. With proper care, your bombilla can last for years and provide endless enjoyment when drinking yerba mate.
Now that we’ve covered how to select the right bombilla for you and how to properly care for it, let’s move onto buying quality yerba mate leaves.
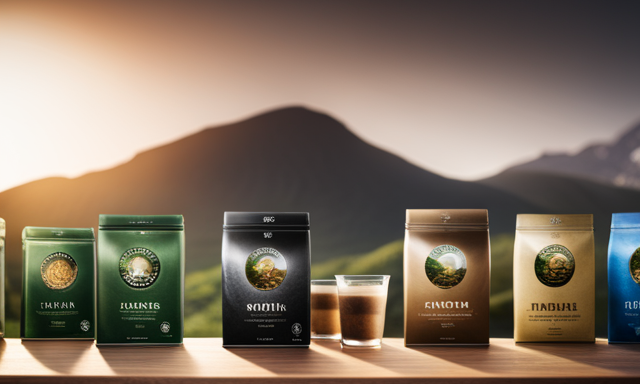
Buying Quality Yerba Mate Leaves
Choosing high-quality yerba mate leaves is crucial for a satisfying and flavorful drinking experience. When it comes to buying yerba mate, there are several things to consider.
Firstly, it’s important to ensure that the leaves are fresh and have been stored properly. This means that they should be kept in a cool, dry place away from direct sunlight.
Another factor to consider when buying quality yerba mate leaves is where they come from. Look for brands that source their leaves from reputable growers and producers in South America.
You can also identify quality by checking the color and texture of the leaves; they should be vibrant green with a fine, powdery texture.
Now that you’ve got your hands on some high-quality yerba mate leaves, it’s time to prepare the gourd or cup.
Preparing the Gourd or Cup
First things first, you gotta prep your gourd or cup for the perfect yerba mate experience. My personal favorite method is using a traditional gourd made from a natural squash or calabash fruit. Before using it for the first time, I like to use a polishing technique where I rub the inside with wet sandpaper until it’s smooth and shiny. This helps prevent any bitterness from seeping into the tea.
Next, I season the gourd by filling it with yerba mate and hot water, letting it sit for 24 hours. This allows the gourd to absorb some of the flavors from the tea and creates a protective layer that can help prolong its lifespan. After seasoning, I empty out any remaining leaves and rinse it thoroughly before each use.
When preparing my gourd for yerba mate, I fill it about two-thirds full with loose leaves and cover the opening with my hand while turning it upside down to distribute them evenly. Then, I add cold water to moisten the leaves before pouring in hot water (around 160-180 degrees Fahrenheit) up to just below rim level. Finally, I insert my bombilla (metal straw) into one corner of the gourd and sip away!
Now that your gourd is prepped and ready to go, let’s move on to preparing those quality yerba mate leaves we talked about earlier!
Preparing the Yerba Mate Leaves
After your gourd is polished and seasoned, it’s time to prepare the yerba mate leaves by gently shaking them to remove any dust or debris. Using fresh or dried leaves depends on personal preference, but I find that the fresher the leaves, the better the taste. If using dried leaves, make sure they’re not stale or expired.
Once you have your desired amount of yerba mate leaves, place them in the gourd. The traditional method is to fill about 2/3 of the gourd with yerba mate leaves, but this can be adjusted based on taste preferences. To ensure a rich and flavorful tea, pack the leaves tightly toward one side of the gourd.
Now that your yerba mate leaves are ready in your gourd or cup, it’s time to add hot water. But before we move onto that step, let’s talk about different steeping techniques for yerba mate tea to get the most out of each sip.
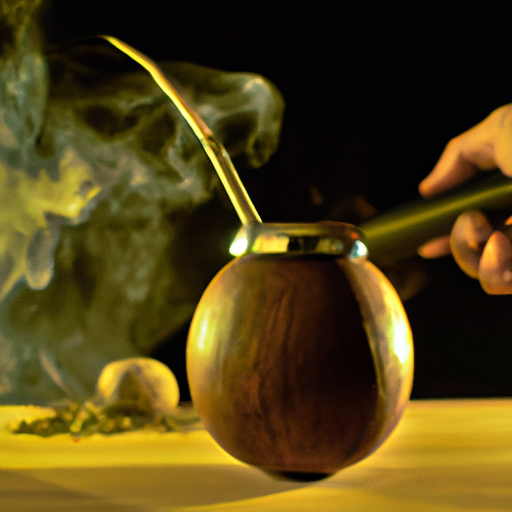
Adding Hot Water
Now that the yerba mate leaves are in your gourd, it’s time to pour hot water and experience the ultimate infusion of flavor and comfort. The temperature of the water is crucial for making a perfect cup of yerba mate tea. Boiling water can damage the delicate flavors and nutrients in the leaves, so it’s better to use water at around 160-180°F (70-80°C).
You can either heat up the water on a stove or use an electric kettle with temperature control settings. Once you have heated up your water to the desired temperature, pour it into your gourd until it reaches about two-thirds full. It’s essential not to overfill it as this will affect how well the yerba mate brews.
After pouring in hot water, wait for about 30 seconds before inserting a bombilla (a metal straw with a filter on one end) into your gourd. This break allows for proper steeping times for yerba mate tea. Experimenting with different types of water is another way you can customize your cup of yerba mate tea.
Some people prefer using filtered or springwater instead of tap water because they believe this enhances its taste. Others try adding cold or warm milk to create creamier versions of their favorite brews. Whatever you choose, be sure to take note of what works best for you so that you can replicate it later.
After adding hot water and experimenting with different types of liquids, we’re ready to move on to our next step: enjoying our delicious cuppa! With our bombilla inserted firmly into our gourd and our beverage brewed perfectly, we’re now ready to savor each sip while basking in its warmth and comfort.
So let’s lift up that gourd and get drinking!
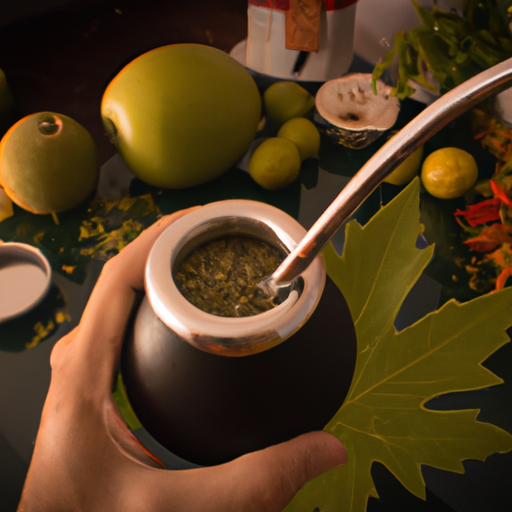
Drinking Yerba Mate
Did you know that drinking yerba mate can provide numerous health benefits, such as boosting energy and improving mental focus? It’s no wonder this South American drink has gained popularity around the world.
Not only does it have a unique flavor, but it also contains high levels of antioxidants and other nutrients. There are different ways to prepare yerba mate, depending on your preferences. Some people like to drink it hot, while others prefer it cold. You can also add sweeteners or milk to customize the taste.
Regardless of how you choose to prepare it, drinking yerba mate can offer several benefits for your health. In addition to its antioxidant properties, yerba mate is also known to promote weight loss and support a healthy immune system. Its caffeine content can help enhance cognitive function and reduce fatigue.
So why not give this delicious beverage a try? Now that we’ve explored the benefits of drinking yerba mate, let’s move on to customizing your own cup!
Customizing Your Yerba Mate
I absolutely love my yerba mate, but sometimes I like to mix things up and customize it to my liking. One way I do this is by adding sweeteners or milk. Whether I use honey, agave syrup, or almond milk, these additions bring a unique flavor and richness to my drink that make it even more enjoyable.
Another way I customize my yerba mate is by mixing in other herbs or spices, such as mint leaves or cinnamon sticks. This not only adds additional health benefits but also gives me new flavors to experience with every sip.
Adding Sweeteners or Milk
You can enhance the flavor of your yerba mate tea by adding a splash of milk or a touch of honey. Here are some sweetener and milk alternatives that you can use to customize your drink:
-
Sweetener options: You can add sugar, honey, stevia, or agave nectar to your yerba mate tea for a touch of sweetness. Each sweetener has its own unique flavor profile and health benefits, so choose the one that suits your taste buds and dietary preferences.
-
Milk alternatives: If you prefer a creamier texture in your yerba mate tea, try adding almond milk, soy milk, coconut milk, or oat milk. These plant-based milks are lactose-free and offer a variety of flavors and nutrient profiles.
Adding sweeteners or milk to your yerba mate tea is a matter of personal preference. Some people enjoy their tea plain while others like to experiment with different combinations. Whichever option you choose, make sure to stir well before drinking for an even distribution of flavors.
As you explore the world of yerba mate tea customization, consider mixing it with other herbs or spices for added health benefits and aroma.
Mixing with Other Herbs or Spices
To add depth and complexity to your yerba mate tea, try mixing in some aromatic herbs or spices. Some great herb pairings with yerba mate include mint, cinnamon, ginger, cardamom, and lavender. These ingredients not only enhance the flavor of your tea but also offer a range of health benefits.
For instance, adding mint to your yerba mate tea can help aid digestion while providing a refreshing taste. Cinnamon adds sweetness and warmth to the drink while helping regulate blood sugar levels. Ginger adds a spicy kick and is known for its anti-inflammatory properties. Experiment with different yerba mate recipes by combining these ingredients until you find the perfect blend that suits your taste buds.
Now that you’ve brewed your customized yerba mate tea, it’s time to clean up your equipment to ensure that it stays in good condition for future use.
Cleaning Your Equipment
After brewing your yerba mate tea, it’s important to clean your equipment thoroughly. Effective cleaning techniques will ensure that your gourd and bombilla are free of any residue or mold that can affect the taste and health benefits of your next cup. Additionally, regular cleaning will help extend the lifespan of your equipment.
To clean your gourd, start by emptying any remaining leaves and rinsing it with warm water. Then, use a soft sponge or cloth to gently scrub the inside of the gourd with baking soda or white vinegar. Rinse again with warm water and let it air dry upside down.
For the bombilla, remove any remaining leaves and soak it in a solution of hot water and baking soda for at least 10 minutes. Then, use a small brush or pipe cleaner to remove any residue from inside the stem. Rinse thoroughly with warm water and let it air dry.
Cleaning your equipment may seem like an extra step after enjoying a delicious cup of yerba mate tea, but the benefits of regular cleaning cannot be overstated. Not only does it ensure that you’re getting all the health benefits without any unwanted mold or bacteria, but it also helps keep your equipment in good condition for years to come. Speaking of which, once you’ve cleaned everything up nicely, you’ll want to think about how best to store your yerba mate until next time…
Storing Your Yerba Mate
Proper storage of your yerba mate ensures that you can enjoy its full flavor and health benefits for a longer period of time. Here are some storing instructions to help you preserve the quality of your yerba mate:
-
Keep it in an airtight container: Exposure to air can cause your yerba mate to lose its freshness and flavor. Therefore, it’s essential to store it in an airtight container to prevent air from getting inside.
-
Store it away from light: Yerba mate should be stored in a cool, dark place as sunlight can cause oxidation, which affects the taste and aroma of the tea.
-
Avoid moisture: Moisture is another enemy of yerba mate. Make sure that the container you use for storage is dry and keep it away from any source of moisture such as sinks or humidifiers.
-
Don’t mix old and new batches: Mixing old and new batches of yerba mate can affect the taste and quality of each. It’s best to finish one batch before opening another.
By following these preservation tips, you can ensure that your yerba mate stays fresh for up to six months or more. So, next time you buy a bag of yerba mate, keep these instructions in mind before storing it away!
Frequently Asked Questions
How long does yerba mate tea last once it has been brewed?
I remember the first time I brewed yerba mate tea and stored it in my fridge overnight. The next morning, I took a sip and was hit with an unpleasant stale taste. That experience taught me the importance of understanding the brewed yerba mate shelf life and proper ways of storing yerba mate tea.
Once you’ve brewed your yerba mate, it’s important to drink it within 24 hours for optimal flavor. If you need to store it for longer, make sure to transfer it into an airtight container and keep it refrigerated.
Yerba mate tea can last up to 48 hours in the fridge, but anything beyond that will result in a loss of flavor and quality. So brew your yerba mate mindfully, and enjoy it fresh!
Can I reuse the yerba mate leaves for multiple cups of tea?
Yes, you can reuse yerba mate leaves for multiple cups of tea! Not only is this an economical choice, but it’s also a sustainable one.
Yerba mate is a versatile drink that can be enjoyed in many different ways. The benefits of yerba mate tea are numerous; it’s packed with antioxidants, vitamins, and minerals that provide energy and improve mental clarity.
To reuse the yerba mate leaves, simply add fresh hot water to the existing leaves and let them steep for a few minutes longer than usual. You may notice a slightly weaker flavor with each subsequent brew, but the health benefits remain intact.
Experiment with different brewing methods to find your perfect cup of yerba mate tea – whether it’s traditional style in a gourd or French press style with added ingredients like mint or lemon – there are endless possibilities to enjoy this delicious beverage!
Is it safe to drink yerba mate tea while pregnant or nursing?
Yerba Mate Tea and Pregnancy: Safe or Risky?
Yerba Mate Tea and Breastfeeding: What You Need to Know.
As someone who’s pregnant or breastfeeding, you may be wondering if it’s safe to drink yerba mate tea. While there are some potential risks associated with consuming this type of tea during pregnancy or lactation, the evidence isn’t conclusive.
Some studies suggest that drinking yerba mate tea in large amounts may increase the risk of certain health problems, such as preterm labor and low birth weight. However, other research suggests that moderate consumption of yerba mate tea is safe for most people.
If you’re considering drinking yerba mate tea while pregnant or breastfeeding, it’s important to talk to your healthcare provider first to determine what’s best for you and your baby.
Can I add milk or sugar to yerba mate tea?
I love adding a splash of milk and honey to my yerba mate tea for a cozy afternoon treat. However, it’s worth noting that some studies have found that adding milk may decrease the absorption of certain health-promoting compounds in yerba mate. On the other hand, using honey or another natural sweetener can enhance the flavor without compromising the benefits.
It’s all about finding what works best for you! If you’re looking to explore traditional flavor pairings, consider adding citrus or mint for a refreshing twist. Ultimately, whether or not to add milk or sugar is a personal preference that depends on your taste buds and desired nutritional benefits.
Does the temperature of the water affect the taste of yerba mate tea?
Water temperature plays a crucial role in the taste and quality of yerba mate tea. Brewing time is also important, but if the water is too hot it can make the tea taste bitter and unpleasant. Personally, I find that using water that’s around 158-176°F (70-80°C) produces the best flavor. This temperature allows for enough heat to extract the flavors from the leaves without scorching them or ruining their delicate taste.
In terms of brewing time, I usually let my tea steep for about five minutes before enjoying it. However, this can vary depending on personal preference as well as how strong or weak you like your tea.
Overall, paying attention to the temperature of your water when making yerba mate tea can greatly enhance your drinking experience and ensure a delicious cup every time.
Conclusion
In conclusion, making yerba mate tea is a simple yet incredibly satisfying process. Every step is crucial to brewing the perfect cup of yerba mate tea, from gathering your supplies to cleaning and storing your equipment. But the most important part? Enjoying it!
So why not give it a try? With just a few steps, you can experience the rich flavor and energizing benefits of this traditional South American drink. And who knows, maybe you’ll even find yourself customizing it to suit your own tastes.
So go ahead and grab your gourd or cup, prepare those leaves, add some hot water, sit back and sip away. Trust me, once you’ve tried yerba mate tea for yourself, you won’t be able to resist its unique charm.
Ready to brew up some magic?