
As the saying goes, “when in Rome, behave as the Romans do.”
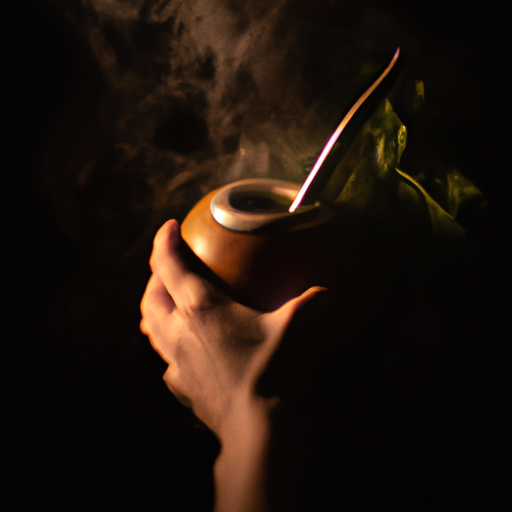
And when it comes to drinking yerba mate, there’s no better way to embrace the South American culture than by sipping on this traditional drink from a gourd.
As a lover of all things herbal and aromatic, I’ve spent years perfecting my technique for making yerba mate in a gourd – and now I’m excited to share it with you.
For those unfamiliar with yerba mate, it’s a tea-like beverage made from the leaves of the South American holly tree. But unlike regular tea, yerba mate is known for its ability to energize and invigorate both body and mind.
It’s also steeped in tradition and ritual – which is why learning how to make it correctly is so important.
So let me guide you through each step of the process, from selecting the right gourd all the way through cleaning and maintaining your equipment.
Key Takeaways
- Choosing the right yerba mate involves considering type, quality, and flavor.
- Bombilla is a crucial part of brewing in a gourd, and selecting the right one involves material, length, and filter size.
- Water temperature and timing are crucial for optimal brewing, and small sips and avoiding stirring the straw are recommended for drinking.
- Drinking yerba mate is not just about satisfying thirst but also about connecting with others and enjoying a social experience.
Choosing the Right Gourd
When you’re looking for the perfect gourd, you’ll want to keep in mind both the size and shape that will suit your personal preferences and enhance your yerba mate experience.
There are many different shapes of gourds available on the market, from traditional round ones to more modern elongated shapes. Some people even prefer a gourd with a unique design or decoration that represents their personality or culture.
If you’re new to drinking yerba mate, it’s best to start with a smaller gourd as it’ll be easier to manage and drink from. However, if you’re an experienced yerba mate drinker, then a larger gourd may be more suitable for you as it allows for more yerba leaves and water.
Keep in mind that the shape of the gourd can also affect how well the yerba infuses with hot water.
Once you’ve chosen your ideal gourd, it’s time to prepare it for use by removing any dirt or debris inside. This can be done by filling the empty gourd with hot water and letting it sit for several hours or overnight.
Afterward, rinse out the water and let it air dry before adding in your yerba leaves.
Now that we have our perfect gourd ready, let’s move onto preparing our yerba mate!
Preparing the Gourd
Now that I’ve chosen the right gourd for my yerba mate, it’s time to prepare it properly.
The first step is curing the gourd. This involves filling it with hot water and letting it sit overnight to remove any impurities and improve its ability to retain heat.
Next, I must clean the gourd thoroughly before using it to avoid any unpleasant taste or aroma from previous use.
By taking these steps, I can ensure a smooth and delicious yerba mate experience every time.
Curing the Gourd
First, it’s important to understand that curing the gourd is a crucial step in preparing it for yerba mate. The curing process is necessary to remove the natural bitterness and flavor of the gourd, which can affect the taste of your yerba mate. Additionally, it helps to strengthen and harden the walls of the gourd, making it more durable and long-lasting.
To cure your gourd, you’ll need to follow a few simple steps. First, rinse the inside of the gourd with hot water and let it dry completely. Then, fill it with used yerba mate leaves and add hot water until it reaches just below the rim. Let this mixture sit for 24 hours before discarding the liquid and rinsing out any remaining debris. Repeat this process two or three times over a period of about a week until your gourd is fully cured.
Now that your gourd has been properly cured, it’s time to move on to cleaning it before preparing your first cup of yerba mate.
Cleaning the Gourd
To ensure the longevity and cleanliness of your beloved drinking vessel, it’s crucial to properly maintain the gourd by regularly cleaning it.
After each use, I recommend removing any remaining yerba mate leaves by gently scraping them out with a spoon or bombilla. Then, rinse the gourd thoroughly with hot water and use a soft sponge or cloth to wipe away any leftover residue.
For deep cleaning, there are different techniques you can try depending on the level of buildup in your gourd. One method is to soak the gourd in warm water mixed with baking soda for about 30 minutes before scrubbing it with a brush and rinsing thoroughly. Another technique is to fill the gourd with hot water and add some coarse salt, then let it sit for several hours before shaking and rinsing out the salt.
Benefits of clean gourds not only include better taste but also prevent bacteria growth that can harm one’s health.
Now that we’ve covered how to keep your gourd in top condition, let’s move on to selecting the right yerba mate for your taste preferences.
Selecting the Right Yerba Mate
When it comes to selecting the right yerba mate, there are a few key points to consider. First, you’ll want to think about the type of yerba mate you prefer – whether it’s traditional, flavored or blended with other herbs.
Next, pay attention to the quality of the yerba mate – look for leaves that are bright green and have a strong aroma. Finally, don’t forget about flavor – different brands and types of yerba mate can have distinct tastes and strengths that may appeal more or less to your personal preferences.
As a passionate yerba mate drinker myself, I always take these factors into account when choosing my next batch of leaves!
Types of Yerba Mate
You may want to try out different types of yerba mate to find your favorite flavor. For example, the robust and smoky Argentine yerba mate or the fruity and floral Brazilian yerba mate. A friend of mine tried the Brazilian yerba mate and described it as a tropical paradise in a cup, with hints of mango and jasmine.
Here are four types of yerba mate that you may come across:
-
Traditional: This type is made from dried leaves that haven’t been flavored with any other herbs or fruits. It has a strong, earthy taste that some people may find bitter.
-
Flavored: Yerba mate can also be mixed with other herbs or fruits to add flavor. Some popular flavors include mint, lemon, and orange.
-
Health benefits: Yerba mate is rich in antioxidants, vitamins, and minerals that offer numerous health benefits, such as improved digestion, boosted immunity, and reduced inflammation.
-
Caffeine content: Yerba mate contains caffeine but at lower levels than coffee or tea. It provides a gentle energy boost without causing jitters or crashes.
As you explore the different types of yerba mate available, you will notice varying degrees of quality and flavor depending on where they are grown and how they are processed.
Quality and Flavor
Get ready to experience a burst of flavor and quality that’ll leave your taste buds singing with joy. You’ll savor the unique and intricate notes of yerba mate from different regions. The key to achieving a rich and flavorful cup of yerba mate lies in the quality of the leaves used, as well as the brewing techniques employed.
Yerba mate is typically available in three variations: suave (smooth), con palo (with stems), and despalada (stemless). Each variation boasts its own distinct blend of flavors, ranging from earthy and herbal to sweet and nutty.
To achieve a perfect infusion of flavor, it’s important to use high-quality yerba mate leaves that are fresh and aromatic. The brewing technique also plays an important role in bringing out the best flavors from the leaves. Some popular brewing methods include using hot water at 160°F-180°F, steeping for 3-5 minutes, or even cold-brewing overnight for a milder flavor.
By experimenting with different brewing techniques, you can discover which method works best for your taste buds. This allows you to fully appreciate the complex flavors of yerba mate. So let’s dive into how to fill your gourd with this delicious drink!
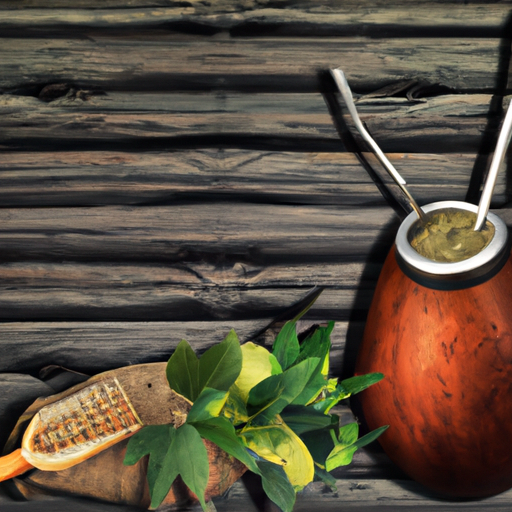
Filling the Gourd
First, take your gourd and fill it about two-thirds of the way with yerba mate leaves. Gently tap the gourd to settle the leaves before adding hot water. To ensure a perfect brew, measuring the correct amount of yerba mate is crucial. I recommend using one tablespoon for every six ounces of water.
Proper straining techniques are also important in ensuring an optimal flavor. When filling your gourd with hot water, tilt it slightly to create a small pocket of air at the top. This will prevent any loose particles from entering your mouth when you drink. Additionally, avoid stirring or shaking the gourd while drinking as this can dislodge particles and create a bitter taste.
Now that we have filled our gourd with yerba mate and hot water, it’s time to prepare the bombilla. The bombilla is a metal straw that filters out any loose particles while allowing you to sip on your delicious brew. Simply insert one end into your gourd, making sure it reaches all the way down to touch the bottom.
With this step complete, we’re ready to enjoy our homemade yerba mate!
Preparing the Bombilla
Now that we’ve filled our gourd, let’s get ready to enjoy our yerba mate by preparing the bombilla, a crucial part of the brewing process. The bombilla is a metal straw with a filter at one end that helps you drink your mate without getting any loose leaves in your mouth. Choosing the right bombilla is important because it affects the taste and experience of drinking yerba mate.
When selecting a bombilla, you want to consider its material, length, and filter size. Most bombillas are made of stainless steel or nickel silver, but some prefer gold or bronze for their aesthetics. Length also matters as it should be long enough to reach the bottom of your gourd without touching the yerba mate. Lastly, make sure to choose a filter size appropriate for your preference – smaller filters allow for more flavor while larger filters catch more leaves.
Proper use of the bombilla involves placing it at an angle towards the side of your gourd where there is less yerba mate. This allows air flow into the straw while preventing clogging from too much yerba mate blocking the filter. When sipping through your bombilla, avoid stirring or moving it around as this can cause blockage or disrupt the herbs’ natural settling process. Now that we have our properly chosen and prepared bombilla set up in our gourd, let’s move on to adding water to start brewing our delicious cup of yerba mate!
Adding Water
To add water to your yerba mate, simply fill your gourd about three-quarters of the way with hot (but not boiling) water. The temperature of the water is crucial for a perfect cup of yerba mate. If the water’s too hot, it can burn the leaves and make the drink bitter. On the other hand, if it’s too cold, you won’t be able to extract all the flavors from the leaves.
Timing is also important when adding water to your yerba mate. You should wait a few seconds after pouring in the hot water before drinking it. This allows time for the yerba mate to absorb some of the liquid and release its flavor. It’s recommended that you let it sit for at least 30 seconds before taking your first sip.
Now that you’ve added water to your yerba mate, it’s time to enjoy this delicious beverage! But before we get into drinking it, there are a few things you need to know about how to properly consume yerba mate.
Drinking Yerba Mate
When sipping on yerba mate, you’ll want to take small sips and avoid stirring the straw. This is because stirring can cause clogging, which will prevent you from getting a good flow of tea. Instead, simply tilt the gourd slightly to one side and sip slowly and steadily.
To fully enjoy the health benefits of yerba mate, it’s important to use the right brewing techniques. Don’t let the water boil or steep for too long as this can make the tea too bitter. It’s recommended to use water that’s around 160-180°F (70-80°C) and steep for no more than 5 minutes.
Drinking yerba mate is not just about satisfying your thirst but also about connecting with others and enjoying a social experience. Invite friends over to share a gourd of yerba mate and pass it around clockwise while catching up on life events or discussing topics of interest. This tradition has been passed down through generations in South America and remains an important part of their culture today.
As important as drinking yerba mate is cleaning and maintaining your gourd so that it lasts longer and remains hygienic for future uses. To do this, rinse out your gourd with warm water after each use and dry it thoroughly before storing it away. Avoid using soap or harsh chemicals as they can damage the natural materials used in making the gourd.
With proper care, your gourd will continue to provide you with many enjoyable cups of yerba mate for years to come!
Cleaning and Maintaining Your Gourd
Take care of your trusty yerba mate companion by giving it the TLC it deserves, and you’ll be rewarded with a loyal tea-drinking partner for years to come.
One of the most important aspects of maintaining your gourd is ensuring its hygiene. After each use, rinse the gourd with warm water and use a spoon or brush to remove any remaining leaves or debris. Avoid using soap as it can leave a residue that affects the taste of your mate.
To prevent mold from growing inside your gourd, make sure it’s completely dry before storing it away. You can do this by placing it upside down on a towel or drying rack until all moisture has evaporated. If you notice any signs of mold, such as black spots or an unpleasant odor, discard the gourd immediately and replace it with a new one.
When not in use, store your gourd in a cool, dry place away from direct sunlight. This will help prevent cracking and discoloration over time.
With proper care and maintenance, your yerba mate gourd can last for many years and provide countless enjoyable tea-drinking experiences.
Frequently Asked Questions
How long does it take to prepare a gourd for yerba mate?
To properly prepare a gourd for yerba mate, there are two main methods: soaking and scraping. Soaking involves filling the gourd with hot water and letting it sit overnight to soften the interior before scraping out any remaining debris.
In my experience, I prefer to soak my gourd as it helps to loosen any stubborn debris and makes for easier scraping. Scraping, on the other hand, involves using a spoon or knife to carefully remove any remaining debris from the interior of the gourd.
Once the gourd is cleaned, it’s important to properly dry it after each use by leaving it in a well-ventilated area until completely dry. This will help prevent mold from forming inside the gourd.
Overall, taking proper care of your yerba mate gourd is crucial for enjoying a delicious and authentic cup of yerba mate every time.
Should I use hot or cold water to fill the gourd?
Hot vs. cold: which is better for Yerba Mate in a gourd? As someone who’s been drinking Yerba Mate for years, I can confidently say that hot water is the way to go. Not only does it bring out the full flavor and aroma of the yerba mate, but it also helps to release more of the caffeine and other beneficial compounds.
Cold water can be refreshing on a hot day, but it simply doesn’t do justice to this amazing drink. Now, onto different ways to flavor your Yerba Mate in a gourd. While traditionalists may argue that plain yerba mate is all you need, there’s nothing wrong with adding a bit of variety to your brew.
Some people like to add herbs like mint or chamomile for extra flavor and relaxation benefits, while others prefer sweeteners like honey or stevia. Personally, I enjoy adding a splash of lemon juice for some tartness and vitamin C.
In conclusion, if you want to experience the true potential of yerba mate in a gourd, use hot water and experiment with different flavors until you find what works best for you. This ancient beverage has been enjoyed for centuries for its health benefits and social aspects – so why not make it your own?
How long does it take for the yerba mate to steep before drinking?
The steeping duration for yerba mate is crucial to achieving the ideal flavor profile. It typically takes around 3-5 minutes for the flavors to fully infuse into the water, but this may vary depending on personal preference and the strength of the yerba mate.
I enjoy a bold and robust flavor, so I tend to let it steep for closer to 5 minutes. However, if you prefer a milder taste, you can reduce the steeping time accordingly. It’s important not to oversteep yerba mate as it can become bitter and unpleasant.
By finding your perfect balance between steeping duration and desired flavor profile, you’ll be able to enjoy a delicious cup of yerba mate every time.
Is it necessary to use a bombilla when drinking yerba mate?
Using a bombilla when drinking yerba mate is definitely necessary! Not only does it make the whole experience more authentic, but it also has some pretty awesome benefits.
For starters, using a bombilla allows you to drink the mate without getting any of the leaves in your mouth. This may not seem like a big deal, but trust me, nobody wants to be chewing on bitter leaves while trying to enjoy their drink!
Additionally, using a bombilla allows for better temperature control and helps prevent clogging of the straw. Of course, there are alternative drinking methods such as using a French press or tea infuser, but nothing beats the traditional method with a gourd and bombilla.
So if you want to fully embrace the culture and experience all of its benefits, I highly recommend investing in a good quality bombilla.
Can I reuse the yerba mate leaves for multiple servings or should I start with fresh leaves each time?
When it comes to the Reusing Yerba Mate, Fresh Leaves Debate, I personally prefer to start with fresh leaves each time.
While some people might find it economical and convenient to reuse the leaves for multiple servings, I believe that doing so affects the taste and quality of yerba mate. By using fresh leaves each time, you get a fuller flavor profile and a better experience overall.
Additionally, reusing yerba mate can have negative consequences on the environment as well. The production process of yerba mate requires a significant amount of resources such as water and energy, so by reusing the leaves we are only adding to our carbon footprint unnecessarily.
As someone who values sustainability and reducing my environmental impact, I choose to start fresh each time I make yerba mate in order to enjoy its full potential while also minimizing my impact on the planet.
Conclusion
Well folks, that’s how you make yerba mate in a gourd! It may seem like a lot of steps, but once you get the hang of it, it becomes second nature.
I hope this guide has been helpful and informative for all those looking to enjoy this delicious South American beverage. Personally, I love sipping on my yerba mate while reading a good book or catching up with friends. It’s the perfect pick-me-up for any time of day.
So go ahead and try making your own yerba mate in a gourd – you won’t regret it! And remember, always take care of your gourd so that it lasts for many more rounds of yerba mate to come.
In conclusion, making yerba mate in a gourd is not only a traditional way to enjoy this beloved drink, but it also adds an element of charm and authenticity to the experience. So grab your bombilla and prepare your gourd – let’s raise our cups (or rather, our calabashes) to enjoying the simple pleasures in life!