
Crafting matcha cookies can be likened to painting a masterpiece – the various ingredients serve as your palette of colors, while the oven acts as the canvas. With a dash of patience and a sprinkle of creativity, these tasty cookies can be made by anyone. They not only appease your cravings for sweets but also offer a multitude of health advantages.
In this article, I will guide you through the step-by-step process of making matcha cookies. From gathering your ingredients to baking and cooling them down, I’ll provide detailed instructions to help you create perfect cookies every time.
So put on your apron, grab your mixing bowls, and let’s get started on this culinary adventure!
Key Takeaways
- Using high-quality matcha powder is important for both taste and health benefits.
- Chilling the dough before baking prevents spreading and ensures a perfect texture.
- Mixing in other ingredients can add variety to the cookies, but too many additions may result in dense cookies.
- Matcha is a versatile ingredient that can be used in various recipes beyond baking, and offers numerous health benefits such as antioxidants and amino acids.

Amazon Basics Basket Coffee Filters for 8-12 Cup Coffee Makers, White, 200 Count, Packaging May Vary
- Package Quantity: 200 filters included
- Compatibility: Fits 8-12 cup coffee makers
- Filtration Quality: Eliminates sediment for better taste
As an affiliate, we earn on qualifying purchases.
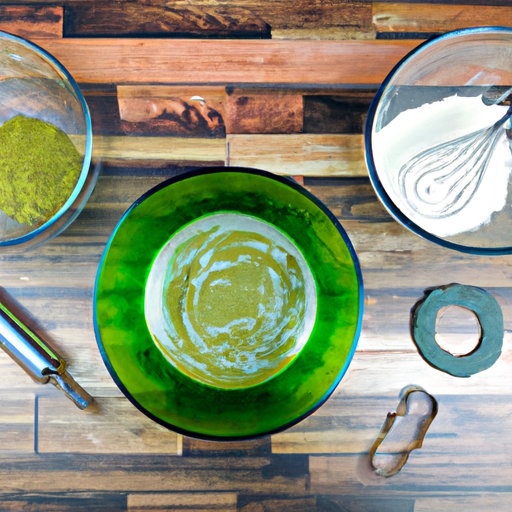
Gather Your Ingredients
You’re going to need some flour, sugar, butter, matcha powder and eggs to make these delicious matcha cookies. But before you start baking, let’s talk about the ingredients a bit more.
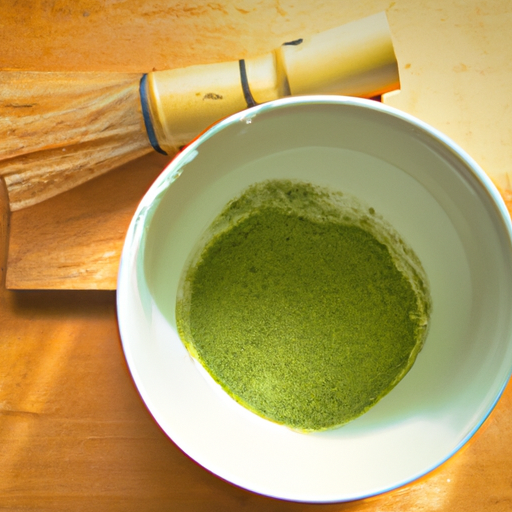
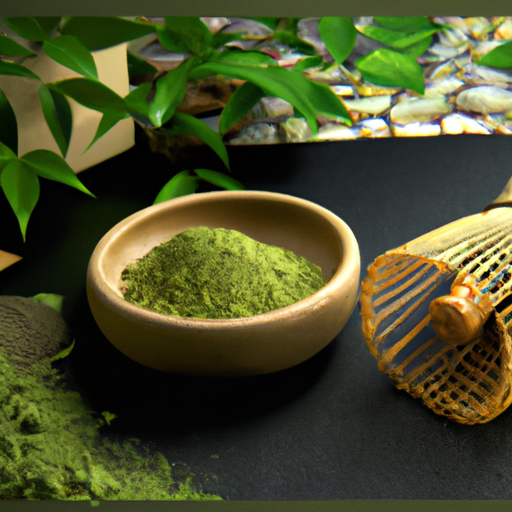
Matcha is the star of this recipe and it’s important to source high-quality matcha powder for the best taste experience. Look for matcha that is bright green in color with a smooth texture. Not only does matcha add a unique flavor to these cookies, but it also provides numerous health benefits. Matcha is rich in antioxidants and has been shown to boost metabolism and improve focus. Incorporating matcha into your diet can lead to better overall health.
Once you have all your ingredients ready, preheat your oven to 350°F. It’s important to preheat because this will ensure even baking of your cookies. Now that we’ve got our ingredients sorted out and our oven heated up, let’s move on to making the dough!
Preheat Your Oven
Before diving into the baking process, it’s important to preheat your oven to ensure that your cookies come out perfectly cooked. Preheating your oven is a crucial step in baking any recipe, and matcha cookies are no exception. Here are some tips to follow when preparing your oven for baking:
- Always make sure you’ve read the manufacturer’s instructions on how to operate your oven safely before using it. Avoid wearing loose clothing or jewelry that could get caught in the oven door or heating elements.
- Matcha cookies require a precise temperature of 350°F (175°C) for them to bake properly. Make sure you set your oven at this temperature and allow it enough time to reach its optimal heat level.
- If you’re short on time or don’t want to use up too much energy, consider using an air fryer instead of an oven. An air fryer can preheat quicker and may even produce crispier cookies.
Once your oven is preheated, it’s time to move onto the next step in making matcha cookies – creaming the butter and sugar together until light and fluffy.
Creaming butter and sugar together creates a base for baked goods that will hold their shape while cooking. To do this effectively, leave the butter out at room temperature for about 30 minutes before starting; it should be soft but not melted. Then mix with granulated sugar until light and fluffy using either a hand mixer or stand mixer fitted with a paddle attachment. Be sure not to overmix as it can cause flat cookies.
Now that our butter and sugar mixture is ready, we can start incorporating other ingredients like eggs, flour, matcha powder, etc., into our dough mixtures!
Cream the Butter and Sugar
With the butter and sugar perfectly creamed, our dough will be the foundation for a deliciously airy and light treat that will melt in your mouth. To achieve the perfect texture, it’s important to use room temperature ingredients. Cold ingredients can result in clumping and lumps in the dough, making it difficult to mix.
There are different variations on how to cream butter and sugar together, but my personal favorite is using an electric mixer with the paddle attachment. This method allows for even mixing without overworking the dough. Start by beating the softened butter on medium speed until it becomes smooth and creamy. Then gradually add in the sugar while continuing to beat until well combined.
Once you’ve achieved a light and fluffy texture with your butter and sugar mixture, it’s time to add in the egg and vanilla extract. But before we move onto that step, let’s make sure we properly incorporate all of our ingredients by scraping down the sides of our bowl with a rubber spatula.
With everything mixed thoroughly together, we’re now ready for the next step of this tasty matcha cookie recipe!
Add the Egg and Vanilla Extract
Now that our butter and sugar are perfectly creamed, it’s time to add in the egg and a splash of vanilla extract for extra flavor. Adding an egg not only helps bind the dough together but also gives it a richer taste. However, if you’ve got dietary restrictions or preferences, there are alternative extracts and egg substitutes that you can use instead.
If you’re looking for different ways to incorporate matcha into cookie recipes, adding it to the wet ingredients is a great option. Matcha has a distinct earthy flavor that complements the sweetness of cookies beautifully. You can adjust the amount of matcha powder according to your preference, but as a general rule, 1-2 tablespoons should be enough for every batch.
After adding the egg and vanilla extract, I like to whisk them with the butter and sugar until well combined. Then, I gradually pour in my dry ingredient mixture while continuing to mix on low speed until everything comes together into a smooth dough. Mixing in the dry ingredients is crucial because it ensures that all of your ingredients are evenly distributed throughout your batter before baking.
Mix in the Dry Ingredients
Once the egg and vanilla extract have been whisked in, it’s time to mix in the dry ingredients for a perfectly smooth dough. I start by sifting together all-purpose flour and matcha powder into a separate bowl. However, if you want to experiment with alternative flours like almond or coconut flour, make sure to adjust the measurement accordingly.
Next, I add baking powder and salt into the same bowl as the dry ingredients before mixing them together thoroughly using a whisk. Doing so ensures that these ingredients are evenly distributed throughout the dough later on. Additionally, it prevents any lumps from forming, which could affect the texture of your cookies.
For those who want to play around with flavor variations, this is an excellent opportunity to do so! You can add chocolate chips or chopped nuts into your dough at this stage. Alternatively, you may choose to substitute vanilla extract with other flavors like lemon or orange extract for a unique twist on traditional matcha cookies.
Now that everything is well combined, it’s time to chill the dough before shaping them into cookie balls. Adding this extra step will allow your dough to firm up and prevent them from spreading too much while baking. So let’s move on to how we can achieve that perfect consistency!
Chill the Dough
To achieve that perfect consistency for your matcha cookies, you’ll want to pop the dough in the fridge and let it chill. Chilling is important because it allows the dough to firm up, making it easier to work with and preventing the cookies from spreading too much during baking. It also gives the flavors time to meld together, resulting in a richer and more complex taste.
When chilling your dough, make sure to wrap it tightly with plastic wrap or place it in an airtight container. This prevents any moisture from getting in and altering the texture of your cookies. Ideally, you should chill your dough for at least 30 minutes, but you can leave it in the fridge for up to 24 hours if needed.
If you’re short on time or don’t have access to a fridge, there are alternatives to chilling the dough. One option is to freeze small balls of dough for 10-15 minutes before baking them. Another is to use room temperature butter instead of cold butter when making the dough – this will result in softer cookies that spread more during baking. However, keep in mind that these alternatives may affect both texture and flavor of your final product.
Now that our cookie dough has chilled and firmed up nicely, we’re ready for our next step: forming them into cookies!
Form the Dough into Cookies
When you’re ready to form your dough into cookies, remember that the size and shape will affect both the baking time and number of servings. You can use different shaping techniques depending on the look and texture you want to achieve.
For example, you can roll out the dough with a rolling pin and cut it into shapes using cookie cutters. Alternatively, you can scoop spoonfuls of dough onto a baking sheet for a more rustic look. Another way to add variation to your cookies is by mixing in other ingredients such as chocolate chips, nuts or dried fruit.
You could also experiment with different types of flour or sweeteners for a unique twist on the classic matcha cookie recipe. Just make sure not to overdo it – too many additions might cause your cookies to spread too thin or become overly chewy.
Once you’ve shaped your cookies, preheat your oven as directed in the recipe and bake them until they’re lightly golden brown on top. Be careful not to overbake them or they’ll lose their soft texture!
In the next section, I’ll share some tips on how to cool and store your freshly baked matcha treats.
Bake the Cookies
Now it’s time to pop those delicious matcha cookie dough shapes into the oven and watch as they transform into mouth-watering treats.
Preheat your oven to 350°F and place the cookies on a baking sheet lined with parchment paper. Make sure there is enough space between each cookie, so they have room to expand while baking.
Bake the cookies for about 10-12 minutes, or until the edges turn golden brown. Keep an eye on them during this time since every oven is different, and you don’t want them to burn.
Once done, take out of the oven and let them cool before decorating. Cookie decorating is entirely optional, but if you’re feeling creative, go ahead and decorate them with icing or sprinkles!
Alternatively, you can also experiment with alternative baking methods such as air frying or using a toaster oven. The key is to find what works best for you in terms of taste preference and convenience.
Now that we’ve baked our matcha cookies let’s move onto letting them cool before diving in!
Let the Cookies Cool
As the matcha cookies finish baking, they transform into golden brown goodness and need time to cool before enjoying their chewy texture, like sinking your teeth into a fluffy cloud. Cooling is an essential step in the process of making matcha cookies, as it allows them to set properly and maintain their shape. It’s important not to rush this step, as the heat from the cookies can cause them to crumble or break apart.
To ensure that your matcha cookies cool evenly and thoroughly, follow these simple steps:
- Remove the baking sheet from the oven and place it on a cooling rack.
- Let the cookies sit for at least 5-10 minutes before attempting to move them.
- Once they have cooled slightly, use a spatula to carefully transfer each cookie onto the cooling rack.
- Allow them to cool completely before serving or storing.
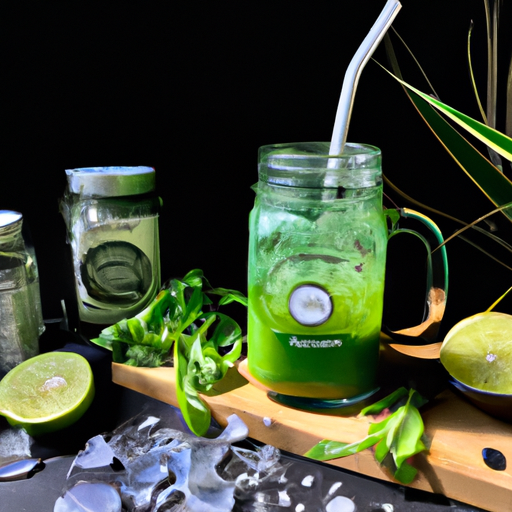
While waiting for your delicious matcha cookies to cool, take some time to appreciate all of the benefits of matcha. Matcha is known for its high levels of antioxidants and amino acids which provide numerous health benefits including improved brain function and increased energy levels. Additionally, there are many different matcha recipes you can try out beyond just baking with it – such as adding it to smoothies or using it in savory dishes.
Now that your cookies have had ample time to cool off and you’ve learned more about matcha’s benefits and versatility in cooking – go ahead and enjoy your delicious matcha creation!
Enjoy Your Delicious Matcha Cookies!
Indulge in the scrumptious matcha treats that’ll leave your taste buds wanting more. After letting the cookies cool, it’s time to savor their delicious flavor.
To make sure your matcha cookies look as good as they taste, try these presentation tips. First, dust them lightly with powdered sugar or sprinkle with some extra matcha powder for added color contrast.
Another great way to present your cookies is by pairing them with a warm cup of tea. Matcha tea is an obvious choice, but you could also try green tea or even a fruity herbal blend to complement the cookie’s earthy flavor. For those who prefer something colder, a scoop of vanilla ice cream on top of a freshly-baked matcha cookie creates an irresistible dessert.
Lastly, don’t forget to store any leftovers properly so that you can enjoy them later. Keep them in an airtight container at room temperature for up to five days or freeze them for longer storage.
With these presentation tips and pairing suggestions in mind, get ready to impress your friends and family with your homemade matcha cookies!
Frequently Asked Questions
Can I substitute the matcha powder with regular green tea powder?
I know it can be tempting to substitute matcha powder with regular green tea powder, especially if you don’t have any matcha on hand. However, I strongly advise against it.
Matcha and green tea powder may come from the same plant, but they are processed differently and have vastly different flavors. Matcha has a richer and more complex flavor profile than regular green tea powder, which tends to be more bitter and astringent.
Using regular green tea powder in place of matcha will result in a cookie that lacks the distinctive taste and aroma that makes matcha cookies so enjoyable. Additionally, matcha is known for its numerous nutritional benefits, including high levels of antioxidants, chlorophyll, and L-theanine.
While regular green tea powder does contain some of these nutrients as well, the concentration is much lower compared to matcha. So if you want to make truly delicious and healthy matcha cookies, stick with the real thing!
How long can I store the matcha cookies and how should I store them?
When it comes to storage tips for matcha cookies, the key factor is to keep them in an airtight container. This will help prevent any moisture from getting in and causing the cookies to become stale or even moldy.
As for shelf life, matcha cookies can typically last for up to 2 weeks if stored properly. However, I recommend consuming them within the first week for optimal freshness and flavor.
Additionally, it’s best to store them at room temperature rather than in the refrigerator or freezer as this can affect their texture.
Overall, following these simple storage tips will ensure that your matcha cookies stay fresh and delicious for as long as possible.
Can I use margarine instead of butter for this recipe?
When it comes to baking, the debate between margarine and butter has been ongoing for years. Margarine is a great substitute for butter in many recipes, but it’s important to understand that they have different properties.
Butter contains more fat than margarine, which can affect the texture and flavor of your baked goods. When substituting margarine for butter in a recipe, you need to adjust the amount of liquid and salt accordingly.
However, if you’re making matcha cookies specifically, I would recommend using butter as it will give them a richer taste and better texture. Margarine may work as a substitute, but it won’t give you the same results as using real butter.
Overall, when deciding whether to use margarine or butter in your baking, consider the specific recipe you’re making and how each ingredient will affect the final product.
Is it necessary to chill the dough before forming it into cookies?
When it comes to the chilling debate, I firmly believe that it’s necessary to chill the dough before forming it into cookies.
This step helps to ensure that the dough consistency is just right for baking and allows the flavors to meld together more effectively.
Without chilling, the dough may spread too much in the oven, resulting in flat or misshapen cookies.
Additionally, chilled dough is generally easier to work with and less likely to stick or break apart during shaping.
Overall, taking a little extra time to chill your cookie dough can make a big difference in the final texture and taste of your baked goods.
Can I add chocolate chips or nuts to the cookie dough?
When it comes to making cookies, you can add in chocolate chips or nuts to switch things up and add extra flavor and texture. There are many variations on add-ins to experiment with based on personal preferences. Personally, I think the best chocolate chip and nut combinations for cookies include classic milk chocolate chips with toasted pecans or dark chocolate chunks with chopped almonds. However, feel free to get creative and try out different combinations until you find the perfect match for your taste buds. Just remember to chop any nuts finely so they don’t overpower the cookie dough.
Conclusion
Well, there you have it! Making matcha cookies isn’t as complicated as it may seem. With just a few simple steps and ingredients, you can whip up a batch of delicious and healthy treats that are sure to impress your friends and family.
In conclusion, I highly recommend giving this recipe a try. Not only are these cookies delicious, but they also offer numerous health benefits thanks to the antioxidant-rich matcha powder.
So, next time you’re craving something sweet, why not reach for some homemade matcha cookies instead? Your taste buds (and your body) will thank you!