Cultivating yerba mate can prove to be both satisfying and gratifying. Having been intrigued by the healing properties of plants for many years, I made the decision to embark on growing my own yerba mate at home. Through a combination of studying and experimentation, I’ve acquired the fundamental skills needed to effectively nurture this remarkable plant.
For those who are not familiar with yerba mate, it is a traditional South American beverage made from the leaves of the yerba mate plant. It is known for its stimulating effects, as well as its numerous health benefits such as boosting energy levels, aiding digestion, and reducing inflammation.
While yerba mate can be purchased in stores or online, there is something special about being able to grow your own plant and harvest its leaves for brewing your own homemade tea.
In this article, I will share my knowledge on how to grow yerba mate from seed to cup.
Key Takeaways
- Choosing the right seeds and finding a reputable supplier are crucial for optimal growth and yield.
- Proper soil preparation and maintenance, including well-draining soil rich in organic matter and maintaining pH levels, are essential for healthy growth.
- Yerba mate plants prefer partial shade and ideal watering for healthy growth.
- Regular pruning and proper harvesting and processing techniques are necessary for maintaining the health and productivity of yerba mate plants.
Top picks for "grow yerba mate"
Open Amazon search results for this keyword.
As an affiliate, we earn on qualifying purchases.
Understanding the Basics of Yerba Mate
If you wanna grow yerba mate, it’s important to start by understanding the basics of this amazing plant. Yerba mate is a popular tea-like beverage that originated in South America and has been enjoyed for centuries due to its many health benefits.
It’s made from the leaves of the Ilex paraguariensis tree, which is native to Argentina, Brazil, Paraguay, and Uruguay. In addition to being delicious, yerba mate also offers many health benefits. It contains antioxidants and caffeine, which can help boost energy levels and improve mental alertness. Yerba mate also contains vitamins and minerals like vitamin C and potassium. This makes it a great choice for people looking for a healthy alternative to coffee or tea.
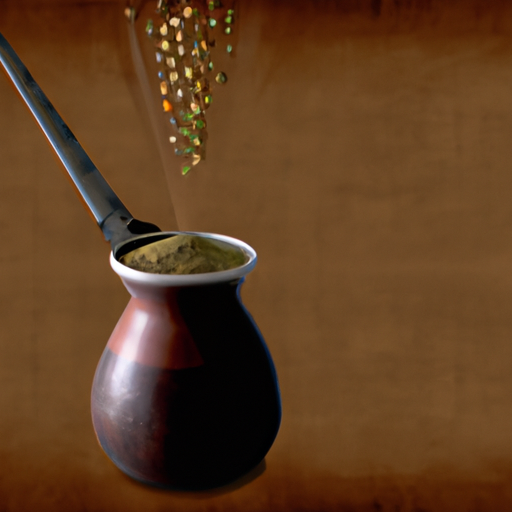
Traditional yerba mate rituals involve sharing the drink with friends and family as a way of building community and fostering social connections. The process involves brewing loose-leaf yerba mate in a special cup called a gourd using hot water. The drink is traditionally sipped through a metal straw called a bombilla.
Understanding these traditional rituals can help you appreciate the cultural significance of yerba mate as well as its many health benefits. Now that we’ve covered the basics of yerba mate including its health benefits and traditional rituals, let’s move on to choosing the right seeds for growing your own plants at home.
Choosing the Right Seeds
When it comes to choosing the right seeds for growing yerba mate, there are a few key points to keep in mind.
First and foremost, it’s important to find a reputable supplier who can provide high-quality seeds that are free from pests and disease.
Additionally, selecting the right species of yerba mate is crucial for ensuring optimal growth and yield.
Finally, understanding germination techniques is essential for successfully starting your plants from seed.
Finding a reputable supplier
To ensure a high-quality yerba mate experience, it’s crucial to find a reputable supplier that you can trust. Finding a reputable supplier involves evaluating quality standards and checking the authenticity of the products they offer. You want to make sure that the yerba mate you purchase is of high quality, sustainably sourced, and free from any harmful substances.
When searching for a supplier, look for certifications such as Fair Trade or USDA Organic. These certifications indicate that the product has met certain ethical and environmental standards. Additionally, reading reviews from other customers can give you an idea of the quality of their products and customer service.
By taking your time to find a trustworthy supplier, you can have peace of mind knowing that every sip is not only delicious but also ethically and sustainably sourced.
Now that we’ve covered finding a reputable supplier, let’s move on to selecting the right species.
Selecting the right species
To ensure your yerba mate experience is customized to your taste preferences, it’s important to consider the different species available and select the one that suits you best. Yerba mate varieties can differ in flavor, aroma, and potency. Some of the most common species include Ilex paraguariensis, Ilex brevicuspis, and Ilex amara.
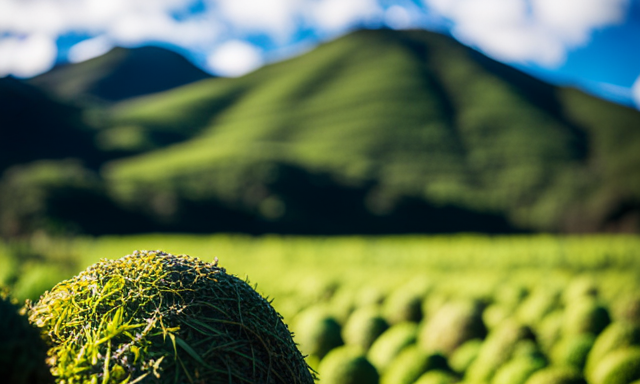
When selecting a yerba mate species, it’s also essential to consider climate considerations. Different species thrive in specific temperature ranges and soil types. For instance, Ilex paraguariensis grows best in subtropical regions with well-drained soils while Ilex amara thrives in more humid tropical regions. Knowing which type of yerba mate will grow well in your area will help ensure a successful harvest.
Transitioning into the subsequent section about ‘germination techniques,’ understanding how to properly germinate your chosen variety of yerba mate is crucial for a healthy plant growth cycle.
Germination techniques
As you embark on the journey of cultivating your own yerba mate plant, mastering germination techniques is like laying the foundation for a sturdy house; without a strong start, the rest of the process may crumble. The first step in germinating yerba mate seeds is to select high-quality seeds from a reputable supplier. Look for seeds that are plump, firm and have uniform coloration. Avoid seeds that are discolored, shriveled or damaged as they may not be viable.
Once you’ve selected your seeds, it’s time to begin the germination process. Yerba Mate prefers warm temperatures between 70 and 80 degrees Fahrenheit for successful germination. You can use either paper towel method or directly sow them into pots filled with potting soil. Check moisture levels regularly and mist lightly with water if needed to keep them moist but not wet throughout the germination period which typically takes around 2-4 weeks depending on seed selection and timing of planting. With proper care during this crucial stage of growth, you’ll be well on your way to growing healthy yerba mate plants ready for transplanting into their permanent homes – but before that let’s get into preparing the soil.
Preparing the Soil
Preparing the soil is a crucial step in growing yerba mate, as it determines the success of your crop. Ideal soil conditions include well-draining soil that’s rich in organic matter. Fertilization and pH levels must also be considered to ensure healthy plant growth.
Choosing the right location for your yerba mate plantation is important, as it should receive ample sunlight and protection from strong winds.
Ideal soil conditions
You’ll want to aim for soil that’s well-drained and slightly acidic for the best growth of your yerba mate plants. This means choosing a location with good drainage, as waterlogged soil can cause root rot and other problems.
Additionally, adding organic matter such as compost or leaf mold to the soil can improve its ability to hold moisture without becoming waterlogged.
When it comes to sunlight requirements for growing yerba mate, these plants prefer partial shade rather than full sun. Aim for a location that gets around four hours of direct sunlight per day but is shaded during the hottest part of the day.
Optimal watering also plays an important role in promoting healthy growth, so make sure you’re watering your yerba mate plants regularly and thoroughly without overwatering them.
Finally, consider incorporating soil amendments such as sulfur or iron sulfate to adjust the pH level if necessary.
To continue promoting optimal growth in your yerba mate plants, it’s important to pay attention to fertilization and pH levels.
Fertilization and pH levels
Maintaining proper pH levels through soil amendments and regular testing is crucial for the healthy growth of your yerba mate plants. Yerba mate requires a slightly acidic soil with a pH between 5.5 and 6.5 to thrive. Without the appropriate pH level, the plant may struggle to absorb essential nutrients from the soil, leading to stunted growth, yellowing leaves, and decreased yield.
To maintain ideal pH levels, it’s important to conduct regular soil tests throughout the growing season. Soil tests can help determine if your soil is too acidic or alkaline and provide recommendations for how much fertilizer or organic amendments you need to add to adjust pH levels accordingly. Organic options like composted manure, bone meal, or fish emulsion can be particularly effective in providing necessary nutrients while also improving overall soil quality.
Importance of soil testing cannot be overstated when it comes to growing yerba mate as it ensures that you aren’t over-fertilizing or under-fertilizing your plants, which can lead to nutrient deficiency or toxicity, respectively.
Choosing the right location for planting yerba mate is equally important as maintaining proper fertilization and pH levels for successful cultivation.
Choosing the right location
Now that we’ve discussed how to properly fertilize and adjust pH levels for yerba mate, let’s talk about choosing the right location for your plant. This is a crucial step in ensuring the success of your yerba mate growth.
When choosing a location, it’s important to keep in mind the sunlight requirements and soil drainage of yerba mate. Yerba mate thrives in areas with partial shade and well-draining soils. Direct sunlight can scorch the leaves, while excessive shade can lead to slow growth and poor quality leaves.
As for soil drainage, yerba mate roots are susceptible to root rot if they sit in waterlogged soils for too long. Therefore, it’s best to choose an area with well-draining soil or consider using raised beds.
With all this information in mind, take some time to scout out potential locations before planting your yerba mate. Consider factors such as nearby trees or buildings that may block sunlight, as well as any areas prone to flooding or standing water.
Once you’ve found the perfect spot, it’s time to move on to our next section about planting yerba mate without delay!
Planting Yerba Mate
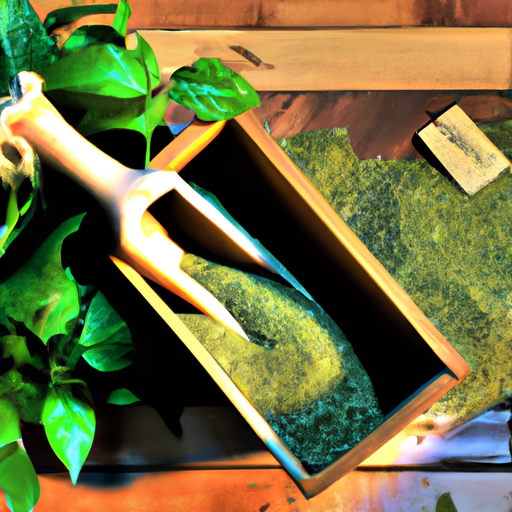
First, prepare the soil by loosening it with a garden fork or tiller before planting yerba mate. This will help improve drainage and soil aeration, which is crucial for the growth of yerba mate. It’s also important to choose a location that receives partial shade, as direct sunlight can harm the plant.
To plant yerba mate, dig a hole slightly larger than the root ball of the plant. Gently loosen the roots and remove any damaged or dead ones before placing it in the hole. Fill in around the roots with soil and water thoroughly. Yerba Mate plants can be grown both indoors and outdoors in containers or directly in the ground.
Here are some tips for successful Yerba Mate container planting:
- Choose a container that is at least 18 inches deep with drainage holes.
- Use well-draining potting mix and make sure not to overwater.
- Fertilize once a month during growing season with nitrogen-rich fertilizer.
- Prune regularly to control growth and promote bushy growth.
Caring for your yerba mate plant is essential for its survival. In addition to regular watering, it’s important to monitor for pests such as spider mites or aphids. Regular pruning will also help keep your plant healthy and prevent overcrowding.
With proper care, your yerba mate plant should thrive and provide you with delicious tea leaves for years to come!
Caring for Your Yerba Mate Plant
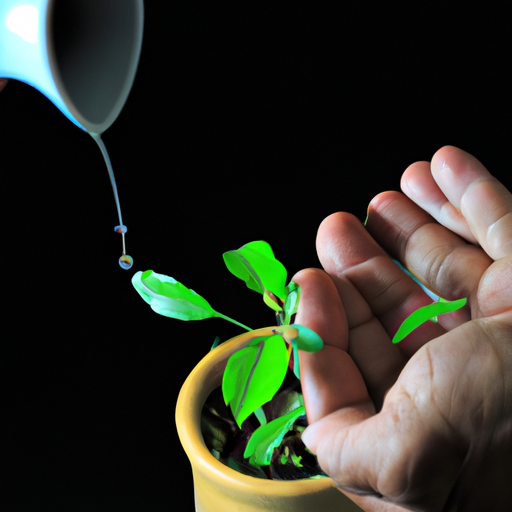
Taking good care of your beloved yerba mate plant is crucial if you want to enjoy its delicious tea leaves for years to come. One of the most important factors in caring for your yerba mate plant is watering frequency.
Yerba mate plants require regular and consistent watering, especially during hot and dry periods. However, overwatering can be just as harmful as under-watering, so it’s essential to strike a balance. To avoid overwatering, I recommend using well-draining soil and allowing the top layer of soil to dry out before watering again.
It’s also important to water deeply rather than frequently, ensuring that the entire root system receives moisture. Yerba mate plants are sensitive to salt buildup in the soil, so I suggest using rainwater or distilled water instead of tap water whenever possible.
In addition to proper watering techniques, pruning your yerba mate plant regularly is necessary for healthy growth and longevity. Pruning helps remove dead or damaged branches and promotes new growth from the base of the plant. To prune your yerba mate plant correctly, use sharp pruning shears and cut just above a healthy bud or leaf node at a 45-degree angle.
With proper care and maintenance techniques like these, you’ll soon have a thriving yerba mate plant ready for harvest. When it comes time for harvesting yerba mate leaves from your prized plant, there are several steps you need to follow carefully.
Harvesting Yerba Mate Leaves
When it’s time to pluck the precious leaves of your yerba mate plant, proper preparation and patience are paramount for a perfect harvest. Here are some important tips to ensure that you get the most out of your yerba mate leaves:
-
Pruning techniques: Regular pruning is essential for maintaining the health and productivity of your yerba mate plant. To promote new growth and keep the plant from becoming too bushy, trim back any dead or yellowing leaves, as well as any stems that are starting to look woody or old.
-
Drying methods: Once you’ve harvested your fresh yerba mate leaves, it’s important to dry them properly in order to preserve their flavor and aroma. Traditionally, this is done by laying the leaves out in a single layer on a flat surface (such as a cloth or screen) in a warm, dry area with good ventilation. You can also use an oven set at low heat or a dehydrator if you prefer.
After you’ve successfully harvested and dried your yerba mate leaves, it’s time to move on to processing them into loose leaf tea or other forms. But before we get into that, let’s take a moment to appreciate all of the hard work that went into growing and harvesting these beautiful plants!
Processing Yerba Mate Leaves
Now that I’ve harvested my yerba mate leaves, it’s time to process them.
The first step is roasting and grinding the leaves to bring out their flavor and aroma.
After that, I’ll blend the roasted leaves with other herbs or flavors before packaging them for storage and aging.
Roasting and grinding
To achieve the perfect roast and grind, it’s essential to understand the intricacies of yerba mate preparation. Roasting techniques play a crucial role in determining the flavor profile of yerba mate.
There are two primary methods for roasting – traditional and modern. Traditional roasting involves placing the leaves on a wood fire until they turn brown, while modern roasting uses heat generated by gas or electricity.
After roasting, it’s time to move on to grinding methods. Grounding is an important step in preparing yerba mate as it can affect its taste and aroma. The most common way to grind yerba mate is through industrial grinders that use steel blades or burrs to chop the leaves into small pieces.
Once ground, the yerba mate is ready for blending and packaging. Different blends can be created by mixing different types of roasted and ground yerba mate with other ingredients such as herbs and spices.
Blending and packaging
Once the yerba mate has been roasted and ground to perfection, it’s time to craft unique blends by mixing in various herbs and spices before packaging for distribution. Blending techniques play a crucial role in creating different flavors of yerba mate. Some popular ingredients that are added to the blend include peppermint, chamomile, lemongrass, cinnamon, ginger, and cardamom. These ingredients not only add flavor but also provide additional health benefits.
Packaging materials also play an important role in ensuring the freshness of yerba mate. The ideal packaging material is airtight and does not allow any light or moisture to enter. A common type of packaging used for yerba mate is vacuum-sealed bags made out of aluminum foil or plastic. Another popular option is paper bags with airtight seals that come with zip locks.
Once packaged, the yerba mate should be stored in a cool and dry place away from direct sunlight until it is ready to be consumed or aged further for enhanced flavor.
Storing and aging
Imagine yourself as a tea connoisseur, eager to savor the rich and robust flavors of yerba mate. As you open the vacuum-sealed bag or paper package, take note that proper storage and aging can make all the difference in taste.
To ensure maximum flavor, it’s important to store yerba mate in a cool and dry place away from direct sunlight. The ideal temperature for storage is between 50-70°F (10-21°C) with a humidity level of 60%. If stored properly, yerba mate can last up to two years without losing its flavor.
Aging techniques also play an important role in developing the taste of yerba mate. Traditionally, Argentineans age their yerba mate by leaving it exposed to air for several months before packaging it. This process allows the leaves to oxidize and develop a smoother taste. However, if you prefer a more robust flavor, you can skip this step and consume your freshly packaged yerba mate right away.
Now that we know how to properly store and age our beloved herb, let’s move on to brewing methods that will complement its unique taste profile.
Brewing Yerba Mate
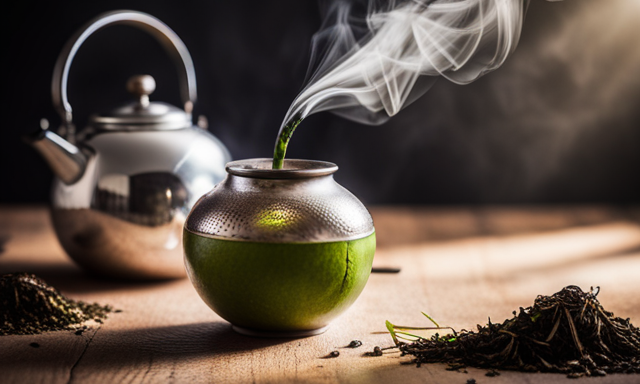
First, you’ll need to gather your yerba mate and a gourd to brew it in. Yerba mate is a South American herbal tea that’s been consumed for centuries due to its various health benefits and cultural significance. It contains caffeine, theobromine, and other compounds that can stimulate the mind and body while also providing nutrients like antioxidants, vitamins, and minerals.
To brew yerba mate properly, start by filling the gourd about two-thirds full with loose leaf or powdered yerba mate. Use a bombilla (a metal straw with a filter at one end) to create an opening in the center of the dry leaves. Then, add hot water (not boiling) to fill the gourd up to three-quarters full.
Let it steep for a few minutes until the water is absorbed into the leaves. Sip on the yerba mate through the bombilla as long as there are still enough leaves in the gourd. The first few sips may be bitter or strong but eventually they’ll become milder as you continue drinking.
This communal experience of sharing yerba mate is an important part of many cultures in South America and beyond. It fosters social connections while also promoting overall wellness through healthy habits like sharing tea instead of other unhealthy beverages or substances.
Sharing Your Yerba Mate Experience
Sharing your yerba mate experience is the most delightful and heartwarming way to bond with friends and family, especially if you’ve never tried it before. Sharing tips on how to prepare yerba mate can make all the difference in achieving a perfect brew.
One of my favorite recipes with yerba mate involves adding mint leaves or lemon juice for an extra refreshing taste. Another tip would be to use cold water instead of hot water, which can prevent the bitter taste that sometimes comes with brewing.
Yerba mate carries a cultural significance that dates back centuries in South American countries like Argentina, Uruguay, Paraguay, and Brazil. Drinking yerba mate is not just about enjoying its unique flavor but also about sharing moments of connection with others.
It’s customary to share one gourd among friends or family members using a metal straw called a ‘bombilla.’ This tradition highlights the importance of community and hospitality in these cultures.
Sharing your yerba mate experience can bring people closer together while introducing them to new flavors and traditions. Whether you’re experimenting with different recipes or simply enjoying the simple pleasure of drinking tea together, yerba mate offers a unique opportunity for connection and relaxation.
So next time you have friends over or visit family members, why not break out some yerba mate and enjoy this cherished beverage together?
Frequently Asked Questions
What are the health benefits of drinking Yerba Mate?
As someone who regularly drinks yerba mate, I can attest to the various health benefits it provides.
First and foremost, it’s an excellent immune booster due to its high antioxidant content.
Additionally, studies have shown that drinking yerba mate can aid in weight loss by reducing appetite and increasing metabolism.
It’s important to note that these benefits are most pronounced when consumed without added sugar or milk.
Overall, incorporating yerba mate into your daily routine can have significant positive impacts on your health.
Can Yerba Mate be grown indoors?
Yes, yerba mate can be grown indoors with the proper cultivation techniques and lighting requirements. Indoor cultivation requires a light source that mimics natural sunlight, such as full-spectrum LED lights or high-pressure sodium bulbs.
It’s important to provide at least 12 hours of light per day during the vegetative growth stage and reduce it to 8-10 hours during the flowering stage. Additionally, maintaining proper humidity levels and temperature control is crucial for successful indoor cultivation.
With proper care and attention, you can grow yerba mate plants in your home or indoor garden year-round.
How long does it take for a Yerba Mate plant to grow to maturity?
Yerba Mate growth rate depends on the ideal growing conditions. Typically, it takes 3-4 years for a Yerba Mate plant to reach maturity and produce leaves suitable for harvesting.
The ideal conditions for growing yerba mate requires well-draining soil with a pH level of 6-7 and plenty of sunlight. The temperature should remain between 20-30°C, and humidity levels should be around 50-70%.
Adequate watering is also essential as these plants require higher moisture levels than other tea plants. Regular pruning of the plant’s lateral branches will encourage new growth, resulting in optimal yields during harvest season.
What pests and diseases should I watch out for when growing Yerba Mate?
Growing yerba mate can be likened to sailing a ship on the open sea. Just like a sailor must constantly watch for storms and rough waters, a yerba mate grower must be vigilant against pests and diseases that can harm their crop.
Proper pest management and disease prevention are crucial for the health of your plants. Some common pests to watch out for include spider mites, aphids, and mealybugs, while diseases such as root rot and leaf spot can also pose a threat.
To combat these issues, it’s important to regularly inspect your plants for any signs of infestation or illness, promptly remove infected or damaged parts, and use natural pest control methods whenever possible.
By staying alert and taking proactive measures to protect your crop, you can successfully navigate the challenges of growing yerba mate.
Are there any cultural traditions surrounding the consumption of Yerba Mate?
Mate ceremonies and social etiquette are an integral part of the cultural traditions surrounding the consumption of yerba mate. As a long-time aficionado, I’ve experienced firsthand the importance of respecting these customs when sharing this beloved beverage with others.
Mate ceremonies typically involve a group of people sitting in a circle, passing around a gourd filled with yerba mate and sipping from a shared straw called a bombilla. Proper etiquette dictates that the person preparing the mate should take great care to distribute the leaves evenly and use hot (but not boiling) water to steep them.
It’s also customary to offer the first sip to one’s guest of honor or elder before passing it around for everyone else to enjoy. By following these time-honored practices, we can honor both the rich history and delicious flavor of yerba mate.
Conclusion
Growing yerba mate can be a rewarding experience for those who appreciate the unique flavor and stimulating properties of this South American beverage. By understanding the basics of yerba mate, choosing the right seeds, preparing the soil, planting and caring for your plant, harvesting and processing its leaves, and finally brewing it to perfection, you can enjoy a truly authentic yerba mate experience.
As the saying goes: "Patience is bitter, but its fruit is sweet."Growing yerba mate requires patience as it takes time to mature into a healthy plant that can provide ample leaves for brewing. However, with proper care and attention, your efforts will be rewarded with a bountiful harvest of flavorful leaves that can be enjoyed alone or shared with friends.
So take your time in growing yerba mate and savor every step of the process – from planting to brewing – as each stage contributes to a rich and satisfying experience.