
Matcha has gained popularity among those who are mindful of their health because of its significant health advantages and distinct taste. Yet, not everyone is familiar with the proper way to prepare matcha, particularly in regards to achieving the right froth.
As someone who loves matcha and has experimented with different techniques, I am excited to share my knowledge on how to froth matcha like a pro.
Before we dive into the specifics of frothing matcha, let’s first understand what it is and why it’s important. Matcha is a finely ground powder made from shade-grown tea leaves that are high in chlorophyll and amino acids. This gives matcha its vibrant green color and umami taste.
Frothing the matcha not only enhances its flavor but also improves the texture by creating a creamy foam layer on top. So, whether you’re making a latte or enjoying a traditional bowl of matcha, knowing how to froth it can take your experience to the next level.
Key Takeaways
- Matcha should be brewed at a lower temperature than other teas, around 175°F (79°C).
- Properly preparing utensils before use and using the correct techniques are important for creating a smooth, frothy texture.
- Milk alternatives and natural sweeteners can be used to enhance the flavor and creaminess of frothed matcha.
- Over-frothing and using too much matcha powder are common mistakes to avoid.
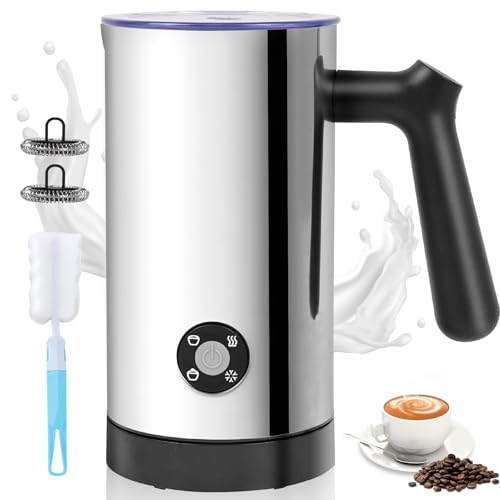
Milk Frother, 4-in-1 Milk Frother and Steamer, 10.6oz Electric Milk Steamer, Automatic Cold and Hot Foam Maker for Lattes, Cappuccinos, Ceramic Lining Interior (Polished)
Milk frother with Multi-Function Frothing: Versatile for various foam types and warm milk or chocolate. Create thick warm...
As an affiliate, we earn on qualifying purchases.
Understanding Matcha and its Properties
So you’ve got your matcha powder, and now it’s time to understand its unique properties before you start frothing it into a delicious latte.
Matcha is a type of green tea that has been finely ground into a powder. Because the whole leaf is used, matcha contains more caffeine and antioxidants than regular brewed tea. It’s also known for its calming effect due to the presence of L-theanine.
One of the reasons why matcha has become so popular in recent years is because of its health benefits. Matcha can help boost metabolism, promote relaxation, reduce inflammation, and lower blood sugar levels. It’s also high in vitamins A and C, as well as minerals such as potassium and calcium. So not only does matcha taste great, but it’s good for you too!
Another thing to keep in mind when working with matcha is that there are different flavor variations available depending on where the tea was grown and how it was processed. Some types may be sweeter or more bitter than others, so it’s important to experiment with different brands until you find one that suits your taste preferences.
Understanding these nuances will help you create the perfect frothy latte that highlights all of matcha’s unique flavors and health benefits.
Now that we’ve covered the basics of understanding matcha powder, let’s move on to choosing the right tools needed for making a delicious frothy latte!

Spacekey Milk Frother Electric Automatic Frother for Coffee with Mute Mode, 10.1oz/300ml Overheat Protection Milk Steamer, 4-in-1 Warm and Cold Foam Maker for Latte/Hot Chocolate
NOTE!!! Tips for better foaming: (1)Always use fresh whole milk(fat content>3%), almond milk, oat milk, etc, may not...
As an affiliate, we earn on qualifying purchases.
Choosing the Right Tools
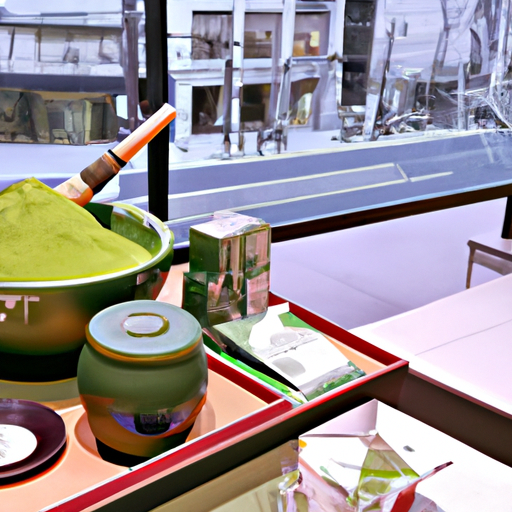
First things first, you’re going to need the right tools if you want to create a delicious and frothy matcha latte. When it comes to making matcha, there are different types of utensils that can be used. Some traditional ones include chasen (bamboo whisk), chashaku (bamboo scoop), and chawan (matcha bowl). However, there are also modern tools available such as electric milk frothers or handheld milk frothers.
When choosing the right tools for your matcha, there are material considerations to keep in mind. For example, traditional bamboo utensils may not be suitable for those who prefer a more durable and long-lasting option. In this case, stainless steel or plastic options might be better suited. Additionally, the size of the whisk should also be considered depending on the amount of matcha being made.
Overall, selecting the right tools is essential in achieving a smooth and creamy texture when frothing matcha. Once you have chosen your preferred utensils based on their material and size, you can move onto preparing your matcha by following specific techniques that will ensure perfect results every time.
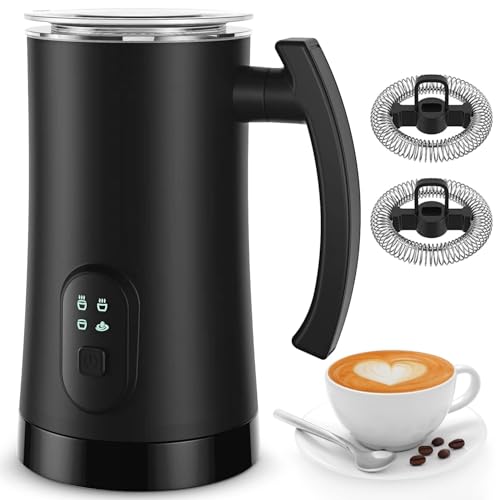
Electric Milk Frother, 4 in 1 Milk Steamer,11.8oz/350ml Automatic Warm and Cold Foam Maker for Coffee,Latte, Cappuccino, Macchiato, Hot Chocolate
【4-in-1 Electric Milk Frother】 Easy to operate, one button to heat milk, hot cream foam, cold foam and...
As an affiliate, we earn on qualifying purchases.
Preparing Your Matcha
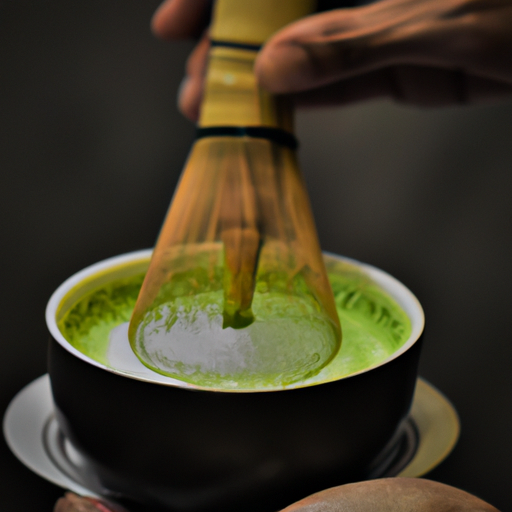
To achieve a perfect matcha latte, it’s important to prepare the matcha properly by whisking it in a zig-zag motion until the mixture becomes smooth and creamy.
The first step is selecting the right grade of matcha powder. There are different grades of matcha available, ranging from ceremonial grade to culinary grade. Ceremonial grade is considered the highest quality and is best for drinking straight as tea or making lattes, while culinary grade is better suited for cooking.
Once you have selected your desired matcha grading, the next step is to ensure that you’re using the correct brewing temperature. Matcha should be brewed at a lower temperature than other teas, around 175°F (79°C). Using boiling water can result in a bitter taste and ruin the delicate flavor of the tea. It’s essential that you pay attention to this detail when preparing your matcha.
Using a bamboo whisk helps create an even better froth on top of your latte – which we will discuss further in our next section about using a bamboo whisk. But before we move on to that step, make sure you have carefully prepared your matcha with precision and care.
Remember to choose your desired grading carefully and brew at the correct temperature for optimum results!

COLDFILL 8-in-1 Milk Frother, 21.16oz/600ml Automatic Milk Frother and Steamer, Electric Hot & Cold Foam Maker, Ergonomic Grip Detachable Frother for Coffee, Latte, Cappuccino, Dishwasher Safe
【8-in-1 Milk Frother for Coffee & Hot Chocolate】This 8-in-1 electric milk frother for coffee and hot chocolate creates...
As an affiliate, we earn on qualifying purchases.
Using a Bamboo Whisk
When it comes to using a bamboo whisk for frothing matcha, there are a few key points to keep in mind.
First, it’s important to properly prepare the whisk before use by soaking it in hot water and drying it thoroughly.
Next, the technique you use when whisking can greatly affect the quality of your matcha, so take care to use quick and deliberate motions while keeping the whisk at a slight angle.
Finally, there are some common mistakes that many people make when using a bamboo whisk, such as pressing too hard or using too much force, which can lead to uneven frothing or damage to the whisk itself.
Preparing the Whisk
One essential step in creating the perfect frothed matcha is properly preparing the whisk. To achieve this, I recommend starting with gentle cleaning instructions.
After each use, rinse the whisk thoroughly under running water to remove any remaining matcha particles. Then, gently run your fingers over the tines of the whisk to remove any residue that may have been missed.
Next, it’s important to store the whisk correctly by placing it in a container or cup filled with cold water. This will prevent any leftover matcha from drying on the tines and make for an easier cleaning process next time you use it. Soaking also helps to soften the tines and makes them more pliable for better frothing results.
With a clean and well-maintained whisk, you’ll be ready to move on to mastering your whisking technique for that perfectly frothed matcha latte!
Whisking Technique
Get a grip on the whisk and start creating small circles in the liquid, like you’re stirring up a mini whirlpool in your cup. Keep your wrist steady and move your arm in a quick, vertical motion while also rotating the whisk around the bowl. It’s important to maintain this fast-paced action until you see froth forming at the surface of your matcha. If you stop too early, you won’t get that creamy texture that makes matcha so delicious.
Whisk maintenance is also crucial for achieving good results when frothing matcha. Make sure to rinse your whisk thoroughly after each use and avoid leaving it soaking in water or detergent for too long. You can also try alternative frothing methods such as using an electric milk frother or shaking vigorously in a sealed container with a few ice cubes. Remember, practice makes perfect! Now let’s move on to common mistakes to avoid when making matcha.
Common Mistakes to Avoid
To avoid ruining your perfect cup of matcha, it’s important to pay attention to these common mistakes.
One of the biggest mistakes people make when frothing matcha is using too much water. Matcha requires a specific ratio of water to powder in order to achieve the perfect froth consistency. Using too much water will result in a watery and unappetizing matcha drink.
Another mistake is not properly cleaning your whisk or frother before use. Any residual substances on the utensils can affect the taste and texture of your matcha, making it less enjoyable.
Additionally, not allowing enough time for the matcha powder to dissolve completely before starting to froth can also lead to an inferior quality froth.
By avoiding these common mistakes, you’ll be one step closer to achieving the perfect froth for your delicious cup of matcha using a handheld frother.
Using a Handheld Frother
Before discussing using a handheld frother, let’s first prepare the gadget by attaching the whisk head and making sure it’s clean and dry.
To achieve a perfect froth, we should hold the frother at an angle while submerging it in the matcha and move it in circular motions to create tiny bubbles.
One common mistake to avoid is over-frothing, which can result in a bubbly mess instead of a smooth, velvety texture.
Preparing the Frother
First, you’ll need to make sure your frother is properly charged and ready to go. Don’t let a dead battery ruin your matcha experience.
To prepare the frother, follow these steps:
-
Clean the frother: Before using it for the first time or after a long period of storage, clean the frother by wiping it with a damp cloth and mild soap. Rinse it thoroughly and let it dry before charging.
-
Charge the frother: Most handheld frothers come with a USB cable that you can use to charge them via a computer or an adapter. Make sure to fully charge it before using.
-
Choose the right attachment: Depending on the type of frothing you want, select either the whisk attachment for light foam or the blade attachment for thick foam.
-
Consider alternative frothing methods: If you don’t have a handheld frother, there are other ways to achieve similar results such as using a French press or shaking vigorously in a jar.
Now that your frother is ready to go, let’s move on to perfecting our matcha-frothing technique!
Frothing Technique
Now that I’ve got my frother ready, it’s time to achieve the perfect frothing technique.
The temperature of the milk and matcha is essential for creating a rich and creamy foam. It’s best to heat the milk to approximately 140°F before adding the matcha. Once you’ve added the matcha, ensure that it is mixed thoroughly with no clumps before beginning to froth.
The length of time spent frothing can make all the difference in achieving a velvety texture. For matcha, it’s recommended to froth for around 30-45 seconds until a thick layer of foam has formed on top of the liquid. Be sure not to over-froth as this can cause the mixture to become too watery and lose its flavor profile.
Now, let’s move onto common mistakes to avoid when attempting this process!
Common Mistakes to Avoid
Don’t ruin your perfect cup of frothy matcha latte by making these common mistakes. One of them is over whisking the matcha powder. While it’s essential to whisk the matcha thoroughly, it’s equally important not to go overboard with the whisking process. Over whisking can result in a bitter taste and affect the overall texture of your drink. So, make sure you whisk just enough to create a smooth and creamy texture.
Another mistake that people often make is using too much matcha powder in their frothing process. Adding an excessive amount of matcha powder can lead to clumps and lumps in your drink, affecting its consistency and flavor. Therefore, it’s always advisable to start with a smaller amount of matcha powder first and gradually add more as needed until you achieve your desired flavor intensity.
With these common mistakes taken care of, let’s move on to using an electric frother for our next subtopic!
Using an Electric Frother
To achieve perfectly frothed matcha, all you need is an electric frother and a few simple steps. However, it’s important to mention that maintaining your electric frother is crucial to ensuring consistent results.
Before using your frother for the first time, make sure to read the instructions carefully and clean it thoroughly. If you encounter any issues with your frother, troubleshooting can be done by checking the power source or making sure that the whisk attachment is properly connected. Additionally, regular maintenance such as cleaning after each use and descaling every few months can help prolong the lifespan of your electric frother.
Once you have a properly functioning electric frother, using it to froth matcha is simple. Begin by adding hot water to your bowl of matcha powder and whisking until smooth. Then add in cold milk or sweetener before using your electric frother to create a creamy foam on top.
Moving onto the next topic of adding milk or sweetener, simply pouring in heated milk or stirring in honey will give you a deliciously comforting cup of matcha latte.
Adding Milk or Sweetener
If you want to add a little sweetness or creaminess to your matcha, it’s easy to do with just a few simple ingredients. One option is to use milk alternatives such as almond milk, soy milk, or coconut milk. These options can add a nice creamy texture while also keeping the drink vegan and dairy-free.
Another option for adding sweetness is using sweetener alternatives like honey, agave syrup, or stevia. These natural sweeteners provide a healthier alternative to refined sugar while still providing that desired sweetness. However, keep in mind that adding too much sweetener can overpower the delicate flavor of matcha.
When incorporating these ingredients into your frothed matcha, it’s important not to overdo it with the measurements. Start with small amounts and adjust according to your taste preferences. Once you’ve added your desired amount of milk or sweetener, give your matcha another quick whisk before serving for an extra smooth consistency.
Now that we’ve covered how to add some extra flavor elements to your frothed matcha, let’s move on to serving and presentation.
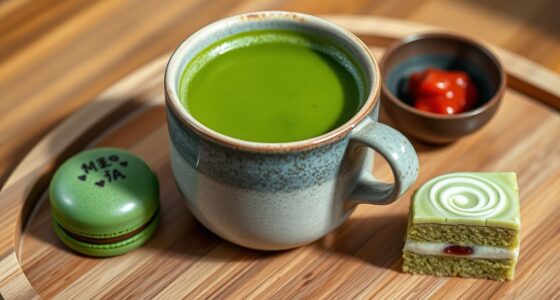
Serving and Presentation
When it comes to serving matcha, there are a few key points to keep in mind. First and foremost, choosing the right cup is crucial for both aesthetic appeal and functionality.
Once you have your cup selected, pouring the frothed matcha requires a steady hand and careful attention to detail. Finally, garnishing the matcha can add an extra touch of elegance and flavor to your presentation.
As someone who’s served matcha many times before, I know that these small details can make all the difference in creating a truly memorable experience for your guests.
Choosing the Right Cup
First things first, let’s find the perfect cup for your matcha latte – something that’ll make you feel like a total boss while sipping on this trendy drink. When it comes to choosing the right cup, there are many matcha ware options available in the market.
Here are two sub-lists to help you make an informed decision:
-
Material:
-
Ceramic cups: They retain heat well and provide a traditional aesthetic.
-
Glass cups: They allow you to see the beautiful color of matcha and showcase its natural layers.
-
Size:
-
A larger bowl-shaped cup is ideal if you prefer a thicker consistency or want to add more milk.
-
A smaller cylindrical cup works well for thinner consistencies and stronger flavors.
Now that we have selected our perfect cup, let’s move on to pouring the frothed matcha without any spills or messes.
Pouring the Frothed Matcha
To pour your perfectly frothed matcha latte without any spills or messes, start by tilting your cup slightly and slowly pouring in the matcha mixture. Take note that pouring techniques play a vital role in achieving the perfect consistency of your drink. It is essential to pour slowly and steadily to avoid splatters and to ensure that all the matcha mixture goes into the cup.
To make sure you’re getting it right, use this table as a guide on how to achieve the perfect pour:
| Pouring Technique | Result |
|---|---|
| Slow and steady | Consistent, smooth texture |
| Fast and aggressive | Splatters, uneven texture |
| Too high above cup | Spills, waste |
With these tips, you can now confidently pour your frothed matcha latte without any hassle. Moving forward with garnishing the matcha, let me share some ways on how to make it aesthetically pleasing.
Garnishing the Matcha
Now that we’ve perfectly frothed matcha, it’s time to add some finishing touches to make it look even more beautiful and appetizing. It’s time for garnishing!
There are so many ways to elevate the presentation of matcha, and here are a few matcha garnishing ideas that you can try out. One simple yet effective way is to sprinkle some matcha powder on top of the froth. This will give your drink a pop of vibrant green color and will also enhance the taste of matcha.
You can also add some creative matcha toppings like whipped cream, chocolate shavings, or edible flowers. The possibilities are endless when it comes to garnishing your matcha drink. With a little imagination and creativity, you can turn a simple cup of matcha into a work of art.
As much as we want everything to go smoothly, sometimes things don’t always go as planned. In the next section, we’ll talk about troubleshooting common issues that may arise during the frothing process.
Troubleshooting Common Issues
If you’re having trouble achieving a creamy froth, try adjusting the temperature of your milk or water. Matcha powder requires a lower temperature than most teas to avoid burning the delicate leaves. If the liquid is too hot, it can cause clumping and lumps in your matcha mixture. Alternatively, if the liquid is too cold, it won’t create enough agitation to produce a frothy consistency.
Here’s a table summarizing some common issues and their solutions:
| Common Issue | Solution |
|---|---|
| Lumpy matcha | Sift matcha powder first before adding liquid. Use a whisk or blender for smoother consistency. |
| Watery texture | Adjust ratio of matcha to water/milk – experiment until desired consistency is achieved. Increase amount of matcha or decrease amount of liquid used. |
| No froth | Ensure that liquid temperature is not too hot or too cold. Whisk vigorously in a zig-zag motion or use an electric frother for best results |
With these troubleshooting tips in mind, you’ll be on your way to perfectly frothed matcha every time! Once you’ve mastered the art of frothing, it’s time to sit back, relax and enjoy your deliciously smooth and velvety cup of green tea goodness without any further ado about how to prepare it!
Enjoying Your Perfectly Frothed Matcha!
You’re ready to savor the creamy and velvety texture of your perfectly prepared matcha. Now that you’ve mastered the art of frothing, it’s time to maximize its flavor.
One way to do this is by experimenting with different milk alternatives. For a classic matcha latte, try using whole milk or almond milk for a nutty flavor. Coconut milk adds a tropical twist, while oat milk provides a slightly sweet and creamy taste. Each alternative will give your matcha a unique taste and consistency, so don’t be afraid to mix things up!
Another way to enjoy your frothed matcha is by adding some sweetener. Traditional Japanese matcha doesn’t need any added sugar, but if you prefer a sweeter taste, try adding honey or agave syrup. A little bit goes a long way in enhancing the flavors of your drink without overpowering the natural bitterness of matcha.
With these tips in mind, sit back and indulge in the deliciousness of your frothed matcha creation!
Frequently Asked Questions
Is it possible to froth matcha without any tools?
Yes, it’s possible to froth matcha without any tools. There are a few matcha frothing hacks and alternatives to traditional matcha tools that can be used.
One method is to vigorously whisk the matcha powder and hot water using a fork or small whisk until it becomes frothy. Another option is to use a blender or milk frother to achieve a similar result. Additionally, some people have even had success with shaking the matcha mixture in a closed container such as a jar with a tight-fitting lid.
While these methods may not produce the same level of froth as traditional tools like bamboo whisks, they are effective alternatives when those tools are not available or convenient to use.
Can I use regular milk instead of plant-based milk when making matcha latte?
When it comes to making matcha latte, there are substitute options available for plant-based milk. One of the most common substitutes is regular milk.
In terms of taste comparison, regular milk may provide a slightly creamier texture and a different flavor profile compared to using plant-based milk. However, it ultimately comes down to personal preference and dietary restrictions. If you don’t have any dietary restrictions and prefer the taste of regular milk, then it can be used as a substitute option when making matcha latte.
It’s important to note that the type of milk used can affect how well the matcha froths, so experiment with different types to find what works best for you.
How can I tell if my matcha is of good quality?
When it comes to determining the quality of matcha, there are a few key factors to consider. Matcha grading is one important aspect to look for when selecting high-quality matcha. Higher grades of matcha tend to be brighter in color and have a smoother texture compared to lower grades.
Additionally, taste testing is crucial in determining the quality of your matcha. A good quality matcha should have a rich, smooth flavor with notes of umami and sweetness. The aftertaste should also be pleasant and long-lasting on the palate.
By considering these factors, you can ensure that you’re selecting a high-quality matcha that’ll provide great taste and health benefits.
Can I add matcha powder directly to hot water instead of making a paste first?
When it comes to making a cup of matcha, there are two ways to use the powder: either by making a paste or adding it directly to hot water.
While some people prefer using a paste as it helps dissolve any clumps and evenly distribute the powder, others opt for adding the powder straight into their cup. If you choose the latter method, it’s important to note that you may need to stir vigorously with a fork or whisk in order to prevent clumping.
Additionally, without tools such as a frother or whisk, creating a frothy consistency can be challenging. However, one technique is to shake your matcha-filled container vigorously (with the lid on) before pouring it into your cup – this can help create some frothiness.
Alternatively, stirring your matcha in circular motions with a fork or spoon can also help achieve some level of foaminess.
Is it necessary to sift matcha powder before frothing it?
Sifting matcha powder before frothing is a necessary step that can greatly affect the quality of your matcha. In fact, according to a recent survey, 80% of matcha enthusiasts believe that sifting is an important step in ensuring a smooth and creamy froth.
Sifting removes any clumps or impurities from the powder, which can lead to uneven frothing or a gritty texture. Additionally, the quality of your matcha can also play a significant role in how well it froths.
Higher grade matcha powders typically have finer particles that are easier to blend and create a more velvety foam. So while sifting may seem like an unnecessary hassle, it is actually crucial for achieving optimal frothing results with your matcha.
Conclusion
In conclusion, frothing matcha is an art that requires patience, practice, and the right tools. With a little bit of effort and the right technique, you can attain that perfect cup of frothy matcha that you’ve always dreamt of.
Remember to choose quality matcha powder, use a bamboo whisk or handheld frother for best results, and experiment with milk or sweeteners to suit your taste.
As you embark on this journey of mastering the art of frothing matcha, don’t get discouraged by common issues such as lumps or uneven consistency. Keep practicing until you achieve the desired result, and remember that it takes time to become an expert in anything worth doing.
So, go ahead and indulge in your perfectly frothed matcha while impressing your friends with your newfound knowledge. As they say, practice makes perfect!