
Cradling the gourd between my palms, I’m transported back to the time-honored practices and medicinal benefits of yerba mate. This modest container, meticulously made from organic resources, possesses the ability to improve my health and instill tranquility into my everyday life.
Just like the human body, the yerba mate gourd requires nurturing and attention to reach its full potential. In this article, I will guide you through the process of curing your yerba mate gourd, allowing it to release its hidden flavors and energies. Together, we will embark on a journey of transformation, unlocking the true essence of this sacred vessel.
So, let us begin our holistic exploration, as we cleanse, prepare, and infuse this humble gourd with the healing powers of yerba mate.
Key Takeaways
- Curing process enhances flavor and prevents mold or bacteria growth.
- Proper drying and storage are important for the gourd.
- Different methods like hot water and mate tea can be used to cure the gourd.
- Curing process adds unique character and elevates the mate drinking ritual.
Top picks for "cure yerba mate"
Open Amazon search results for this keyword.
As an affiliate, we earn on qualifying purchases.
Choose a High-Quality Yerba Mate Gourd
To choose a high-quality yerba mate gourd, you’ll want to look for one that feels sturdy and has a smooth texture, ensuring a great brewing experience.
When considering factors to consider while choosing the right yerba mate gourd, it’s important to think about the different types of yerba mate gourds available. Traditional gourds are made from natural materials like calabash, wood, or ceramic, each offering a unique taste and style.
Calabash gourds are known for their traditional appeal, while wooden gourds provide a natural and earthy flavor. Ceramic gourds, on the other hand, retain heat well and are easy to clean.
Once you’ve chosen your ideal gourd, the next step involves cleaning and rinsing the gourd thoroughly, ensuring a clean and pure mate experience.
Clean and Rinse the Gourd Thoroughly
After enjoying your refreshing yerba mate, it’s time to give your gourd a good scrub to ensure it’s squeaky clean. Curing your gourd is an important step in maintaining its quality and prolonging its lifespan. The curing process benefits the gourd by sealing its pores and preventing it from absorbing the flavors and odors of the mate. To properly clean and rinse the gourd, follow these steps:
- Fill the gourd with warm water and a small amount of mild dish soap.
- Use a soft brush to scrub the inside of the gourd, removing any residue or stains.
- Rinse the gourd thoroughly with warm water, making sure to remove all soap residue.
- Allow the gourd to air dry completely before proceeding to the next step.
Common mistakes in gourd curing include using harsh cleaning agents or scrubbing too vigorously, which can damage the gourd.
Now that your gourd is clean, let’s move on to preparing it for the curing process.
Prepare the Gourd for Curing
Now, get ready to prepare your gourd for the curing process by taking a few simple steps.
To begin, gather all the necessary materials, including a small wooden spoon or bombilla, a clean cloth, and a small amount of olive oil.
Place the gourd in a sink or bowl filled with warm water and let it soak for about 10 minutes. This will help soften the gourd and make it easier to clean.
After soaking, gently scrub the inside of the gourd using the wooden spoon or bombilla to remove any dirt or debris.
Rinse the gourd thoroughly with warm water and pat it dry with a clean cloth.
Now, it’s time to fill the gourd with yerba mate leaves, but we’ll explore that in the next section.
Fill the Gourd with Yerba Mate Leaves
Once the gourd has been cleaned and dried, it’s time to carefully pack it with the aromatic leaves of yerba mate, creating a vibrant and invigorating experience for the senses. Curing methods vary, but using a gourd has numerous benefits. It allows for a more authentic and traditional consumption of yerba mate, enhancing the flavor and overall experience. The gourd also acts as a natural filter, ensuring a smooth and clean infusion. To pack the gourd, follow these simple steps:
| Step | Action |
|---|---|
| 1 | Fill the gourd 1/3 full with yerba mate leaves. |
| 2 | Tilt the gourd to one side and gently shake it to settle the leaves. |
| 3 | Slowly rotate the gourd to create a slope, allowing the yerba mate to form a compact base. |
| 4 | Fill the gourd to 2/3 full, gently shaking and rotating as before. |
| 5 | Lastly, fill the gourd to the top, ensuring a slight mound of leaves. |
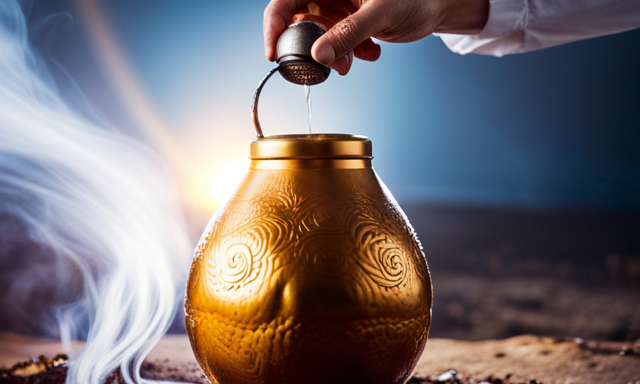
Now that the gourd is filled, it’s time to add hot water to unleash the full potential of yerba mate’s flavors and benefits.
Add Hot Water to the Gourd
To enhance the infusion and unlock the rich flavors, simply pour hot water into the gourd. I find that using water at a temperature of around 160°F is ideal for achieving the best results. It’s important to note that the curing time can vary depending on personal preference, but I recommend letting the hot water sit in the gourd for about 24 hours.
This allows the yerba mate leaves to fully absorb the water and release their natural oils, resulting in a more robust and flavorful brew. Temperature control is crucial during this process, as it helps to maintain the integrity of the flavors.
Once the curing time is complete, we can move on to the next step of letting the gourd sit overnight, allowing the flavors to develop even further.
Let the Gourd Sit Overnight
After pouring in the hot water, it’s time to let the gourd rest overnight, allowing the flavors to develop and deepen. This step is essential in the process of curing a yerba mate gourd as it helps to enhance the taste and quality of the yerba mate. By letting the gourd sit overnight, you are giving it the time it needs to absorb the flavors and aromas of the yerba mate.
To emphasize the benefits of curing a yerba mate gourd, let’s take a look at the following table:
| Benefits of Curing a Yerba Mate Gourd | Different Methods of Curing a Yerba Mate Gourd |
|---|---|
| Enhances flavor and aroma | Traditional method: using hot water |
| Improves the overall drinking experience | Cold water method: using cold water |
| Increases the longevity of the gourd | Oven method: using heat |
| Removes any impurities or residues | Sun method: using sunlight |
By allowing the gourd to rest overnight, you are ensuring that it is properly cured and ready for use. Next, we will move on to the next step of emptying the gourd and rinsing it again to prepare for brewing.
Empty the Gourd and Rinse Again
Now it’s time to empty the gourd and give it another rinse before moving on to the next step. This is an important part of the curing process as it helps to remove any remaining debris or impurities from the gourd.
By emptying the gourd and rinsing it again, we ensure that it is clean and ready for use.
Curing the yerba mate gourd has many benefits. It not only helps to improve the flavor of the mate, but it also helps to strengthen the gourd and prolong its lifespan.
Alternative methods of gourd curing can include using lemon juice or vinegar to clean and sanitize the gourd. These natural ingredients can help to remove any lingering odors or flavors from the gourd, leaving it fresh and ready for use.
Now that the gourd is empty and rinsed once more, we can move on to the next step of the curing process. Remember, it’s important to repeat this process multiple times to fully cure the gourd and enhance its flavor.
Repeat the Curing Process Multiple Times
Repeatedly going through the curing process is like giving the gourd a spa treatment, ensuring it becomes a resilient vessel of pure delight. Each time you repeat the curing process, you enhance the benefits it brings.
The more times you cure the yerba mate gourd, the better it becomes at preserving the flavor and preventing any unwanted tastes from seeping into your drink. This repeated dedication to the curing process allows the gourd to develop a protective layer, creating a barrier between the mate and the gourd itself.
It’s important to note that there are alternatives to the traditional curing process, such as using lemon juice or vinegar. However, I find that repeating the traditional curing process multiple times provides the most authentic and satisfying result.
So, once you’ve completed the curing process, it’s time to move on to the next step: dry and store the gourd properly.
Dry and Store the Gourd Properly
To ensure your gourd remains in perfect condition, it’s essential to properly dry and store it.
After each curing process, it’s important to allow the gourd to completely dry. This can be done by placing it in a well-ventilated area, away from direct sunlight or heat sources. Proper drying techniques include turning the gourd upside down to ensure any moisture inside evaporates. This will prevent mold growth and ensure the gourd remains clean and ready for use.
Once the gourd is completely dry, store it in a cool, dry place, preferably in a cloth bag or a wooden box. This will help protect the gourd from dust and maintain its quality.
Now that your gourd is properly dried and stored, it’s time to enjoy your perfectly cured yerba mate gourd and savor the rich flavors it will bring to your mate experience.
Enjoy Your Perfectly Cured Yerba Mate Gourd
Indulge in the delightful flavors of your perfectly prepared mate gourd, savoring each sip as it transports you to a world of rich and invigorating taste. The curing process of your yerba mate gourd not only enhances the flavor but also brings numerous benefits.
When properly cured, the gourd becomes seasoned, adding a unique character to the mate experience. It also helps in preventing the growth of mold or bacteria, ensuring a safe and hygienic drinking vessel.
There are various methods to cure a yerba mate gourd, each with its own advantages. Some choose to cure it with hot water, allowing the gourd to absorb the flavors. Others prefer to cure it with mate tea itself, infusing the gourd with the essence of the herb.
Whichever method you choose, the result is a perfectly cured gourd that elevates your mate drinking ritual to new heights of enjoyment.
Frequently Asked Questions
How long does it take to cure a yerba mate gourd?
To speed up the curing process of a yerba mate gourd, it usually takes about 24-48 hours. However, it’s important to avoid common mistakes such as using hot water or harsh cleaning agents, as this can damage the gourd’s natural flavor and aroma.
Can I use cold water instead of hot water to cure the gourd?
Yes, using cold water instead of hot water can be an alternative in the yerba mate gourd curing process. However, it may affect the overall effectiveness of the curing process due to the temperature difference.
Is it necessary to repeat the curing process multiple times?
It is not necessary to repeat the curing process multiple times. However, it can be beneficial to try different curing methods for different types of gourds. Curing helps enhance the flavor and prolong the lifespan of the yerba mate gourd.
Can I use soap to clean the gourd during the rinsing process?
Using soap to clean the gourd during the rinsing process may strip away the natural flavors and oils that enhance the yerba mate experience. Opting for natural cleaning solutions preserves the gourd’s authenticity and promotes a holistic, natural approach.
How often should I clean and rinse the gourd after it has been cured?
I clean and rinse my cured yerba mate gourd regularly to maintain its freshness and prevent any buildup. It’s important to clean it after each use to ensure the best flavor and experience. Skipping the curing process may affect the taste.
Conclusion
After following these steps, my yerba mate gourd’s now cured and ready to be enjoyed. It’s like a rejuvenated companion, infused with the essence of earth and warmth. The cleansing process has cleansed not only the gourd but also my spirit, creating a harmonious connection with nature. As I sip on the perfectly brewed yerba mate, I feel a sense of tranquility and vitality flowing through me, as if Mother Earth herself’s nourishing my soul. Embrace this holistic ritual and let the healing powers of yerba mate embrace you too.